Here's Where The Microphone Is On A MacBook Pro (And How You Can Test It)
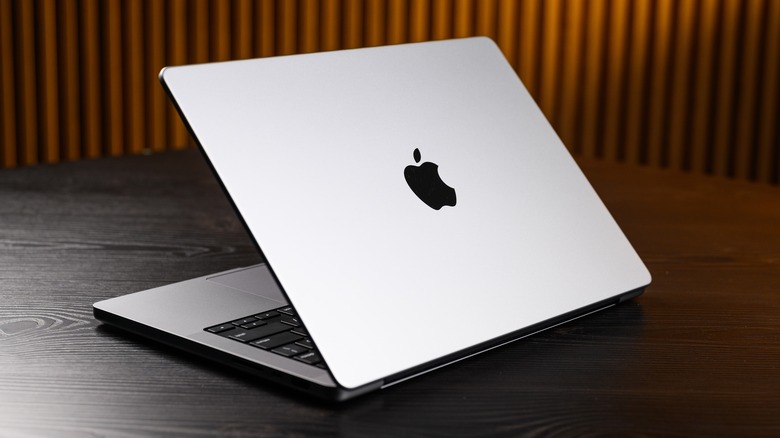
Apple's MacBook Pro laptop became the personal computing device of choice for millions of tech lovers when it was released back in 2006. Almost two decades later the laptops still rank among the bestselling computers in Apple's iconic lineup of devices. Despite MacBook Pros being present in backpacks, boardrooms, and home offices across the globe, even those well versed in Apple's history and design methodology haven't figured out all there is to know about the devices.
For instance, if you ask them where the internal microphone is located on their MacBook Pro, it's likely they may not know. Of course, you may not know either because it's not something users think too much about. As it is, the location varies depending on what model of MacBook Pro they are using, as does the number of microphones the device has.
Thankfully, it's not hard to figure out where the microphone is on your MacBook Pro. For the record, newer MacBook Pros come with three studio-quality microphones located inside the speaker grid on the left side of the device. However, on MacBook Pros made in 2017 or earlier, the single built-in mic is outside the speaker, and located on the left side of the device just above the ESC button on the keyboard. If you're not certain when your MacBook Pro was made, that info can be found by clicking the Apple logo in the top-left corner of your home screen and selecting About This Mac from the drop-down menu.
How to test the microphone on your MacBook Pro
While a functional microphone may not change your MacBook Pro game like certain other features, it's still an important component on your device. Now that you know where the built-in microphone is located, you might be wondering how you can test it to ensure it is working as intended. Apple has made it relatively easy to run a test on your MacBook Pro's internal microphone, and you can do so with just a few clicks of the old trackpad. With your MacBook Pro on and unlocked, follow these steps to test the device's built-in microphone.
- Use the trackpad to click on the Apple icon in the top-left corner of your home screen.
- Select System Settings in the drop-down menu.
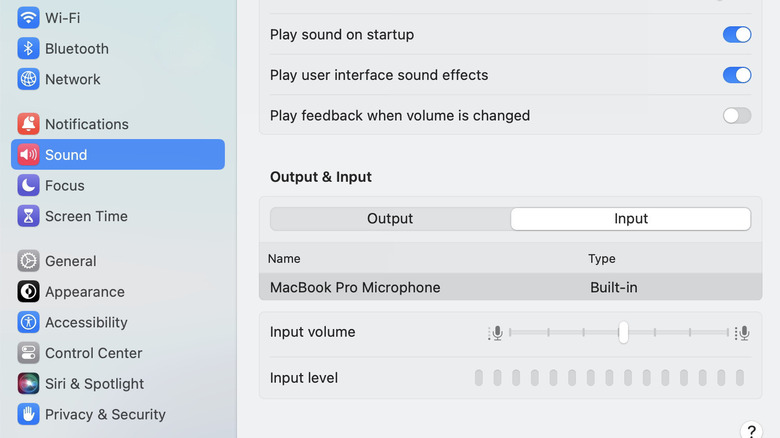
- In the System Settings window, scroll down and click on Sound.
- Click Input in the Output & Input section of the Sound settings window.
- Ensure that MacBook Pro Microphone and Built-In are highlighted.
- You can check to see if the microphone is working by talking into it using a normal speaking voice.
When speaking into the microphone on your MacBook Pro, the little notches in the Input Level meter will illuminate when sounds are registered. You can adjust the levels of the built-in microphone by raising and lowering the volume with the Input Volume slider just above the Input Level. Volume adjustments can be made by scrolling left and right with the trackpad. Once you've tested your MacBook Pro's internal microphone and set your volume levels, you should be set up for success with any calls, voice memos, or personal recording sessions.