Pi-Top Review - Building The Future
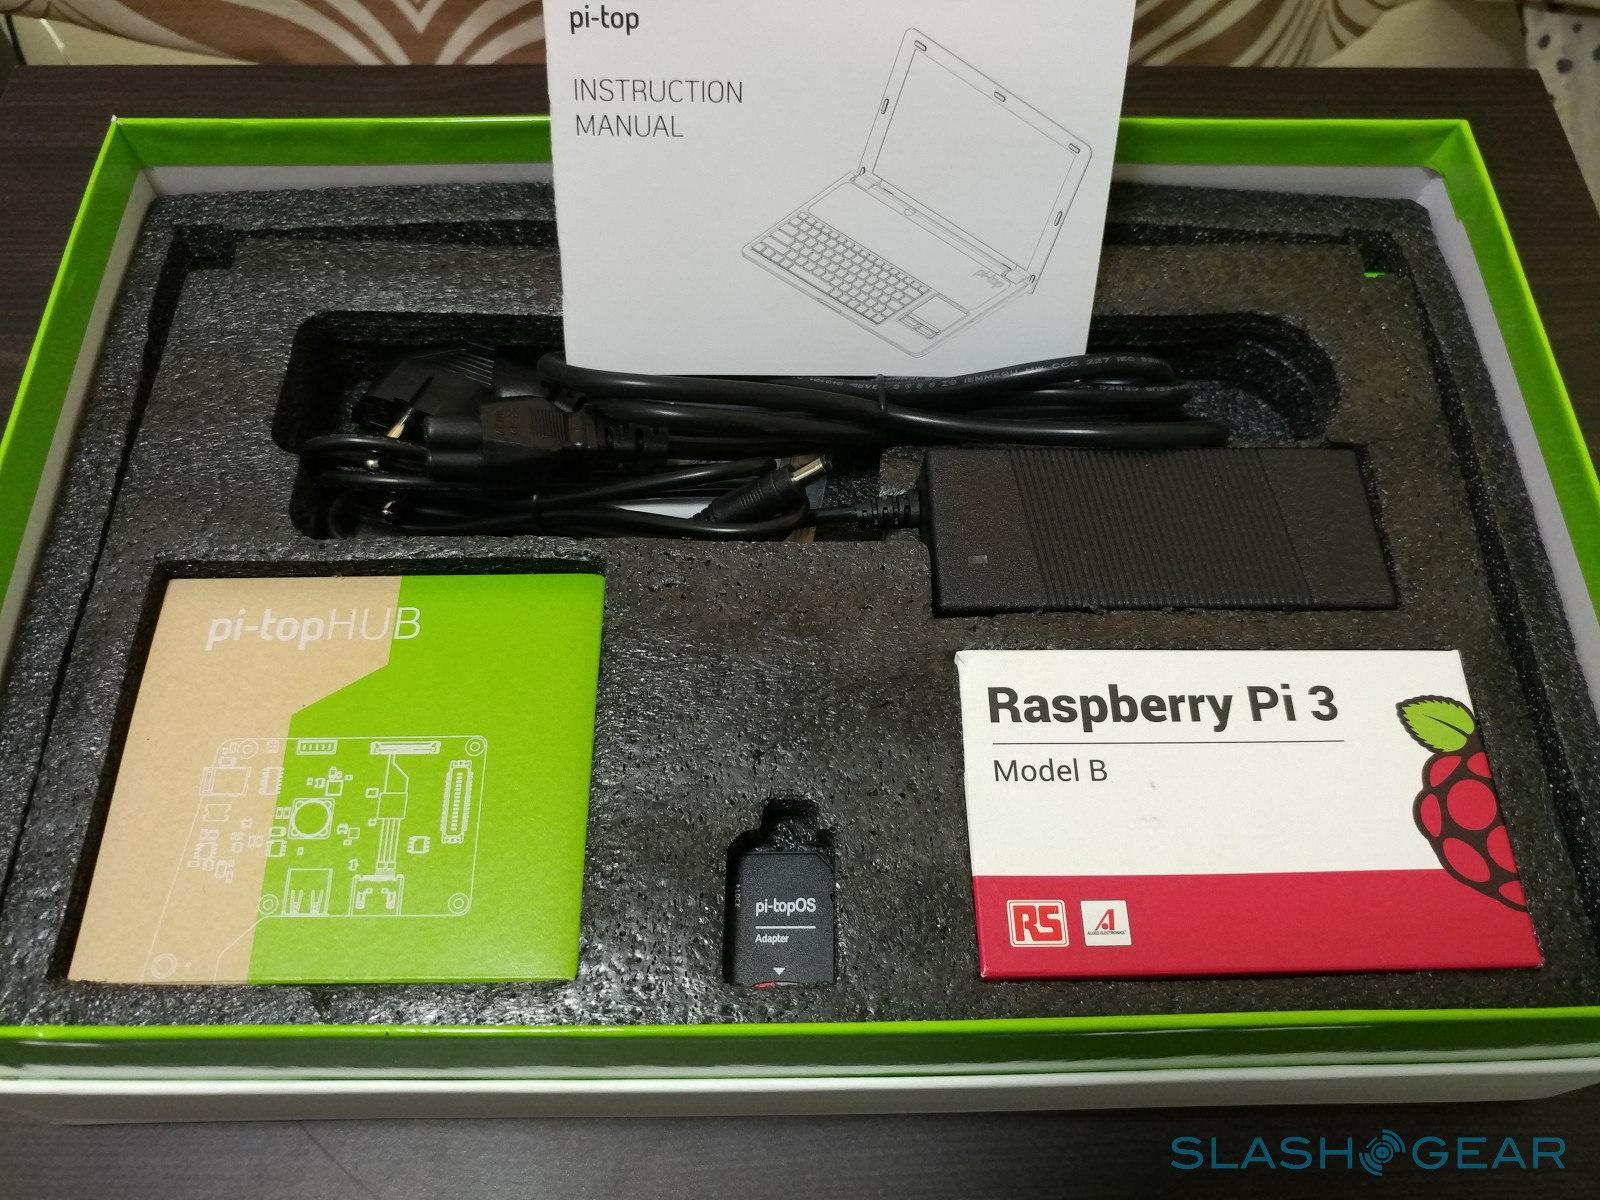
- Includes all needed parts and tools
- Rail system allows for modification
- Compatible with future Model B+ RPi's
- Education-focused, easy to use software
- Accessible price tag
- Manual needs more explicit instructions
- Flimsy materials (GPIO breakout cable, screen hinge)
While the Raspberry Pi is undoubtedly the darling of makers and tinkerers, it has always been envisioned for use in education. But in order to keep the single board computer (SBC) affordable and accessible, the Raspberry Pi had to remain what it is today: a bare bones board that, by itself, isn't exactly useful. You need at least an external display, keyboard, and mouse, not to mention a compatible OS installed on a memory card. This simplicity it both a boon and a bane, the latter because of the nearly infinite amount of choices users, particularly educators, have to make. Fortunately, there are those like pi-top that build greatness on top of greatness. We take its flagship product, the pi-top, to build ourselves a laptop powered by the Raspberry Pi, with a bent towards educating and empowering the next generation.
The history
pi-top is relatively young in the tech industry, launched back in 2014, but in the span of 3 years it has garnered no small amount of acclaim not only within the Raspberry Pi community but, perhaps more importantly, among educational institutions both in the UK and other parts of the globe. It holds the distinction of having the first operating system, pi-topOS, to be endorsed by UK's GCSE for computer science curriculum.
Although it now sells its products directly, pi-top started out in modest but highly successful crowdfunding campaigns, the pi-top in 2014 and the pi-topCEED in 2015. These now populate around 2,000 schools worldwide, teaching the young and the young at heart the basics of computer science and programming, all while having fun and at relatively lower expense. Today, pi-top's product portfolio includes these two flagship products, three add-on modules, an easy to use operating system, and a suite of apps designed to make learning fun, engaging, but also challenging.
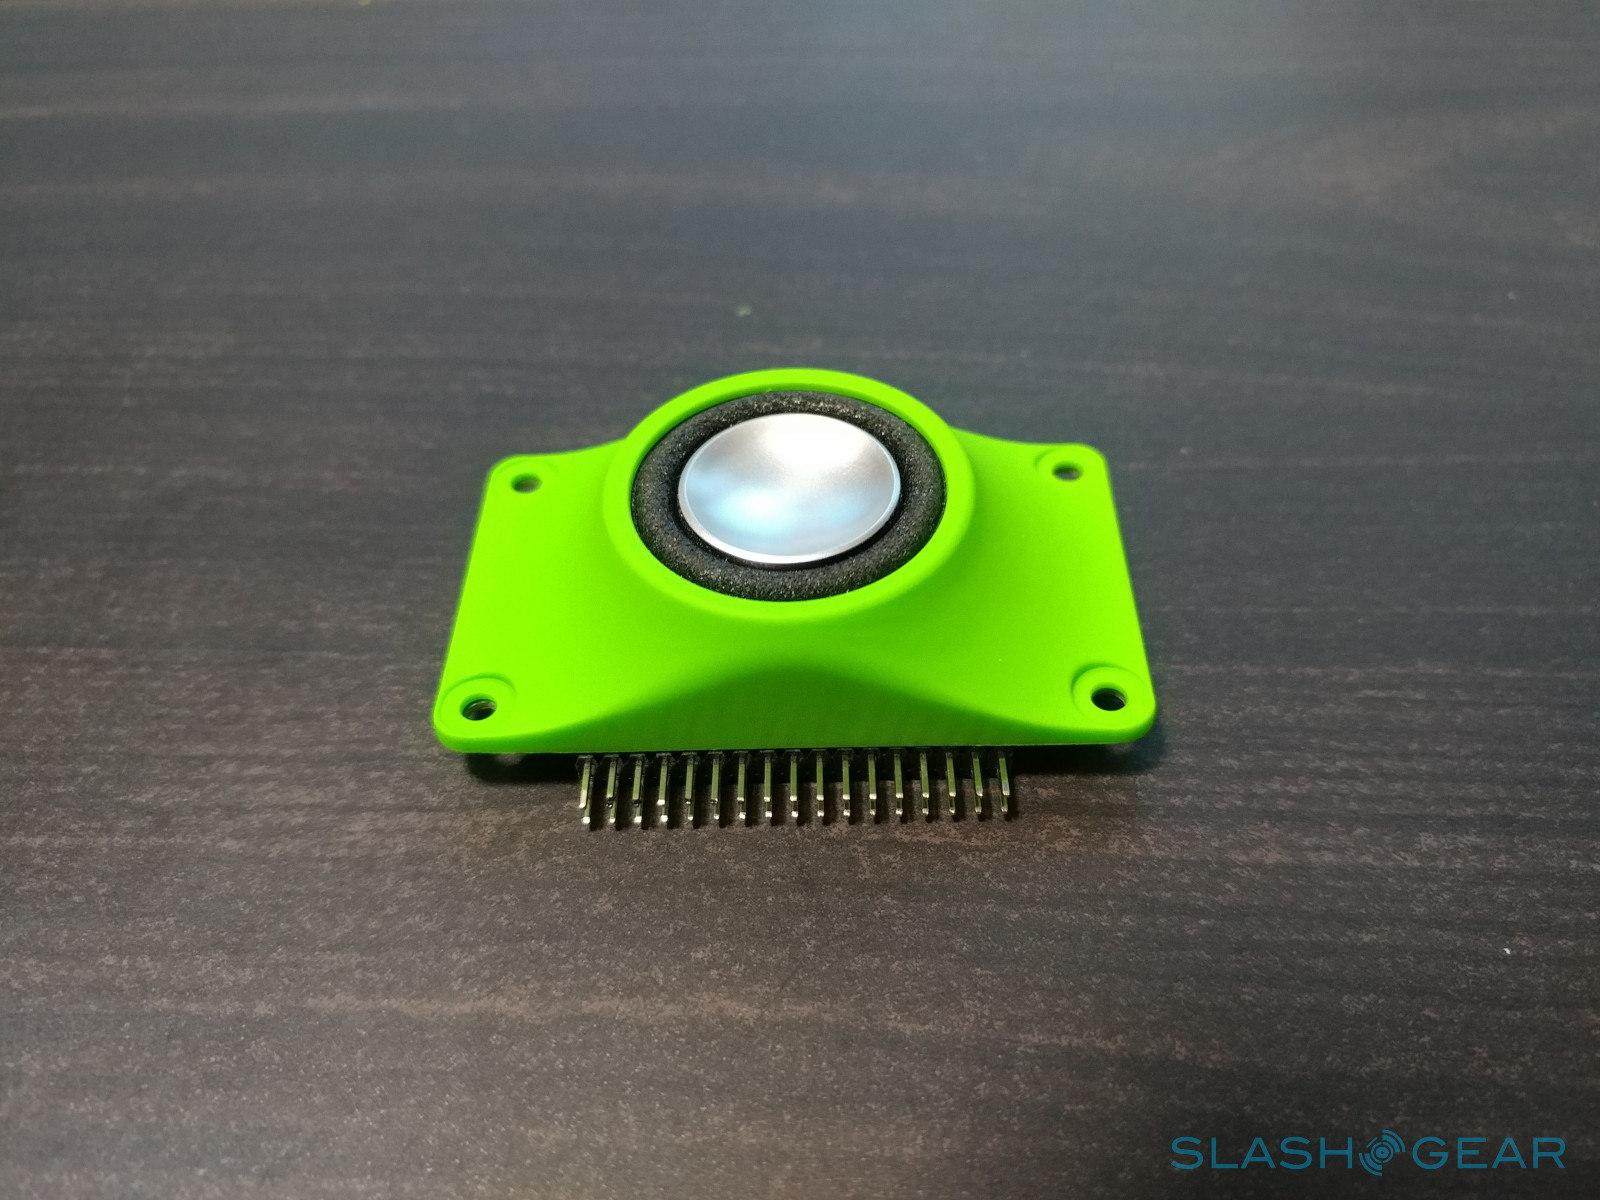
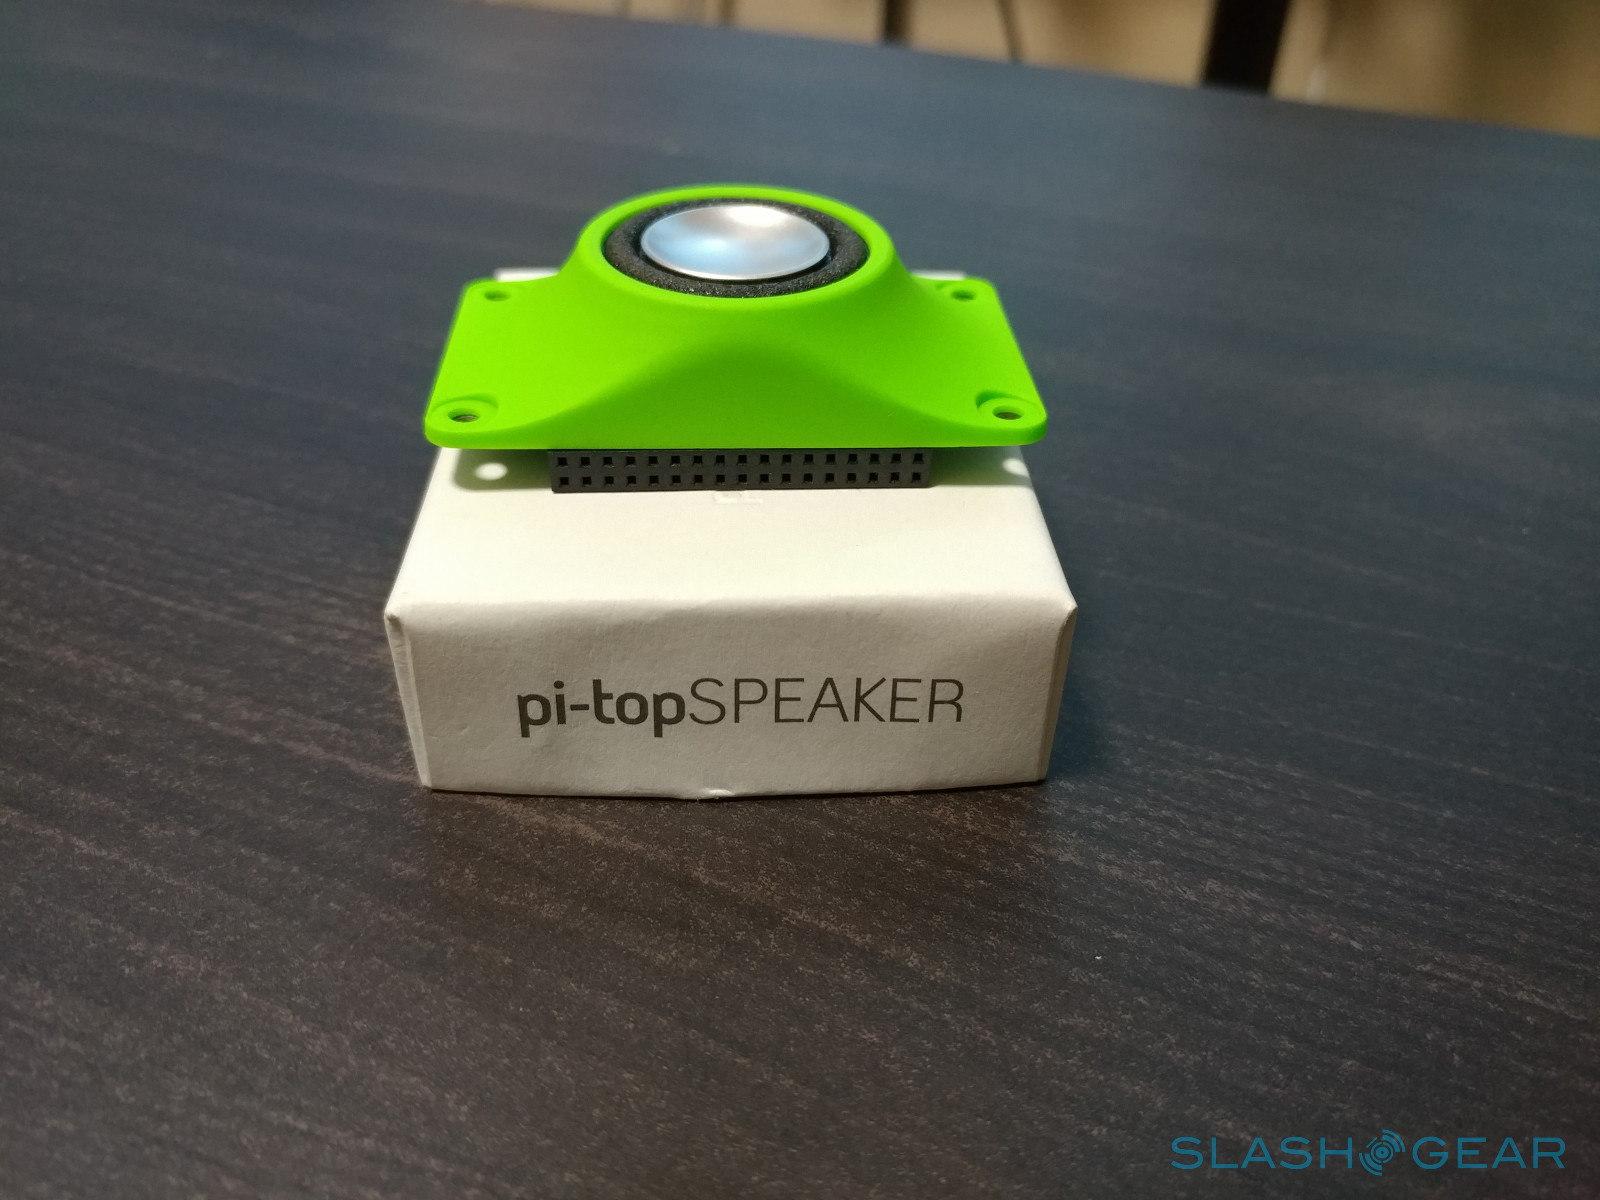
While pi-top is hardly the only Raspberry Pi kit today geared towards education, especially for kids, it has two distinct selling points. Three if you count pi-top's software. The first is its modular rail system, present on both the pi-top and pi-topCEED. which lets you daisy chain compatible modules for additional functionality. The pi-topSPEAKER, for example, adds much needed audio output while the newly launched pi-topPULSE adds a touch of audio-visual functionality, not to mention Amazon Alexa integration. For the makers and tinkerers, the pi-topPROTO returns access to the GPIO pins for compatibility with existing Raspberry Pi HATs.
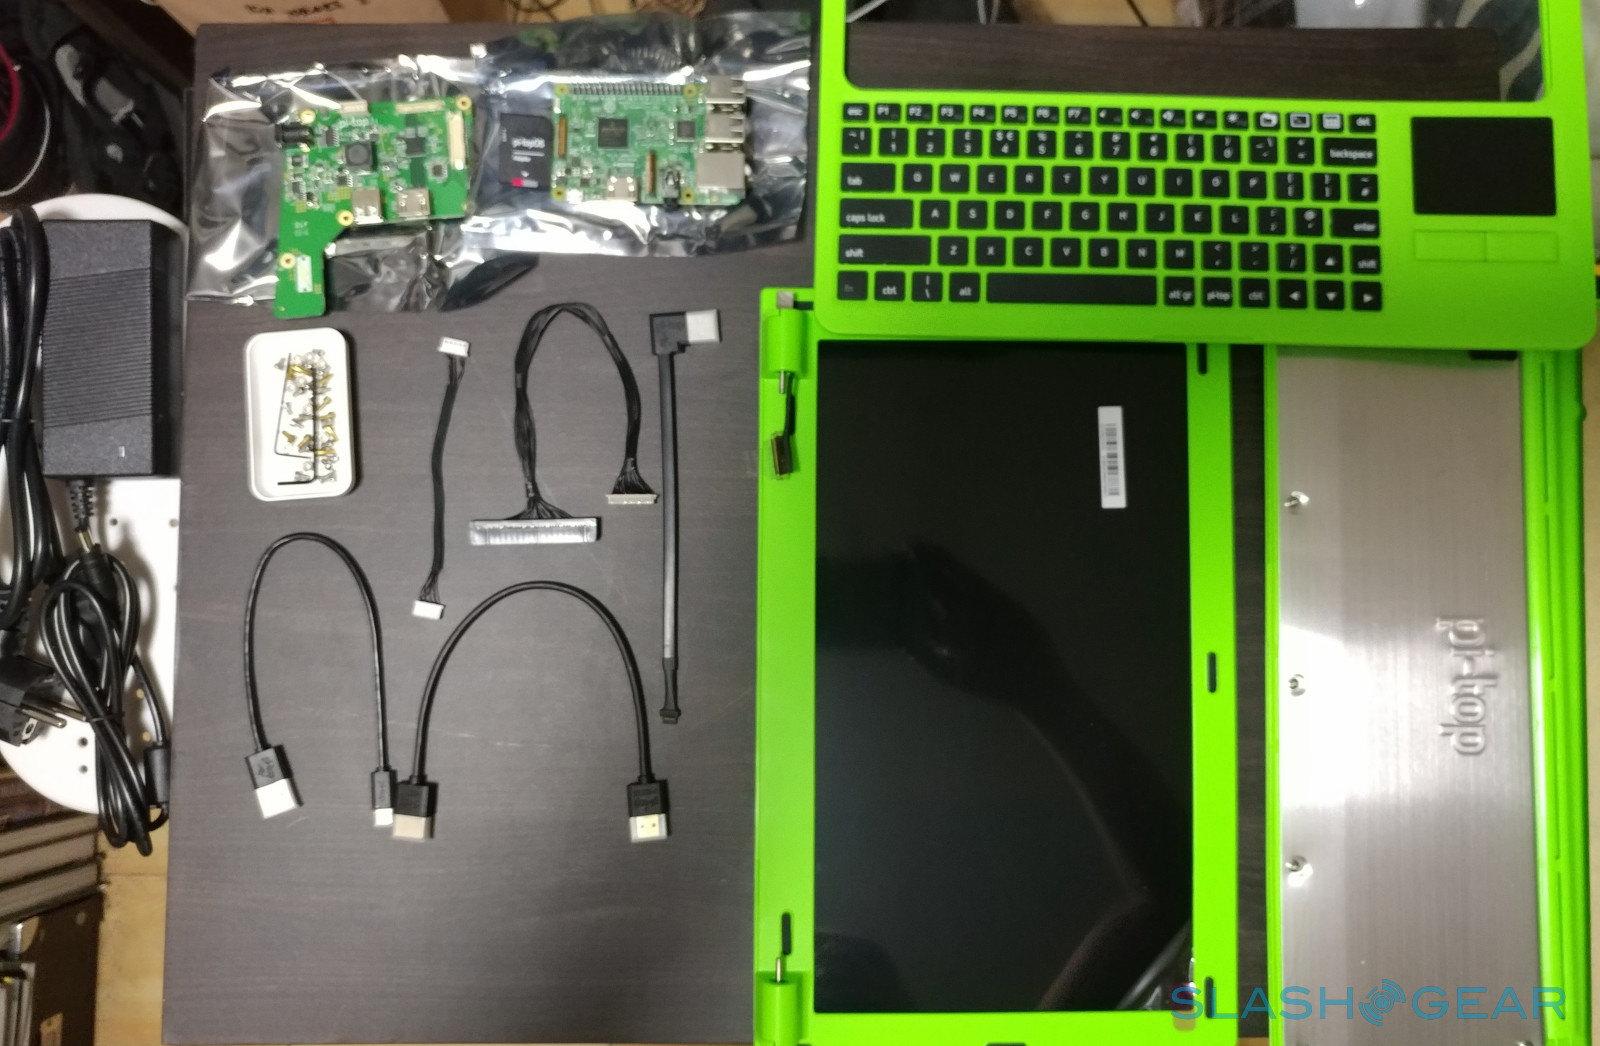
The second advantage is the pi-top itself. While grownups can only dream of being able to build their own laptops, kids can already live that dream. Of course, it's not as powerful as commercial laptops, but never underestimate the power of the Raspberry Pi, especially the newer Raspberry Pi 3. The pi-top is still the only kit that lets you assemble a laptop yourself and it comes with everything you need to do it. While it may not immediately teach kids about the nitty gritty of how ready-made computers work, it still gives them a glimpse into that complex world. At least more than just simply plugging in a screen and a keyboard.
So without further ado, let the adventure begin!
The assembly
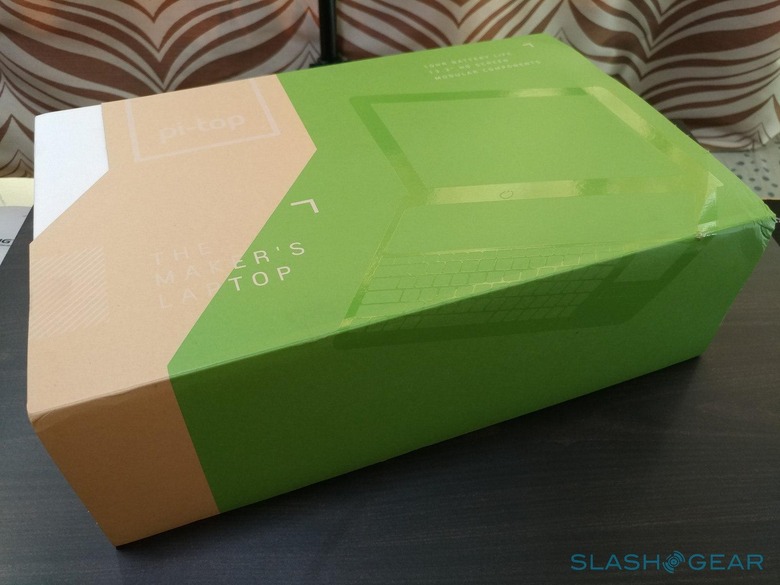
Let's get this out of the way first. The pi-top is designed for kids 8 years and older, as well as adults of course. But it is not something you'll want kids to assemble on their own. In fact, there might be times when an adult would need to get down and dirty as well. While the instructions are easy enough to follow, there are parts that require the precision, dexterity, and care that at child might not posses.
Someone more adept at stringing electronics together might be done in less than an hour, but those less familiar with this kind of activity, like me, is going to take longer. It took me about two and a half hours from screwing in the first bolt to turning the pi-top on for the first time. That even included a bit of backtracking after realizing some things that the manual may have left out.
The instructions for assembling the pi-top are pretty straightforward, but I wish it were more verbose and detailed in some parts. A bit of color coding could have also helped make sense of which part goes where. Especially since you'd be dealing with a younger audience. And then there are also some things that the manual does leave out. Like the fact that you should leave about an inch and a half of space between the Raspberry Pi and the hole for the USB ports. It's a very odd position, indeed, but a necessary one considering how short the frighteningly fragile GPIO breakout cable is.
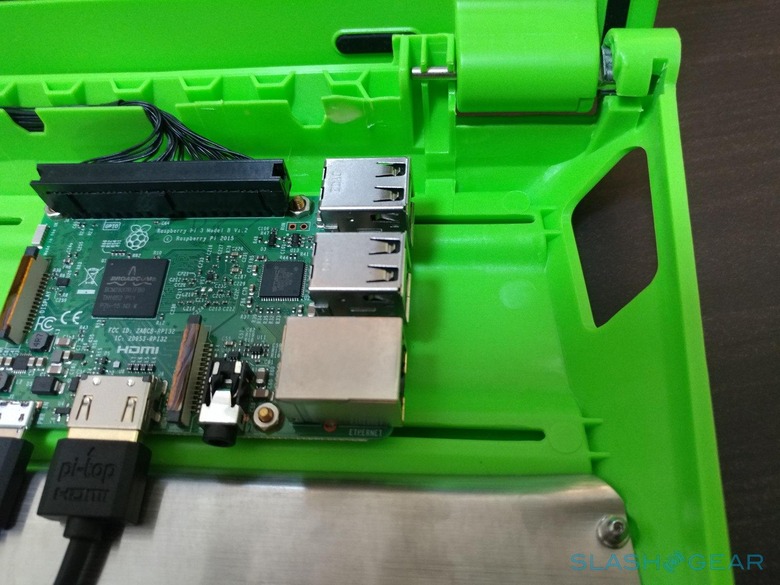
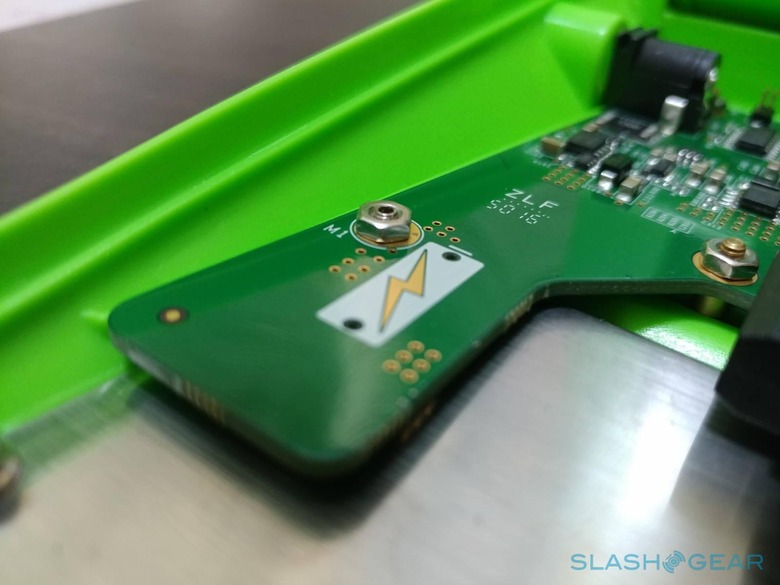
One other thing I wished the manual emphasized was how important it was that the nut connecting the Hub to the battery be secure. While it does say to make sure it makes contact with the gold pad on the hub, it doesn't exactly say that, if you don't, the battery won't actually power the pi-top. The pi-top will still turn on, mind, but only if you plug it to the mains.
Despite that, the assembly process was easy enough and was both exciting and nerve-wracking at the same time. It's a far cry from assembling as desktop, of course, but the combination of electronics and plastic sometimes makes you hesitate whether you're applying too much force for not. But once the dust, and sweat, has settled, you're left with a (hopefully) working laptop that's ready to guide you into a brave new world of learning and programming.
The aftermath
It's not a very powerful laptop, but it's more than adequate for what it's meant to do and a bit more. By now, most tech lovers will have heard of the Raspberry Pi, specifically the RPi 3, that powers this DIY laptop. In terms of raw power, the RPi 3 would match that of an entry-level smartphone, except its form is closer to a conventional PC board than a mobile device.
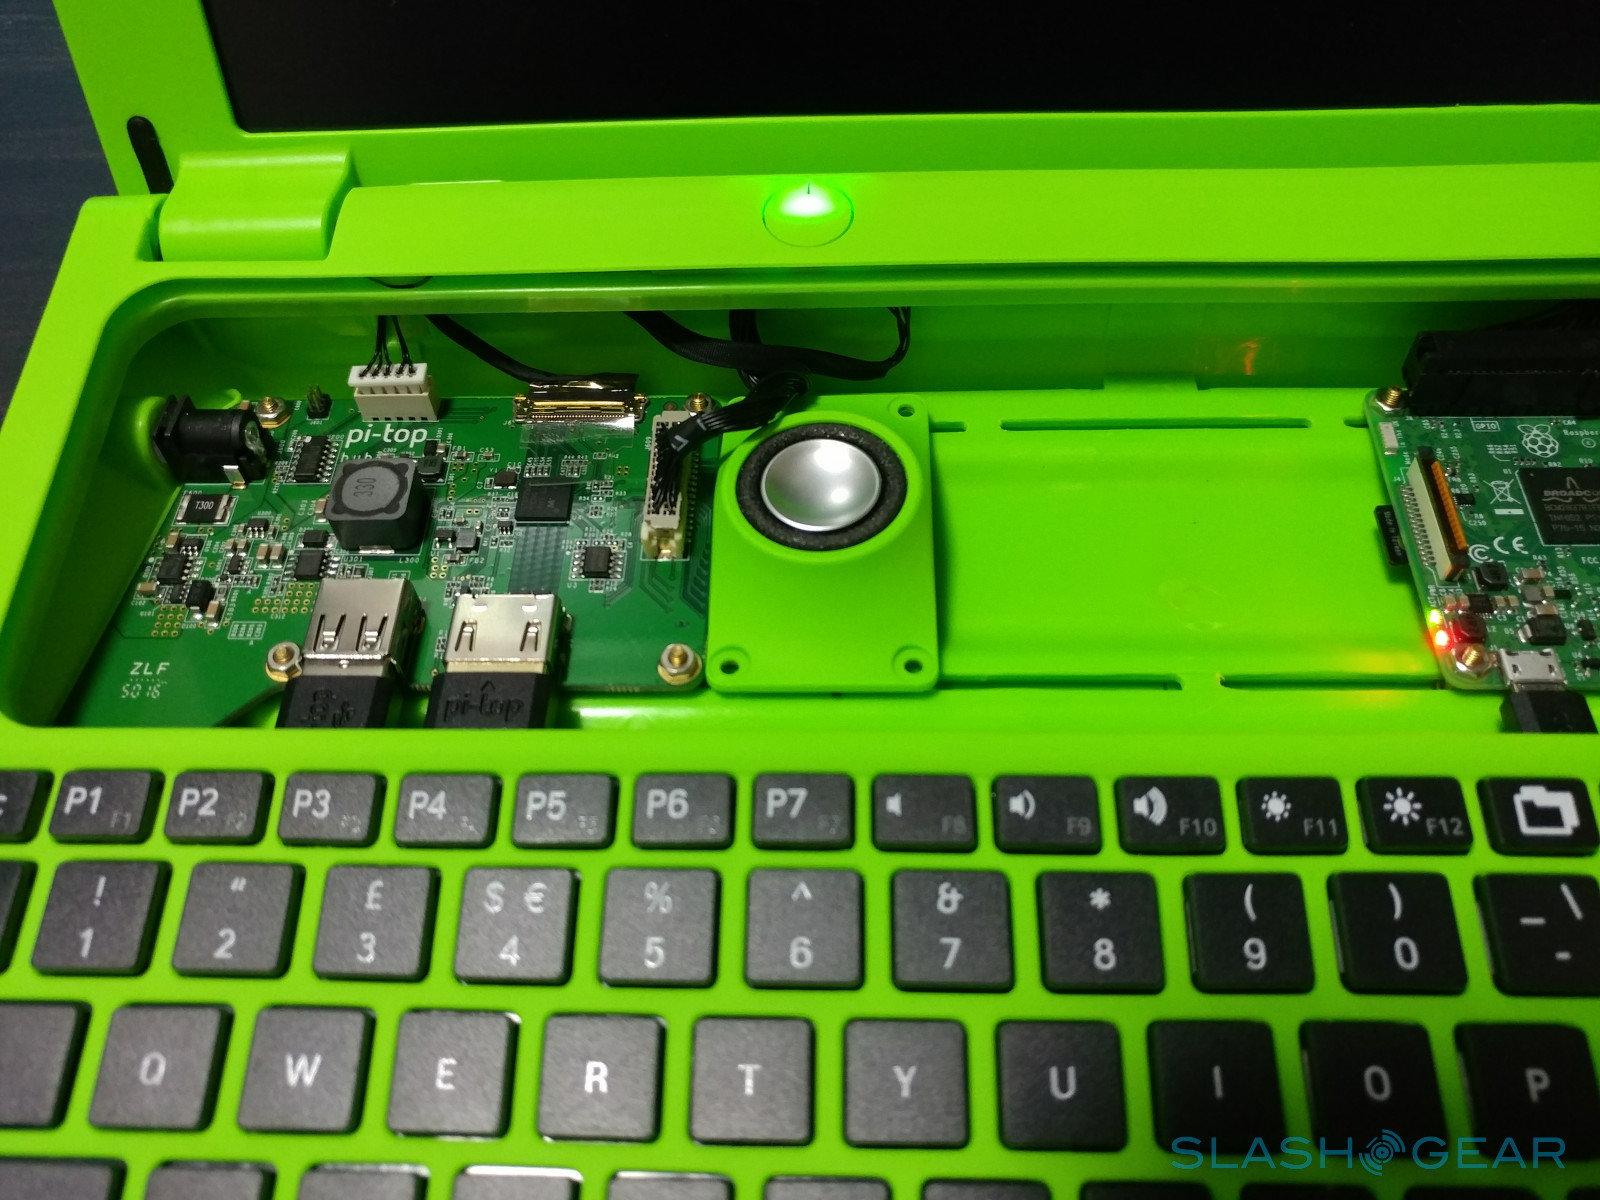
The Raspberry Pi doesn't connect to the peripherals directly, save for the keyboard/touchpad combo. Instead, everything is routed to pi-top's specially made Hub, from power, to display, to audio, and even to GPIO. The latter might be an important consideration for seasoned RPi users. You do not have direct access to the RPi's GPIO pins since it connects to the Hub via that breakout cable. Not all is lost, however, since you can regain that functionality through the pi-topPROTO add-on.
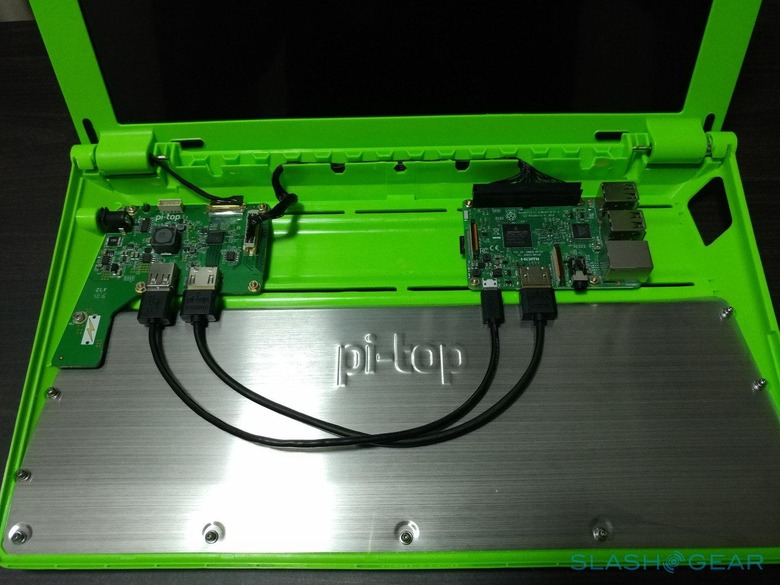
On a side note, you actually don't need to connect the Raspberry Pi to the Hub via GPIO for things to work. That connection, however, provides battery information to the pi-topOS as well as controls for screen brightness.
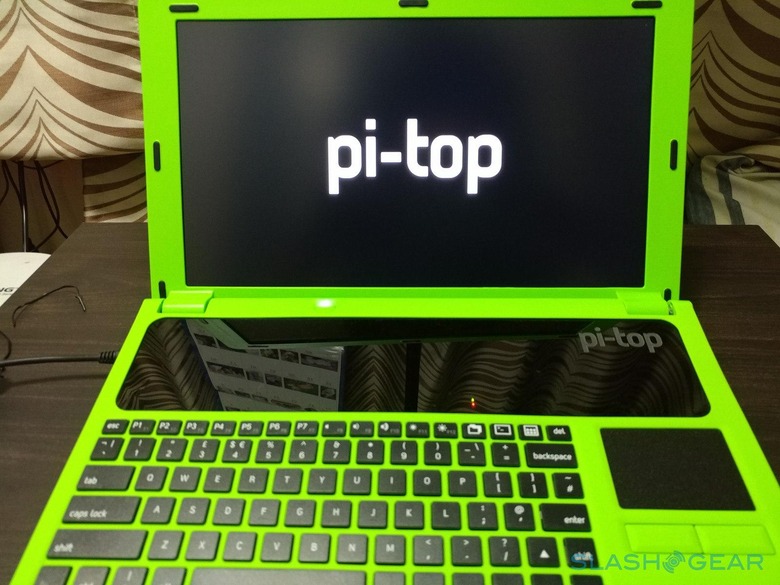
That screen is a 13.3-inch LCD with a resolution of 1366x768. Yep, HD only. At that size, you'd wish it were at least Full HD, but the pi-top's target demographic isn't multimedia-savvy consumers. It's a very bright screen, though, so visibility outdoors isn't going to be a problem.
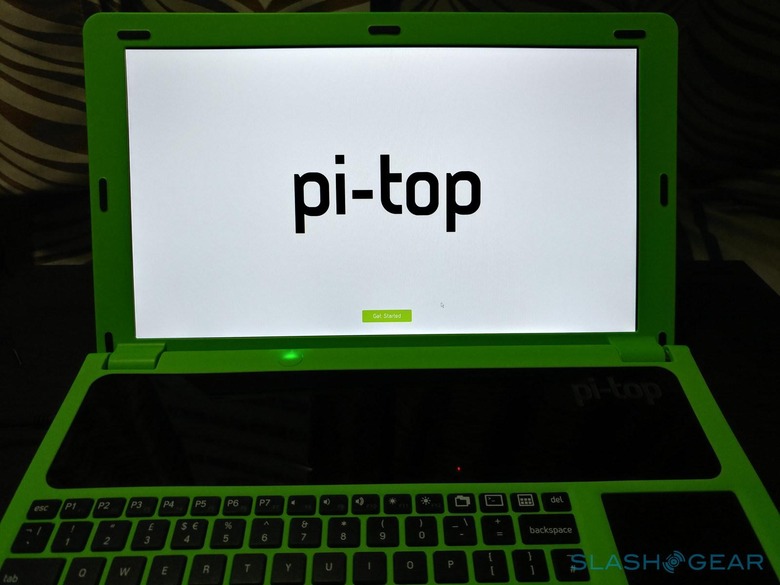
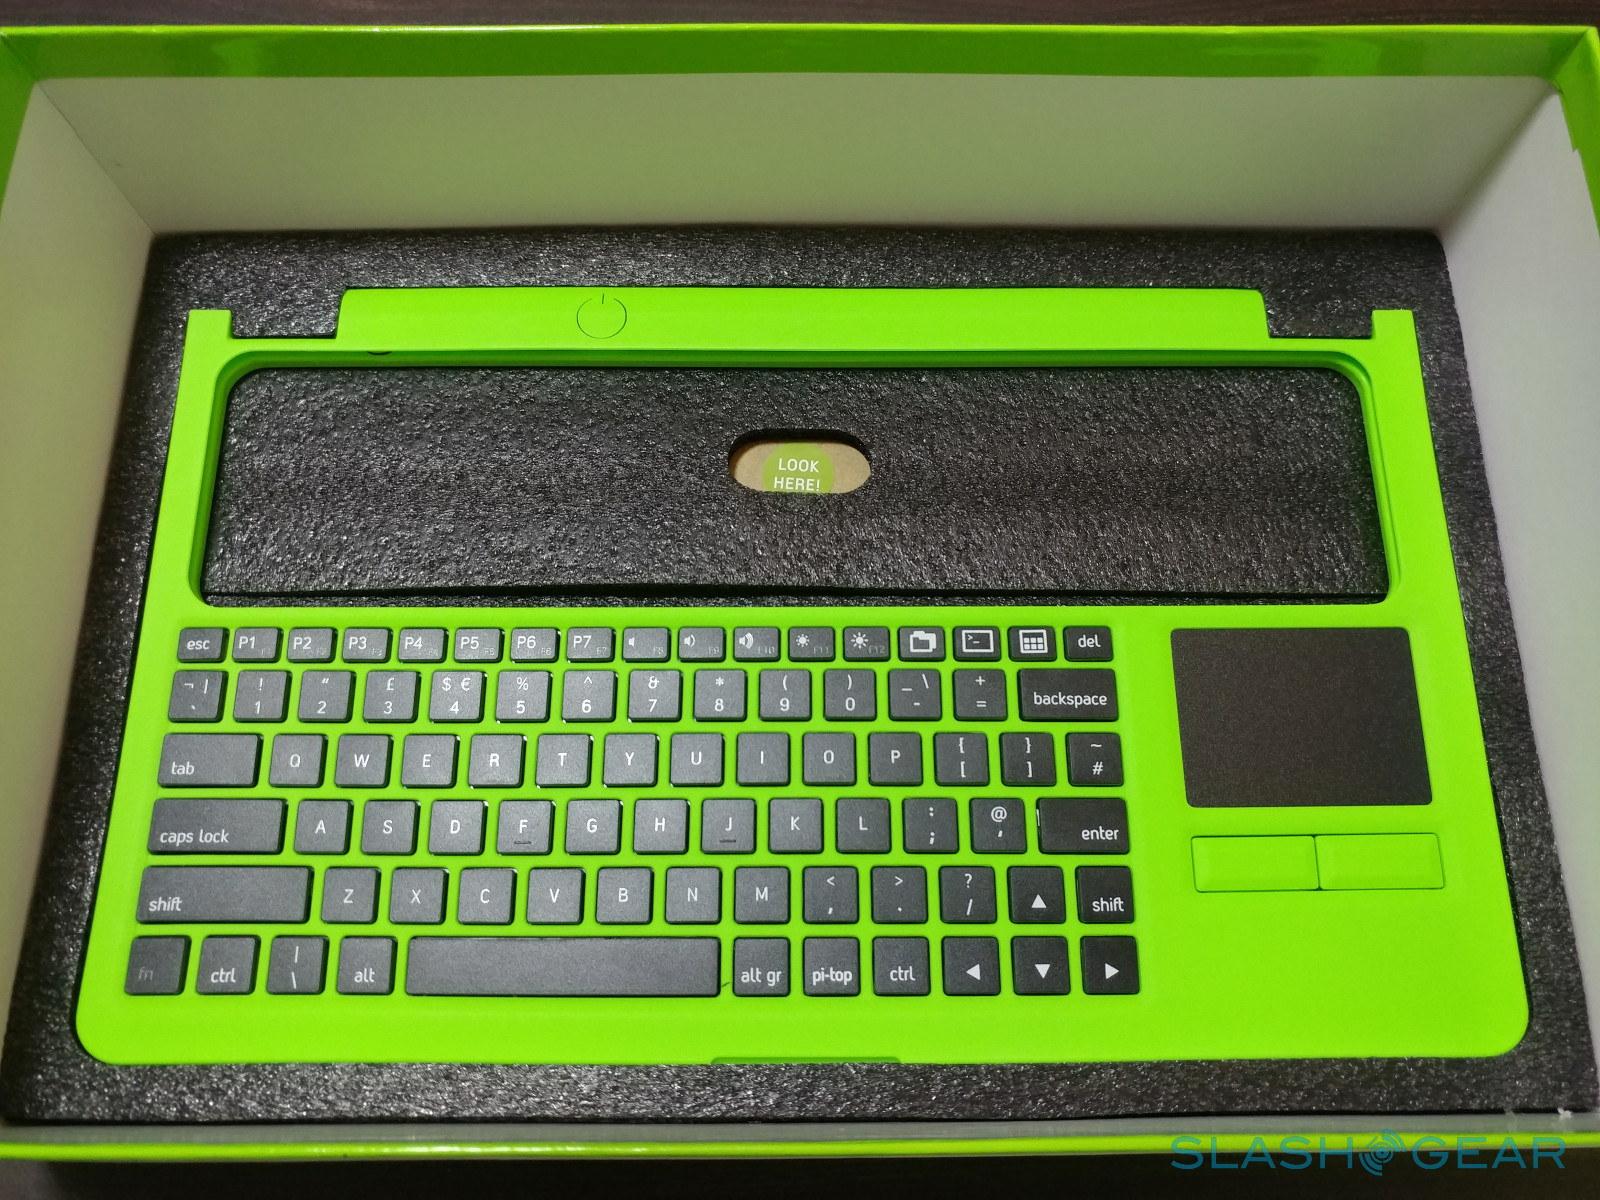
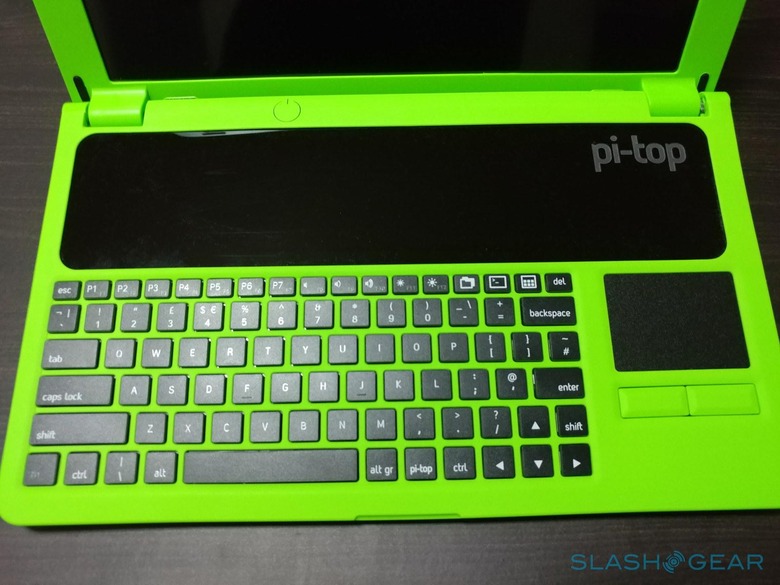
The keyboard and touchpad is an odd one. On the up side, it connects to the Raspberry Pi via USB, so you don't have to worry about the instability of Bluetooth. Its layout, however, might put off some who are more used to the traditional layouts of laptops. The touchpad is off to the right side of the keyboard, which, in turn, isn't exactly centered in front of the display. It is a bit of a compromise since vertical space is taken up by the Raspberry Pi and the Hub at the top. The touchpad is a tad on the small side, so you'll be hitting the edges a lot. The separate buttons for left and right mouse clicks are almost redundant since pi-topOS can recognize gestures just fine. Still, they're nice to have, in case things go awry. As for the keyboard, the keys have a nice travel to them but reflects the dichotomy of the pi-top. They're big enough for small fingers but too small for imprecise young fingers.
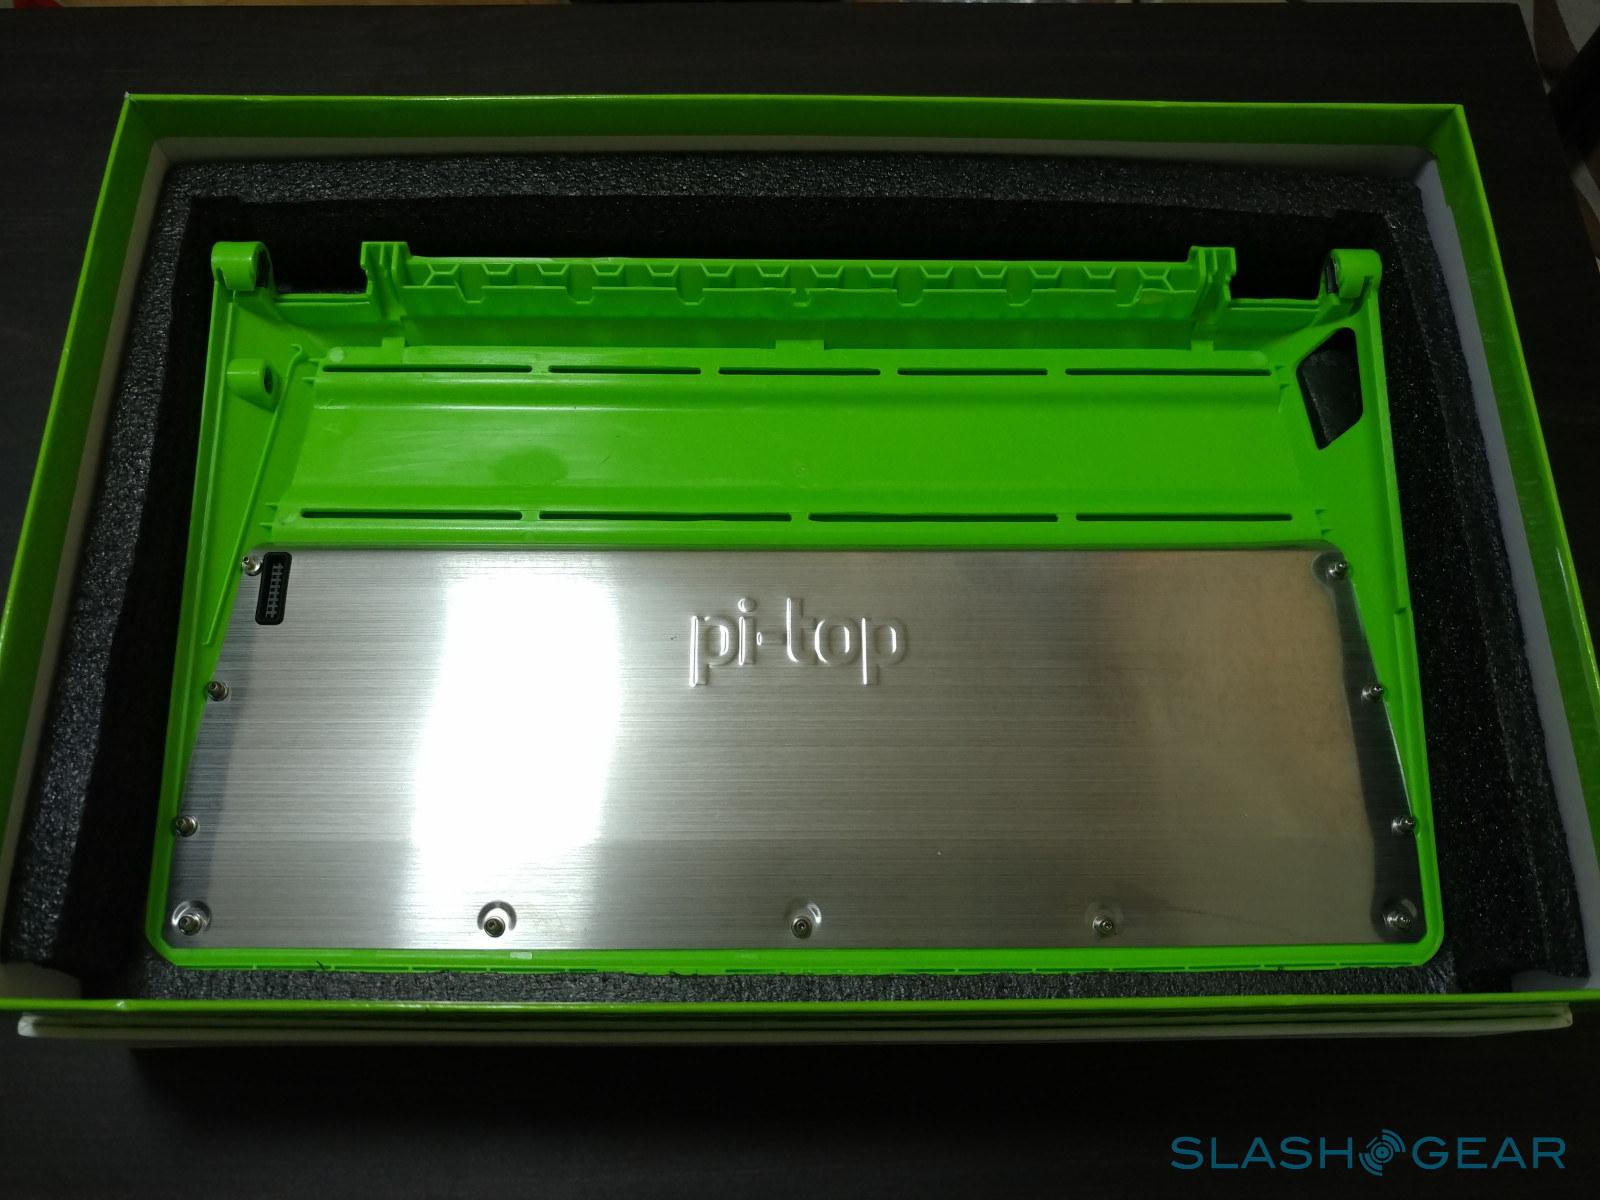
Above they keyboard is perhaps the real crowning glory of pi-top, something that the laptop shares with the pi-topCEED desktop. There you will find the modular rail system where both the RPi and the Hub sit. Since the Hub has taken over the RPi's GPIO pins, it provides an alternative to keep the pi-top still open and moddable. Those come via the modules that pi-top itself sells. One in particular, the pi-topPROTO, gives you back access to those GPIO pins. The great thing about the rail system is that you don't have to limit yourself to just one. Each module can be connected to another module in a daisy chain. Physical space is really your only limit, which, in the case of the pi-top, means only 2 modules at a time.
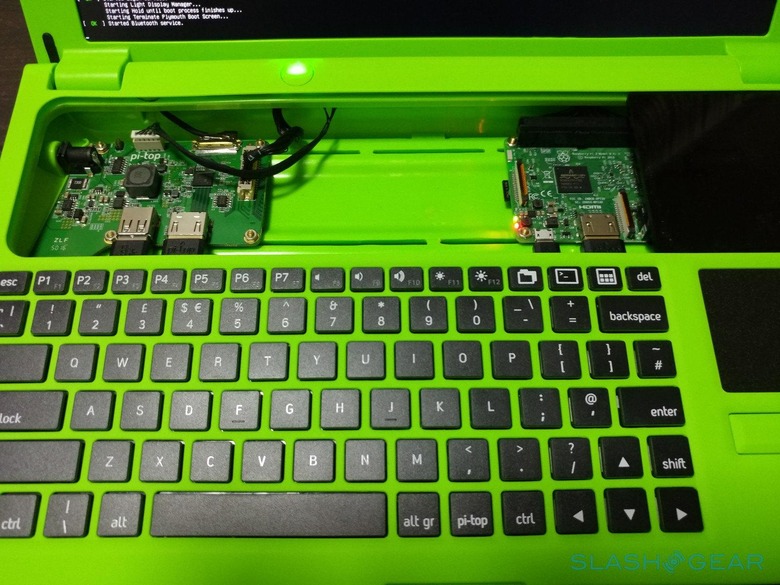
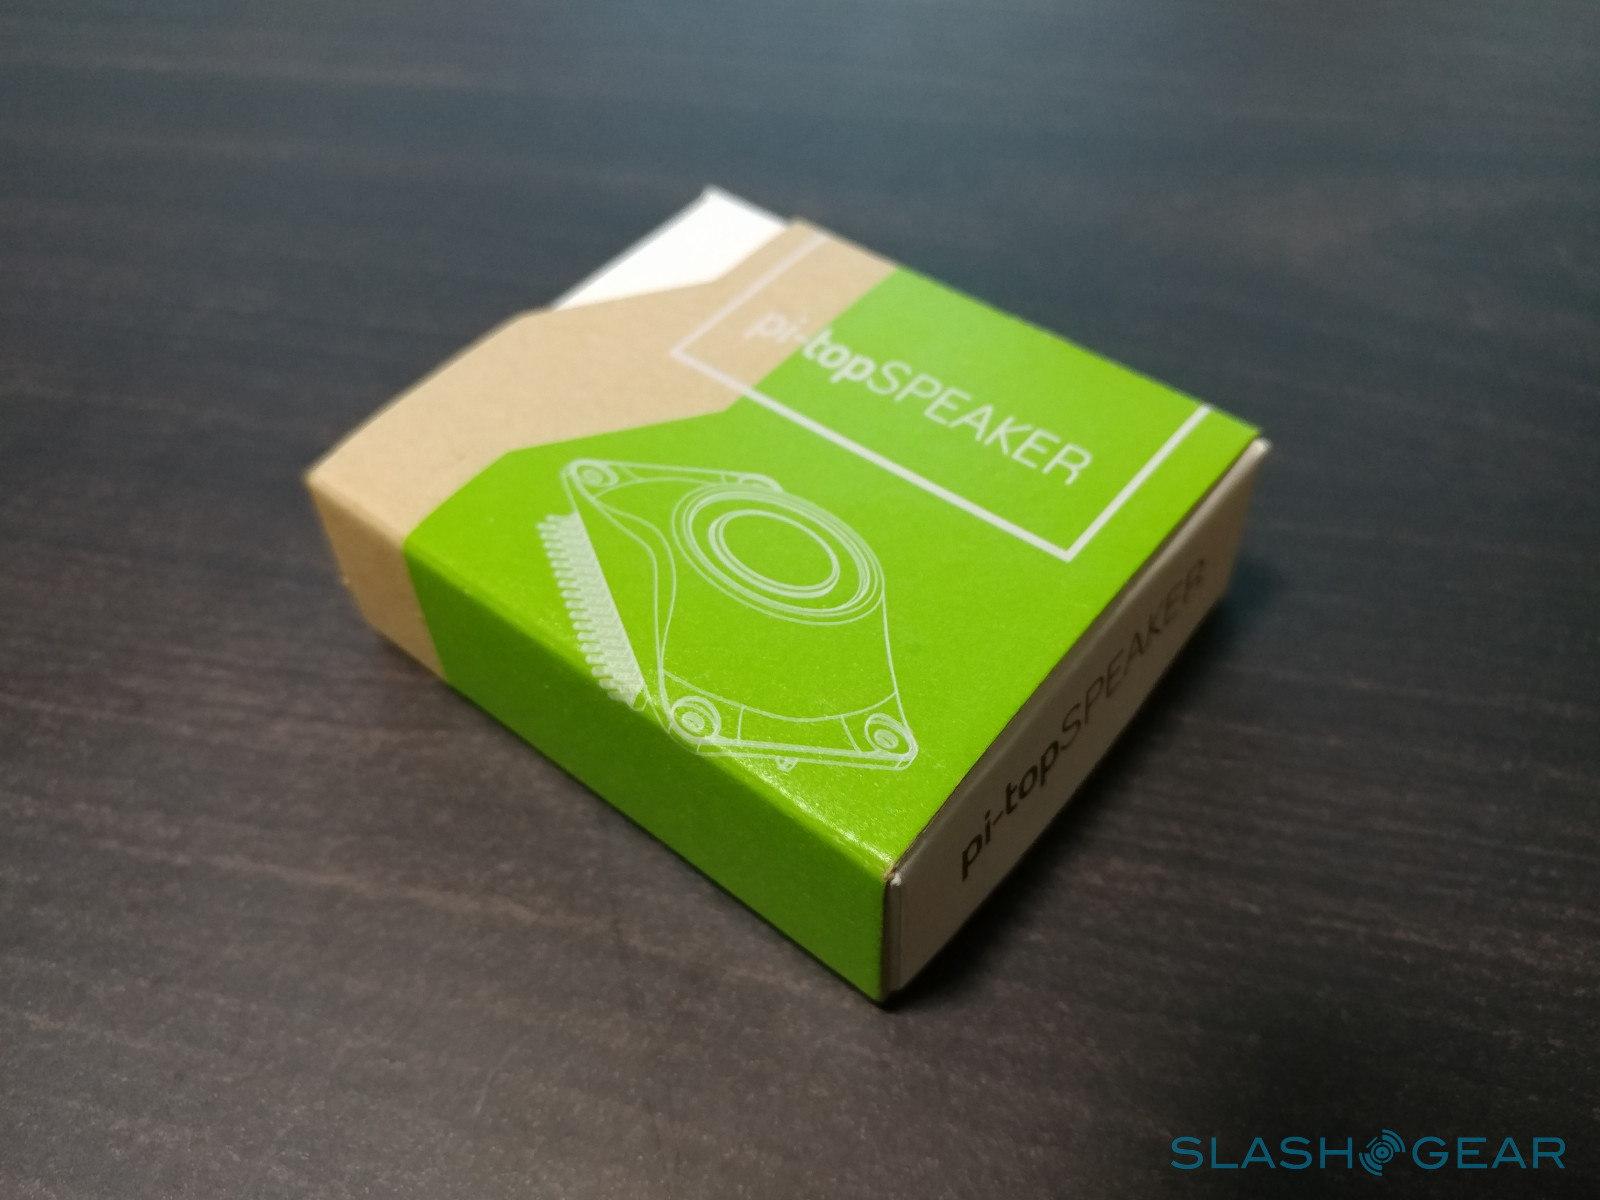
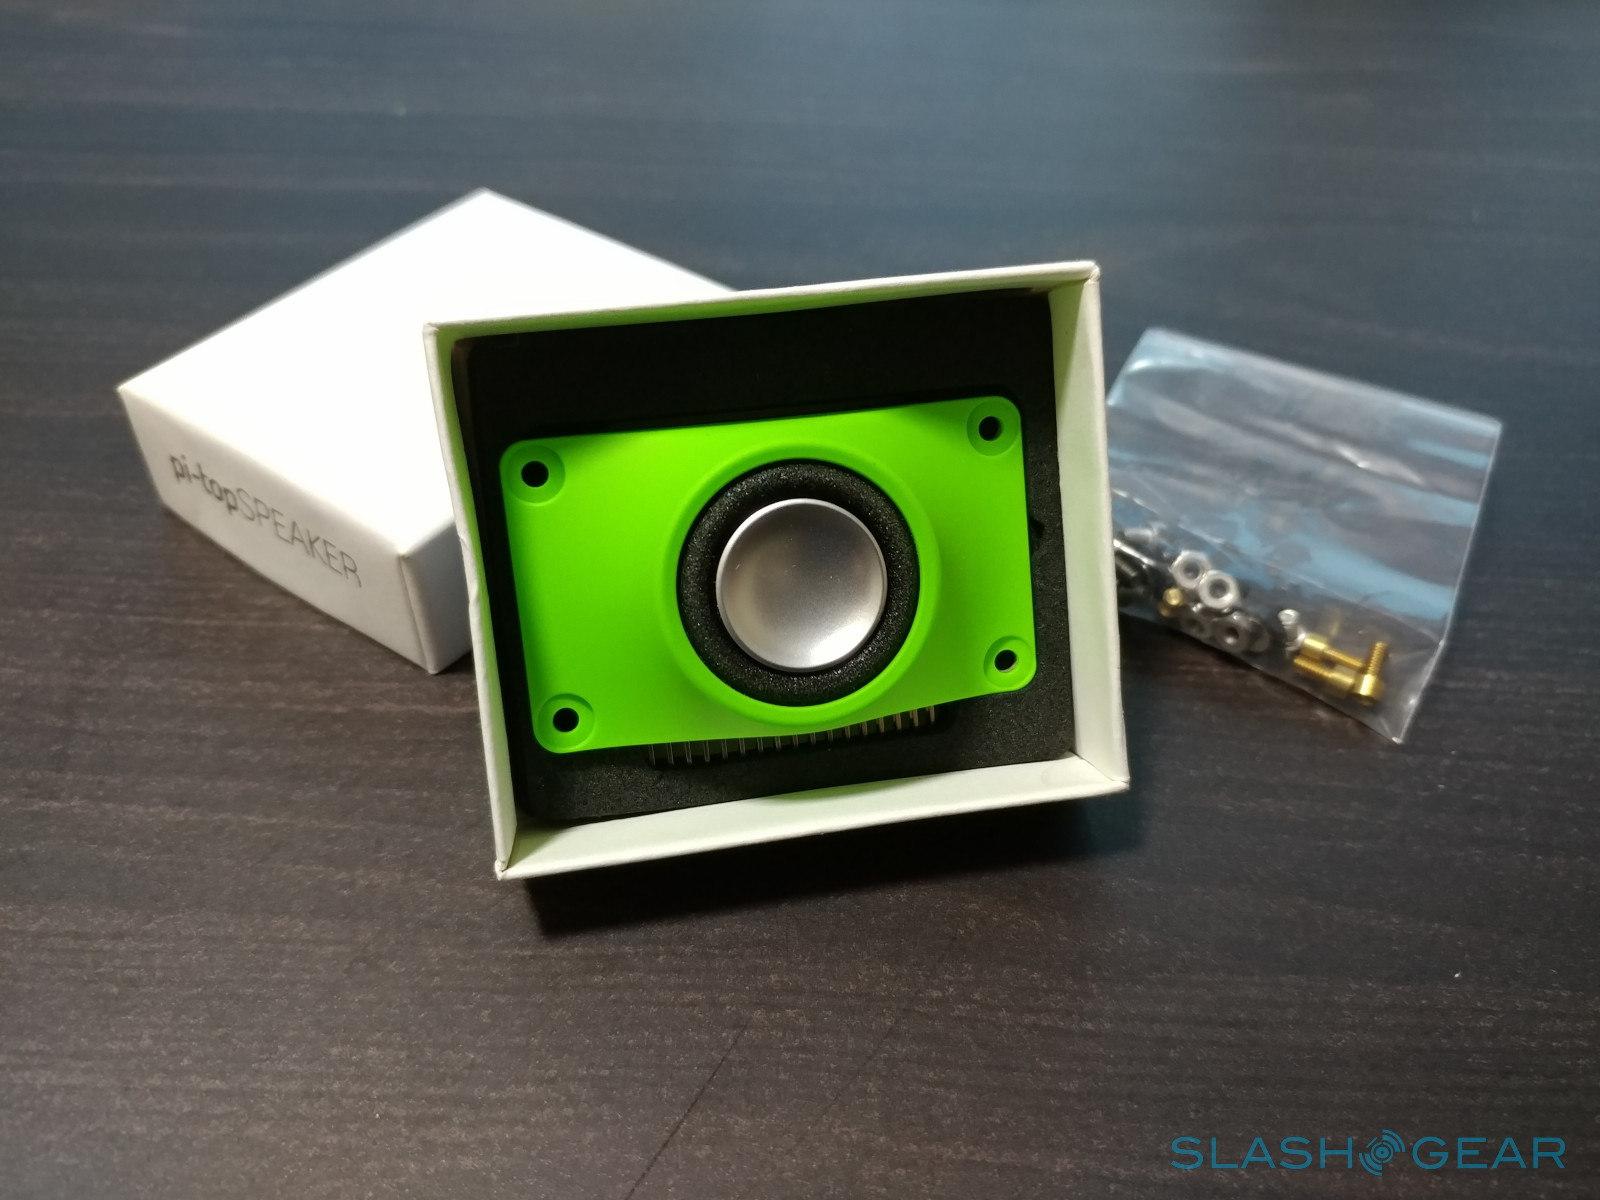
The pi-top itself doesn't have any speakers, and neither does the RPi. Access to the 3.5 mm headphone jack is practically blocked and the HDMI port is locked to the Hub. Your only resort is USB audio or the pi-topSPEAKER, which the great folks over at Dynamo were kind enough to include. It connects via that rail system and can be set to mono, left, or right speakers. With that almost permanently in place, you really only have room for one more module.
The software
As exhilarating as the laptop assembly may have been, the pi-top adventure hardly stops there. After all, what is use a laptop if it doesn't have software to use it with. Of course, the Raspberry Pi has its own official operating system, Raspbian, but pi-top has gone the extra mile to refine that to provide an environment and an experience more suited for education, specifically programming. pi-topOS is still built on top of Raspbian and still provides many of the facilities familiar to Linux users, though it swaps out Xfce for LXDE. That said, the moment you first turn on the pi-top and every time you boot into it, you are greeted with a "desktop" that really wants you to get started with learning immediately.
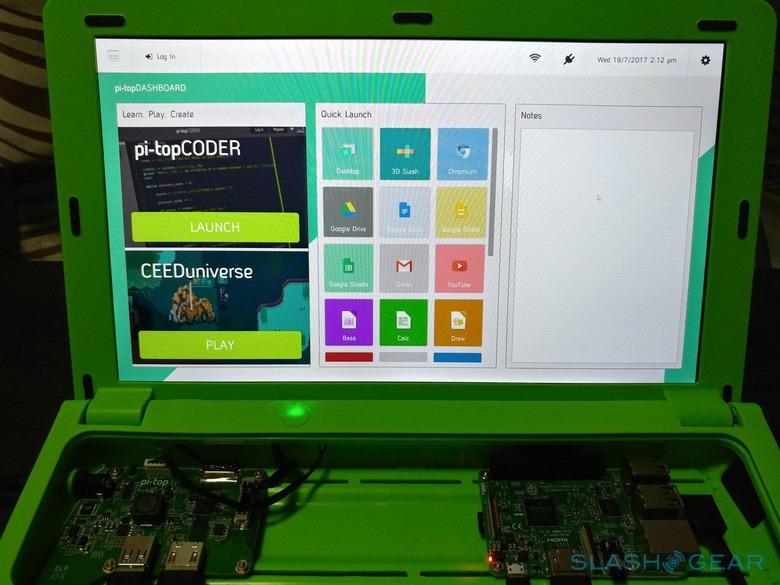
The pi-top Dashboard is a unique, customized launching pad for pi-topCODER and CEEDuniverse, pi-top's two special educational programs that we'll get to later. It also has shortcuts for most of the programs that pi-topOS has pre-installed, including the LibreOffice productivity suite, programming environments, and even some of Google's popular web services, which basically just launches the Chromium web browser. There's also a Notes panel that lets you easily jot down notes, reminders, text, and the like. The notes are saved between reboots.
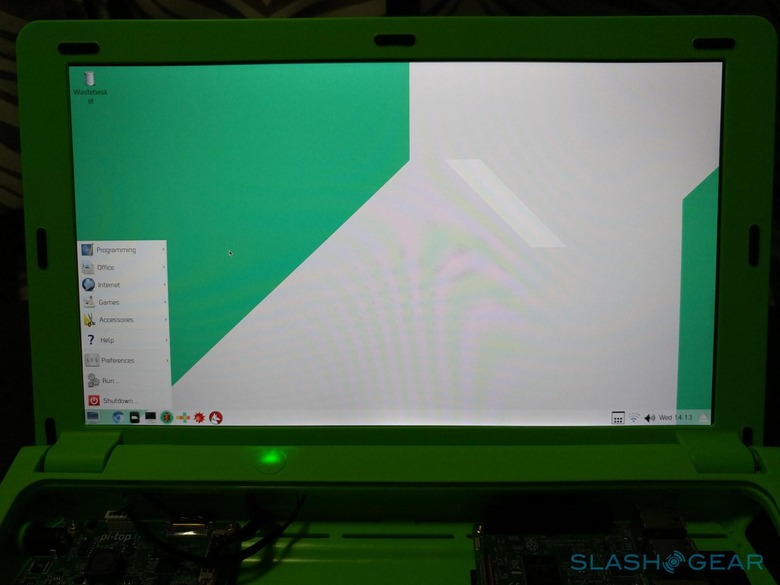
The pi-top Dashboard is an admittedly nice touch that shows how committed pi-top is to delivering an education-centric experience right out of the box. It is, however, an interface that seems to be best suited for touch displays rather than traditional keyboard and mouse input. Which is somewhat ironic considering neither the pi-top nor the pi-topCEED have that. It also severely lacks customization options, like removing or adding Quick Launch apps or even telling pi-topOS to drop you on the desktop at boot. Fortunately, the familiar desktop is just a key or click away. In fact, launching all programs, except for pi-topCODER and CEEDuniverse, will dump you right on the desktop, which might be confusing to first time users.
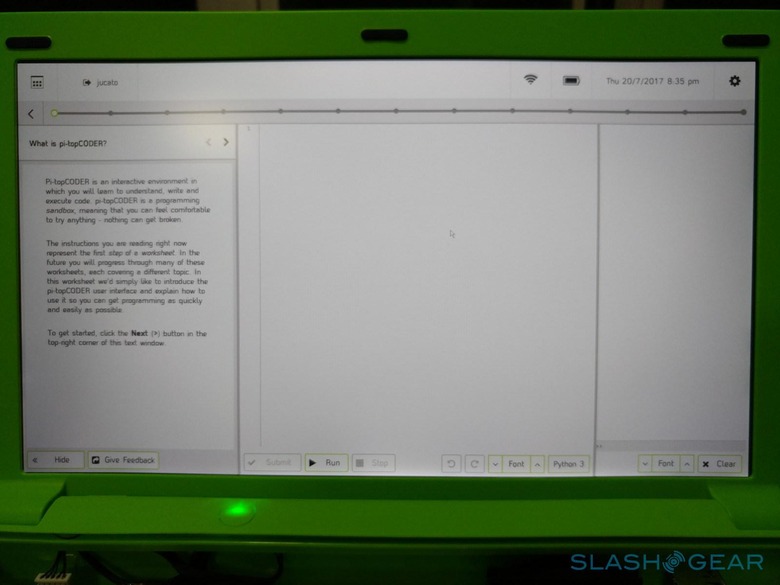
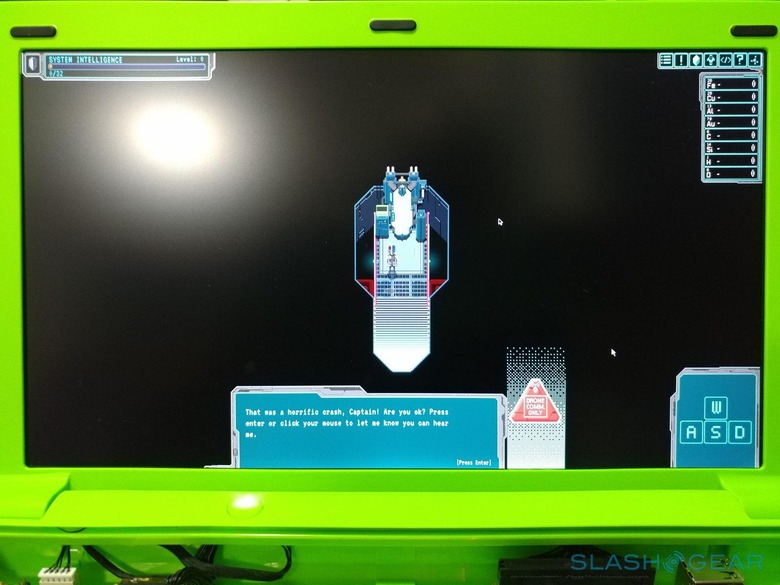
Those two programs definitely bear special mention. There is no shortage of software designed to teach programming to kids and, in fact, pi-topOS pre-installs some of them, like MIT's Scratch visual programming environment. pi-topCODER and CEEDuniverse are still special and a bit unique. pi-topCODER is more your traditional, ladderized programming course that takes you through the basics of Python programming. It includes levels, hints, progress bar, and everything you need to keep kids interested. For those looking for a more unconventional and entertaining way to learn and teaach, CEEDuniverse is worth looking into. It turns programming into an adventure game, letting learners program visually or through actual code.
pi-topOS also has Minecraft Pi, a special educational version of Minecraft, pre-installed for more advanced and adventurous learners. It also comes with Sonic Pi for music synth coding, but it is something you'll only get to really enjoy if you have speakers connected.
The outskirts
It might seem that the pi-top and pi-topOS are made just for kids. While that may be true to some extent, it isn't an exclusive party either. Not only does the hardware and its assembly benefit teens and grownups, they can freely roam and use pi-topOS to their hearts content. After all, it's just Linux underneath.
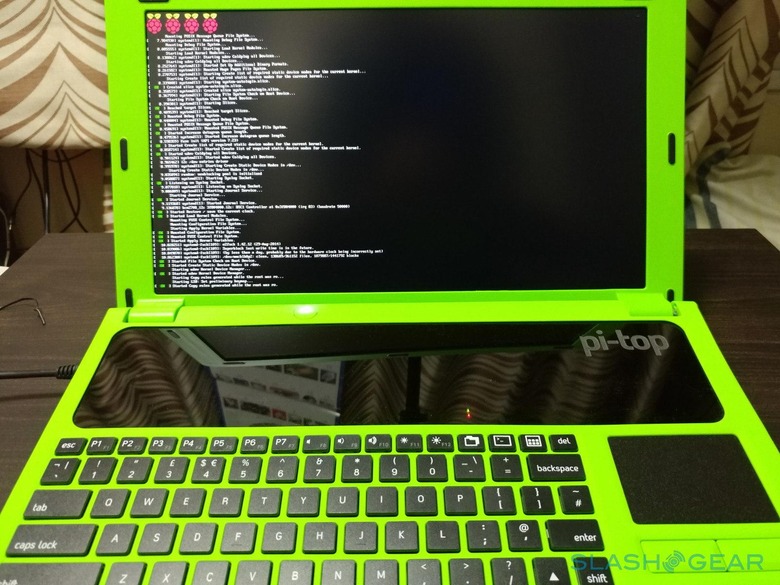
In addition to the programming environments, tools, and games mentioned earlier, pi-topOS also comes preloaded with more "serious" programming software. No one will say that the Python IDLE is a kid's toy, Geany is a lightweight Java IDE used even by veterans, and Wolfram Alpha is not something kids might easily appreciate.
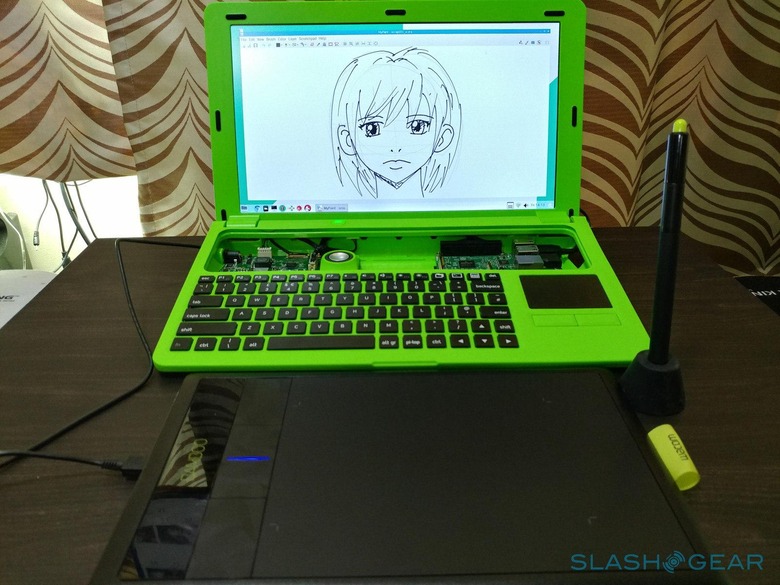
pi-topOS even goes beyond programming and education. As a true Linux distribution, you can install almost anything available from Debian. Your only real limits are the software packages available for the ARM architecture, the free space on the included pi-topOS memory card, and the processing limits of the RPi itself. By simply installing Wacom drivers, I was even able to turn the pi-top into a usable digital art workstation.
Wrap-up: The future
So does the pi-top live up to its promise of providing an ecosystem around the Raspberry Pi specifically catering to computer science and STEAM (Science, Technology, Engineering, Arts, Math) education? That's a resounding yes! But they could also do better, especially in terms of the hardware.
The pi-top definitely deserves a version 2, and that version should focus on making it easier to assemble the laptop, even for kids. Less fragile parts, easier to hold screws, and a more explicit manual will go a long way in inspiring confidence in building the laptop. There are also a few kinks to be ironed out on the software side, but those are easier to roll out even with current hardware. Maybe someday, pi-top can even come out with a DIY tablet. I'd sign up in a heartbeat.
Many of us grownups remark how we're living in the digital age, but imagine what the future will be like for today's children. It might be a future where writing code is as common as writing essays and creating mobile apps will take the place of term papers. While the future always remains uncertain, it's not hard to see how computers and, by extension, programming will play a big role in what lies ahead. And what better way to prepare the future generation than by showing them the ropes, from the very first PCB to the very last line of code with the pi-top.
