How To Use Hide My Email In iOS 15 Devices
While browsing the internet, there's a good possibility that you'll come across sites that require your email as ID, whether for online shopping, streaming media, or registering for newsletters and blogs. Although you might be happy to enter your email address for the task in hand — which could be to buy a pair of headphones or fill out a survey — those sites may subsequently use it to provide updates, send advertisements, and more, which can clutter your inbox.
This is where Apple's Hide My Email feature comes in – it keeps your personal email ID safe, while generating a random but unique email address that automatically forwards all the messages received to your actual email address. Using Hide My Email via iCloud+, you can reply to the emails sent to these random email IDs, which will be available in your private inbox. Apple says that it does not read the emails redirected via Hide My Email addresses, except for filtering out spam messages.
Why Hide My Email is useful
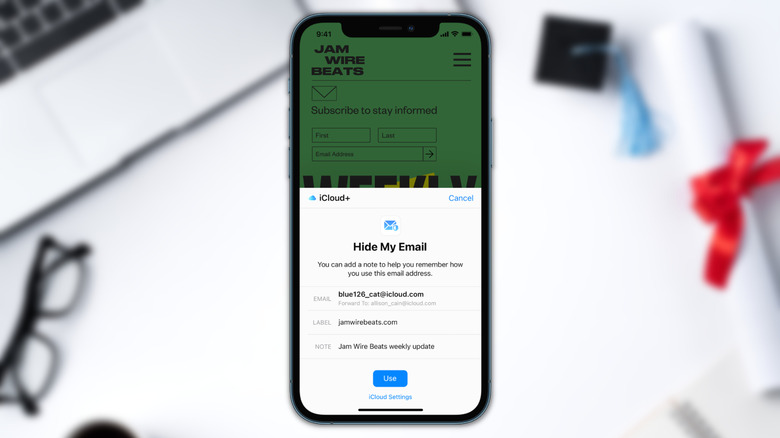
With Hide My Email, Apple enables you to protect your personal email addresses by temporarily replacing them with random email IDs. According to the official support page, you can generate as many random email addresses as you need to suit all your online registrations. For instance, while filling out a web form in Safari, Apple users can create an account using a random email address through their iPhone, iPad, iPod, and Mac. As soon as you tap on an email field in Safari, a 'Hide My Email' prompt appears at the top of the keyboard; tapping on that creates a new email address, or uses one already made.
While purchasing something online, you can enter a Hide My Email random address too: that helps skip the subsequent promotional content that can end up spamming your accounts. It's not just companies, however. The feature is also available on Apple Mail, to help protect your original email ID while sending messages to someone. To use that, tap on the 'From' field in Mail and choose 'Hide My Email' from the pop-up menu. It could be helpful for professionals like journalists or government employees who want to protect their identity. The steps to create and deactivate a Hide My Email address are similar on iPhones and iPads.
How to setup up Hide My Email on an iPhone
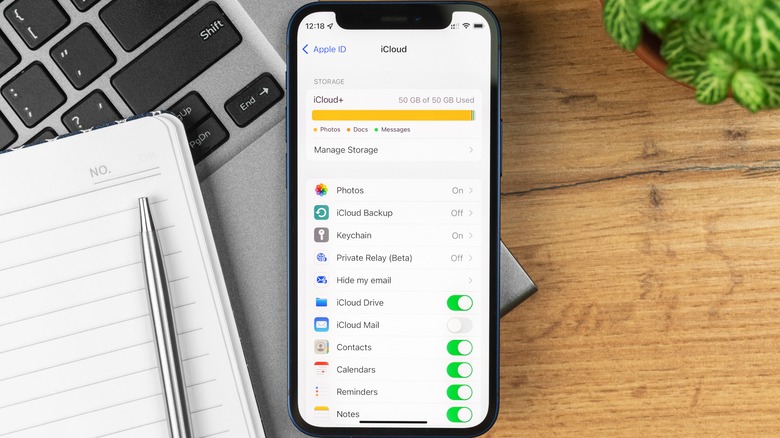
It is important to mention that Hide My Email is only available on devices that run iOS 15, iPadOS 15, and macOS Monterey 12, and for those who subscribe to iCloud+, the revamped version of iCloud. If you use a compatible device, the first step is creating a dummy email address. Open the Settings app on your Apple device and tap on your name to open the Apple ID settings for the account. Over there, tap on 'iCloud' and select 'Hide My Email' from the options on the screen (via Apple). If you're using the free version of iCloud, you will first be prompted to upgrade to iCloud+.
- Tap on 'Subscribe to iCloud+' and follow the instructions to pay the subscription fee and unlock the feature.
- After subscribing to the service, return to the 'Hide My Email' menu and tap on 'Create new address'.
- The system will generate a new Hide My Email address ending in 'appleid.com' indicating that Apple directs these emails via its servers.
- If you are not satisfied with the address, tap on 'Use different address' to view other randomly generated email addresses; tap on 'Continue' to proceed.
- On the next screen, label the email address and confirm.
- Once you create the unique email address, you can use it to sign up for any digital service.
How to manage the Hide My Email address
As you sign up on multiple platforms, you might need to change the Hide My Email forwarding address. To do so, you should open the Settings application on your iOS 15 devices, tap on your name at the top of the menu to open your account settings, tap on iCloud, and then select Hide My Email. On the next screen, you will find the option 'Forward to,' which displays all the available email addresses currently registered. Select one of these — or tap on 'Contactable At' to add another email address — then tap on 'Done' at the top right corner to change the Hide My Email forwarding address.
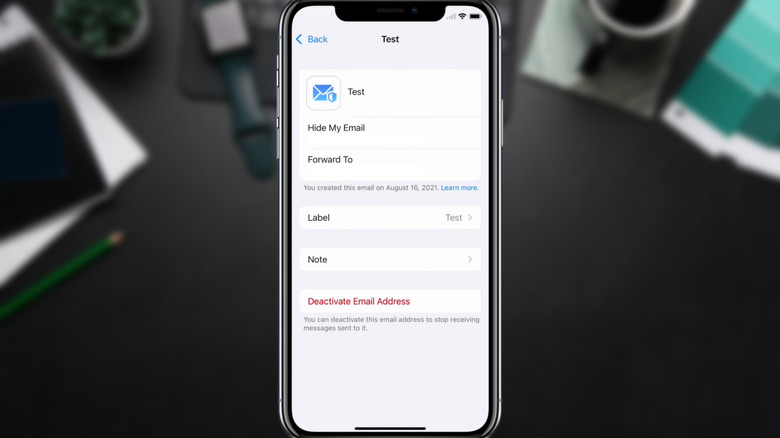
If you want to deactivate your Hide My Email address altogether, meanwhile, open the Hide My Email menu in the Settings app. Here, you'll see all the dummy email addresses you have created; tap on the one you don't wish to use anymore. It will open the 'Sign Up Email' menu with an option at the bottom that reads 'Deactivate email address.' Upon selecting this option, you can deactivate the Hide My Email address, which will put the randomly-generated address on hold. Once you deactivate a Hide My Email address, you will not be forwarded any emails sent to it.


