How To Connect Your Raspberry Pi To Wi-Fi
With more than 40 million units sold (via Raspberry Pi), and more than a decade under its belt, the small, cheap, and stripped-down Raspberry Pi computer is loved by everyone. People use it to build weather stations, security cams, crypto miners, smart machines that water their plants, and hundreds of thousands of other projects. Underscoring its versatility, even U.K. soldiers used one to build a bomb disposal robot, according to a blog post from the company.
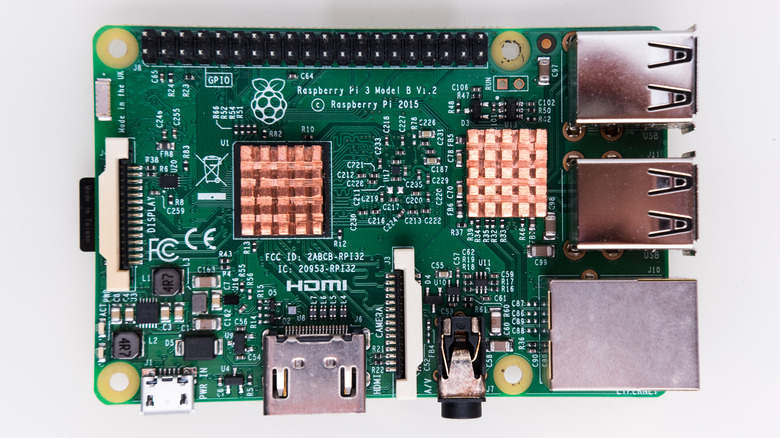
Regardless of what you are using the Raspberry Pi for, the first thing you will probably need to do is to get the small board online by connecting it to a Wi-Fi network. All Raspberry Pi models made since 2016 have a built-in onboard Wi-Fi chip; however, if you happen to get your hands on an older module, or if your Wi-Fi hardware is damaged, you will need a USB Wi-Fi adapter. Once you get that sorted out, there are several ways to connect to a Wi-Fi network.
Connect a Raspberry Pi to Wi-Fi via Raspberry Pi Imager
This is the simplest and easiest way to connect your Raspberry to Wi-Fi. Raspberry Tips has some cool instructions on how to use advanced settings. The first thing you will need to do is download and install the Raspberry Pi Imager. If you are new to the tech, the Raspberry Pi Imager is the fastest and easiest way to install the Raspberry Pi OS. To connect your Raspberry Pi using the Imager:
1. Insert an SD card into your computer.
2. Download and run the Raspberry Imager, which is available via the official link.
3. Select the operating system you want to use and select your SD card by clicking "Choose Storage."
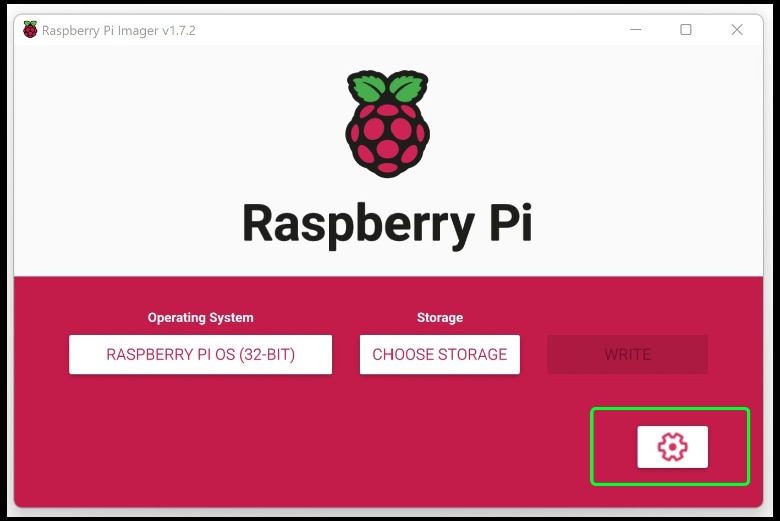
4. Open "Advanced Options" by clicking on the gear icon in the bottom right corner of the app.
5. In "Advanced Options," find and click the box to enable SSH and enter your username and password.
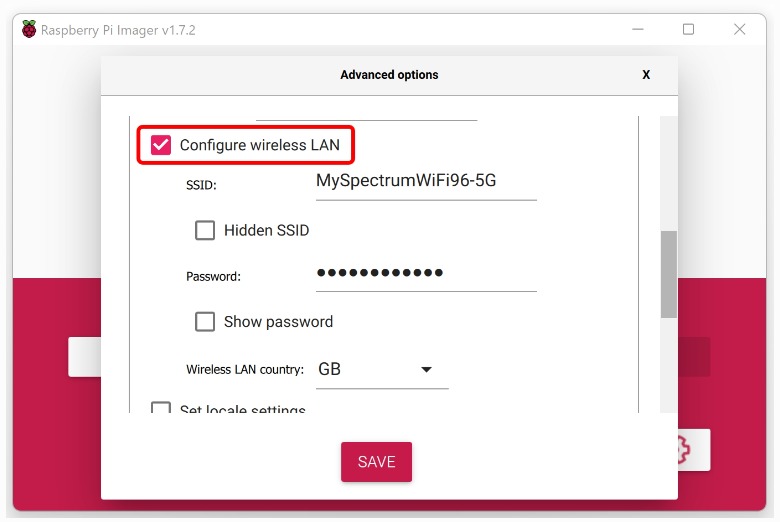
6. Click the box next to "Configure wireless LAN." The credentials for the Wi-Fi network you're already using will automatically appear in the "SSID" and "Password" fields. If that's not the case, you'll need to manually enter them.
7. Click "Save."
8. Click the "Write" button, and the installation will run with your settings included.
9. Boot your Rasberry Pi. It will now connect to the Wi-Fi network automatically!
Configuring your Wi-Fi network manually
Your Raspberry Pi's Wi-Fi network can also be configured manually, but only if the SD card has been flashed. It can also be done to update the information on an old SD card that used Ethernet or an old wireless network. Raspberry Pi HQ explains that to manually configure the Wi-Fi network, a file called "wpa_supplicant.conf" must be edited and modified. To do this, follow these simple steps:
1. Open nano. To initiate nano, just type "nano" in the command prompt.
2. Open in nano the "wpa_supplicant.conf" file by entering the following command: "sudo nano /etc/wpa_supplicant/wpa_supplicant.conf"
3. Scroll to the very bottom of the file and add the following text, which will configure your network:
network={
ssid="Wifi Network Name"
psk="Wifi Password"
}
4. Remember to replace "Wifi Network Name" and "Wifi Password" with your own network name and password.
5. Press Ctrl+X and then Y to save and close the file.
You are all set to go, and the Raspberry Pi should automatically connect to the Wi-Fi network. Verify your connection with the command "ifconfig wlan0." If this fails for some reason, a reboot will often do the trick.
Configuring Raspberry Pi Wi-Fi without a screen
In some usage scenarios, a Raspberry Pi may run without monitors, keyboards, or a mouse. In this case, the Raspberry Pi needs is to have SSH enabled. This allows users to run terminal commands remotely on the Raspberry Pi from an internet connection through the primary computer. The process is straightforward.
- Place a file named "ssh" (with no extension) on the boot partition of the SD card from your computer. The content of the file is not important.
- Your Raspberry Pi will now enable SSH when booting.
You can also connect to Wi-Fi with the Raspberry Pi OS Desktop. If it is the first time you connect, a wizard will run and guide you through the steps to connect. The process is very similar to connecting to Wi-Fi on a normal computer. Raspberry Tips adds that you can also connect using Raspberry Pi OS Lite running the raspi-config tool; this will prompt a menu to appear that is a simplified version of how any computer connects. Ultimately, connecting Raspberry Pi to Wi-Fi is proving to be easier every day as the brand progresses with wireless LAN and Bluetooth options.
