How To Transfer Ownership Of A Used Dell Laptop
When buying or selling used electronics like computers, it's not always just a matter of packing it up and shipping it off to the buyer and washing your hands of it or sitting around waiting for your new device to arrive. Often, there's a process that must be followed to ensure the new owner has full access to support, warranty services, and essential account features. There are lots of advantages that come with buying a laptop used: primarily, you get to save money, and if all goes well, you'll end up with a good computer for a lot less than the original price. On the other hand, if you're the seller, you get to recoup some of your original investment — money that you could put toward buying a Dell laptop good enough to beat the M3 MacBook, according to our tests.
If a used Dell laptop is the device you're looking to buy or sell, you'll need to go through Dell's ownership transfer process to make things official. You don't want to skip this step because completing it ensures the laptop is registered in your name and eligible for warranty support (if applicable), something that's very important if you're the buyer. If something goes wrong down the line, having the laptop in the correct owner's name will help Dell assist them more quickly. Without that transfer, the new owner could run into issues verifying they're entitled to Dell technical support or any remaining warranty, especially if the original owner's information is still tied to the device.
How to transfer ownership of a used Dell laptop
While Dell isn't necessarily the most reliable laptop brand out there, there are a lot of used Dells on the market. Knowing how to transfer ownership of a used Dell laptop can make the difference between getting full support and being stuck without help when you need it. If you're ready to move forward with a Dell laptop sale, or you've just received one as the buyer, transferring ownership is the next step. Luckily, Dell has made the process relatively painless to complete using an online form.
Follow these steps to transfer ownership of a used Dell laptop:
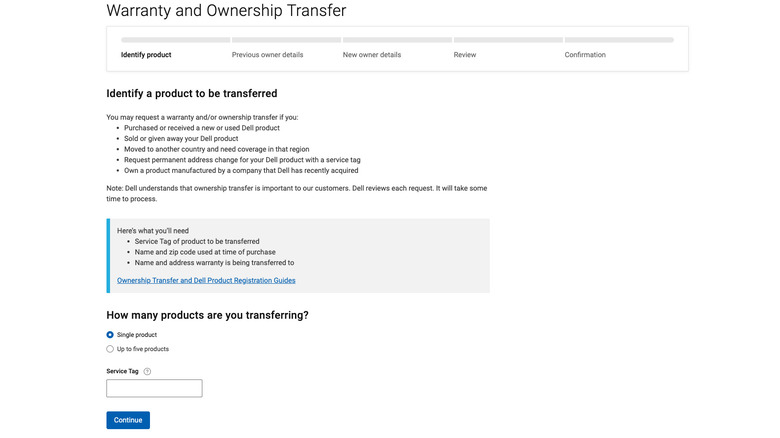
- Go to Dell's Ownership and Bulk Transfer page and click Sign in or Create Account.
- Select how many products you are transferring. Choose Single product or Up to five products.
- Enter the laptop's Service Tag, a unique code consisting of numbers and letters that is usually found on a sticker on the back or bottom of the device.
- Click Continue.
- Type in as much information as possible about the original owner, then click Continue.
- Check all of the information on the review page to be sure you've entered all of the details correctly.
- Check the box to say you have read and agree to the Terms and Conditions.
- Click Confirm to complete the transfer request.
Once you've completed these steps, write down the request ID. Dell computers and laptops are made in various locations worldwide, but that has no impact on transferring ownership. Still, you should expect domestic transfers to take between seven and ten business days to complete, while international transfers can take as many as 15 business days. If you opted in for email notifications, Dell will send you an email after they've reviewed your transfer request.