How To Read The Lights On Your Harley-Davidson Battery Tender
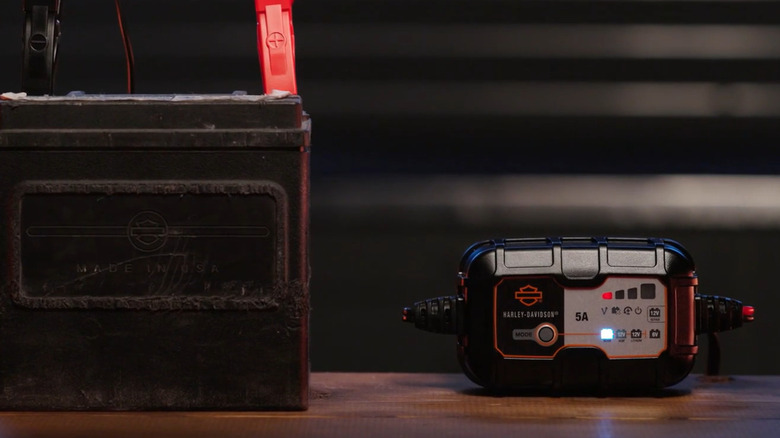
If there's one motorcycle tool you should definitely have for your Harley-Davidson, it's a battery charger that can double as a maintainer. This type of charger can come in handy whenever you need to top up your battery before going on a long ride. But it's actually most helpful during the times you won't be using your bike at all.
In maintenance mode, also called trickle charging, the charger works to stop the connected battery from discharging completely while in storage. It supplies the battery with a low-level supply, just enough to maintain it at 100% without overcharging it. The good thing about such a motorcycle battery charger, especially if you plan to use it for maintenance, is that you can simply connect it and leave it in. You don't even have to check on the charger since it's safe to keep it plugged in for days and even weeks or months.
Still, it's good to know what the status of your battery is from time to time. In that case, we'll walk you through how to read the indicator lights on your Harley-Davidson battery charger (also called battery tender in older models).
Reading the Charge LEDs on Harley-Davidson battery chargers
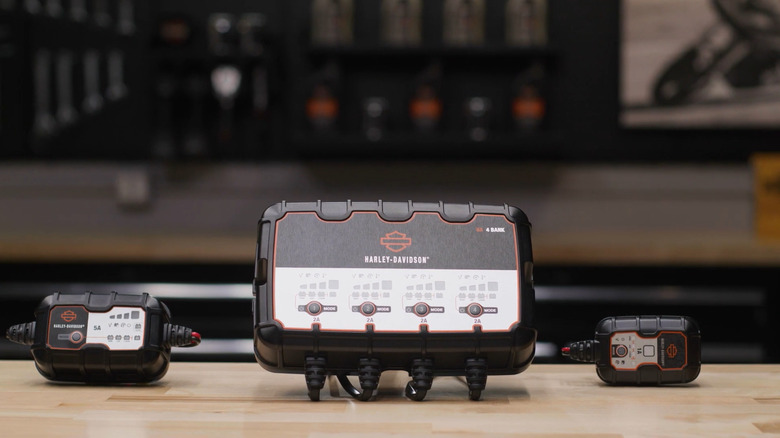
All three of the currently available Harley-Davidson dual-mode battery chargers (1A, 2A, and 5A) are fitted with several LEDs designed for different purposes. These are categorized into three: Charge LEDs, Charge Mode LEDs, and Error LEDs.
On the 1A charger, you only have a single multi-color Charge LED. This flashes red while the battery is charging, but is still under 75%. It then flashes green once the battery is at 80%. When your battery is fully charged (100%), it switches to a steady green light. If you don't remove the charger by this time, the Charge LED will start flashing slowly in green. This means the battery is being monitored and maintained.
The Charge LEDs on the 2A and 5A are different, though, as they both have four instead of one. The four LEDs are laid out like the signal bars on your phone, with the smallest (let's label that LED 1) on the far left and the biggest/tallest (LED 4) on the far right. Here's how to read the lights on these Harley-Davidson chargers:
- LED 1 flashes red: Battery is charging but hasn't reached 25% yet.
- LED 1 steady red: Battery is now at 25%.
- LED 2 flashes red: Charge level is between 25 to 49%.
- LED 2 solid red: Battery has reached 50% charge.
- LED 3 flashes orange: Battery is charging from 50 to 74%.
- LED 3 solid orange: Charge level has hit 75%.
- LED 4 flashes green with LEDs 1 to 3 in solid colors: Battery is 75 to 99% charged.
- LED 4 steady green with LEDs 1 to 3 off: Battery is full. This automatically switches off the other three Charge LEDs.
- LED 4 flashes green with LEDs 1 to 3 off: Battery optimization is ongoing.
- LED 4 solid green with LEDs 1 to 3 off: Optimization is complete.
If you won't be using the battery yet, you can opt to leave it plugged into the charger for however long you want once the optimization/maintenance process starts.
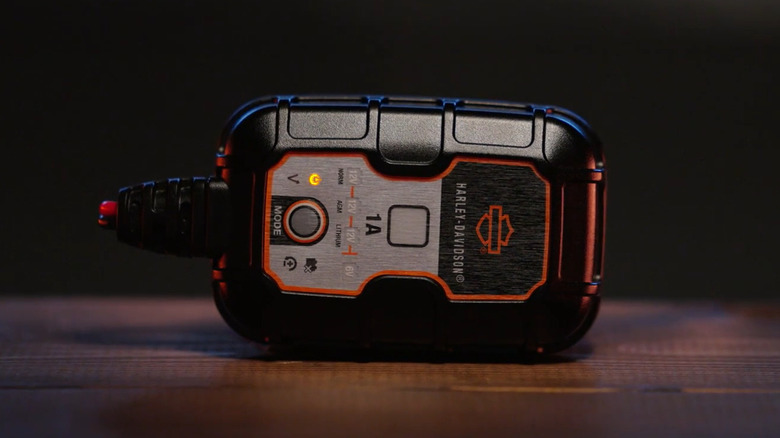
Decoding the Charge Mode LEDs on Harley-Davidson battery chargers
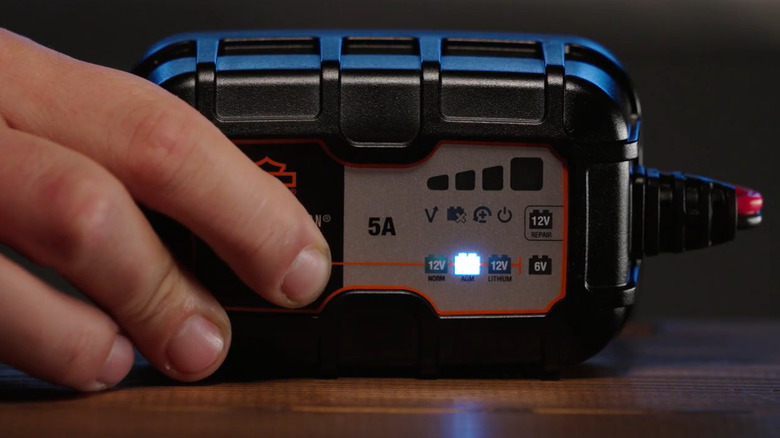
Unlike the Charge LEDs, the Charge Mode LEDs on all three Harley-Davidson battery chargers are almost the same, with only one exception (an additional feature on the 5A). Here are the Charge Mode lights that might show up on your charger and what they mean:
- Orange Standby (power icon): Energy Save mode, which means it isn't charging the battery and only consuming minimal power. This comes on as soon as you connect the charger to a wall outlet but turns off once you press the Mode button.
- White 12V Norm: Charging mode designed for 12V calcium, wet cell, gel cell, maintenance-free, and enhanced flooded batteries.
- White 12V AGM: Charging mode for 12V absorbed glass mat (AGM) lead acid batteries.
- Blue 12V Lithium: Charging mode for 12V Li-ion and lithium iron phosphate (LiFePO4) batteries with battery management systems.
- White 6V: Charging mode for 6V calcium, wet cell, gel cell, maintenance-free, and enhanced flooded batteries.
- Flashing 12V Norm, 12V AGM, 12V Lithium, and 6V at the same time: You long-pressed the Mode button to enter Force Mode. At this point, you can now choose a Charge Mode.
- Charge LED and selected Charge Mode LED flashing alternately: Force Mode is enabled, but this would only be on for five minutes before the charger resumes normal operation.
- (For 5A charger only) Flashing red 12V Repair: Recovery mode for damaged and old batteries.
Besides the Standby icon, the other Charge Mode LEDs will only light up after you select them by pushing the Mode button. They don't appear automatically. Make sure to check what type of Harley-Davidson battery you have before you set the charge mode.
Interpreting the Error LEDs on Harley-Davidson battery chargers
You'll see five error LEDs on the 1A and 5A Harley-Davidson chargers and six on the 2A. The first one that might come up is the Reverse Polarity error, the icon with a plus-minus sign and a curved arrow. When the charger is plugged into the battery the wrong way, this symbol will light up in red. Simply switch the battery connections.
Then, there's the Battery Voltage Undetected error. It's the same as the orange power icon of the Standby Mode, but this time, instead of turning off when the Mode button is pushed, the symbol remains lit. This means your battery's voltage level is lower than what the charger can detect. Try using the Force Mode to charge it.
If you unintentionally select a charge mode that supports a voltage lower than the connected battery — say, you picked the 6V mode but you have a 12V battery, or your battery is 24V but you're on the 12V Norm mode — you'll get the Overvoltage error, a red V-shaped arrow pointing up. Double-check your charge mode and battery rating.
Another error that might appear on the charger is the red Bad Battery. It looks like a battery sign with an X mark. When you see this, your battery is potentially shorted or isn't holding a charge. Have a professional check it.
On the 1A and 5A Harley-Davidson battery chargers, the Overvoltage, Bad Battery, and Reverse Polarity can also flash at the same time. It's to indicate that your charger is either overheating internally or is being used somewhere colder than its minimum operating ambient temperature of -4 °F (-20 °C). Stop charging and wait until the charger cools down or heats up.
To help you easily differentiate between the two, the 2A charger comes with an extra symbol specifically for the charger's internal temperature (looks like a thermometer with a plus sign). Called the Hot/Cold error, this will show up as a steady red light if the charger is too hot. Then, it will flash along with the Overvoltage, Bad Battery, and Reverse Polarity LEDs when the ambient temperature is too low.
Understanding the lights on the old Harley-Davidson 800mA battery tender

If you have the discontinued Harley-Davidson 800mA Waterproof Battery Tender with one LED and two rectangular indicators, reading the lights is easier compared to the newer models. The single indicator LED in the middle of the charger has five modes:
- No light: The charger doesn't have AC power, or you didn't attach the battery the right way. Make sure to check if the charger is securely connected to the wall outlet and whether the battery connections are correct.
- Flashes in amber: The battery is dead (has under 3V charge and might be the reason your motorcycle isn't starting). The old Harley-Davidson battery tender can't charge a dead battery, unfortunately. If the indicator LED is flashing in amber but your battery is still good, see if the battery connections are reversed or the connections have a blown fuse.
- Solid amber: Charging is ongoing, with charge levels below 80%.
- Flashes in green: The battery charge is already over 80%. You can unplug the charger and start using the battery if you really need to.
- Solid green: Battery is fully charged and ready to go. But if you won't be needing it anytime soon, feel free to keep it on the charger for maintenance.
The two rectangular indicators on each side of the LED light up too. You can see the battery's current charge level (in green) on the left symbol, while the right symbol tells you when the battery has reached 100%. This will show up as a steady green color.