How To Turn On Hearing Aid Mode On Your AirPods Pro (And How The Feature Works)

AirPods offer plenty of cool features, some of which are easy to miss. For instance, if you own AirPods Pro 2, you can even use them as hearing aids. They support a clinical-grade Hearing Aid feature to help those who have hearing loss. To use this feature, you simply need to take a hearing test, and your AirPods Pro will then analyze the test results and adjust the sounds around you to match your hearing capabilities. Similarly, it can fine-tune the audio you hear while playing music, videos, and phone calls through your AirPods.
Since the Hearing Aid mode is a regulated health feature, Apple needs to get approval from respective authorities in each country. For instance, in the US, the FDA has approved AirPods Pro's Hearing Aid mode. Currently, the feature is available in more than 100 countries, including the US, UK, Singapore, and more. You can visit Apple's website to verify its availability in your region.
To enable the Hearing Aid feature, you must install the latest firmware on your AirPods Pro 2. Similarly, your iPhone or iPad must be running iOS 18 or iPadOS 18 or later. Finally, Apple recommends cleaning your AirPods Pro for the best possible results. In this guide, we walk you through the process of setting up and using the Hearing Aid mode on your AirPods Pro 2. So, let's dive in!
Start by taking a hearing test
To use your AirPods Pro 2 as a hearing aid, you first need to take a hearing test with the help of your iPhone or iPad. If you have already taken a test elsewhere and have the audiogram results from a healthcare professional, you can skip this step and move on to enabling the Hearing Aid feature. Before taking Apple's hearing test, ensure your AirPods fit properly in your ears. Then, follow these steps:
- Move to a quiet room and ensure your AirPods Pro are sufficiently charged.
- While wearing the AirPods, open the Settings app on your iPhone or iPad and tap on your AirPods.
- Tap "Take a Hearing Test."
- Now, follow the on-screen prompts to answer a few questions, confirm your AirPods ear fit, and take the test.
- During the test, you'll need to tap the screen whenever you hear a tone.
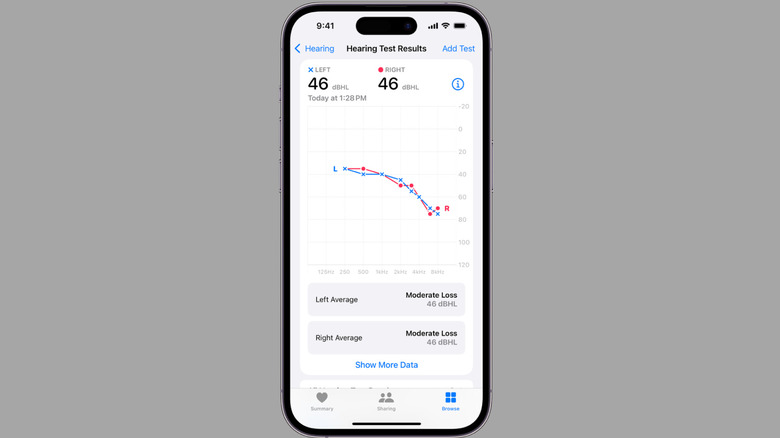
- After the test is complete, you should see the left and right ear test results, along with a note indicating your hearing loss level.
- You can tap Show Details to view the audiogram or tap Done to exit the menu.
If the hearing test result indicates mild to moderate hearing loss, you can enable the Hearing Aid feature so that your AirPods Pro adjusts the sound accordingly. For those with severe or profound hearing loss, Apple recommends consulting a doctor or hearing specialist for professional guidance.
Enabling the Hearing Aid feature on your AirPods Pro
Once you've taken a hearing test, setting up the Hearing Aid feature on your AirPods Pro is fairly straightforward. Here are the steps you need to follow.
- Open the Settings app on your iPhone or iPad and tap on your AirPods.
- Tap Hearing Assistance.
- Tap "Use a Prior Result" and select your test results. You can tap the "Add Hearing Test Result" option to use an audiogram from your hearing health professional.
- Tap Next and then hit Done.
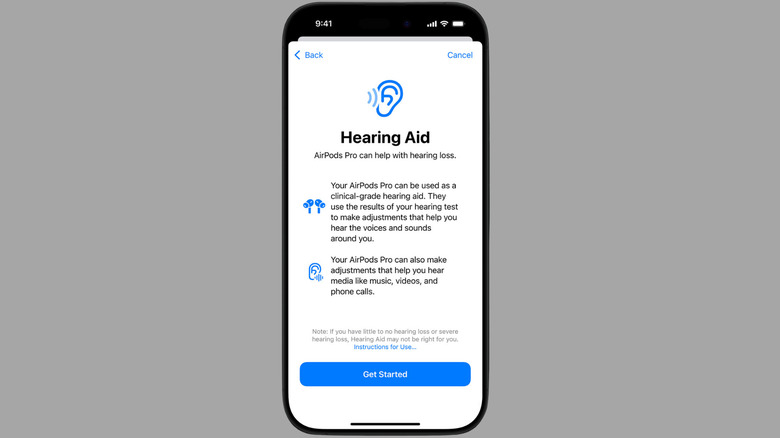
- Go through the prompts to understand how this feature works, then finally tap the "Turn On Hearing Aid" button.
Depending on your hearing test results, you may see a prompt to enable the Media Assist feature, which applies to the sound of music, videos, and phone calls. Once everything is set up, you should instantly notice a difference, with surrounding sounds appearing louder. Apple notes that it can take time to get used to the Hearing Aid mode initially.
Customizing the Hearing Aid feature on your AirPods Pro
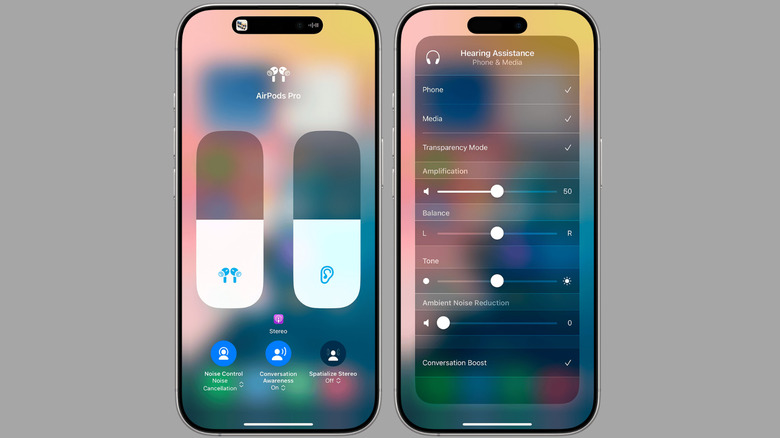
If the sound coming out of your AirPods doesn't feel right, you can make a few adjustments. To do that, simply head to Settings > Your AirPods > Hearing Assistance on your iPhone or iPad. If you're using a Mac, go to the Apple menu > System Settings > Your AirPods > Hearing Health. Then, select Adjustments, and you'll see various options to modify the amplification, tone, ambient noise reduction, and more.
You can also enable the Conversation Boost toggle from the same menu, which enhances audio during a face-to-face conversation with someone directly in front of you. Any changes you make will also sync across other Apple devices, so you won't have to adjust the settings multiple times. However, if you use more than one pair of AirPods, you will need to adjust these settings for each of them separately.
For convenience, you can add the Hearing Control option to the Control Center on your iPhone or iPad. This will allow you to adjust these settings even more quickly. If you are using a Mac or an Apple Watch, you can use the Hearing Aid button to control the amplification levels from the Control Center.