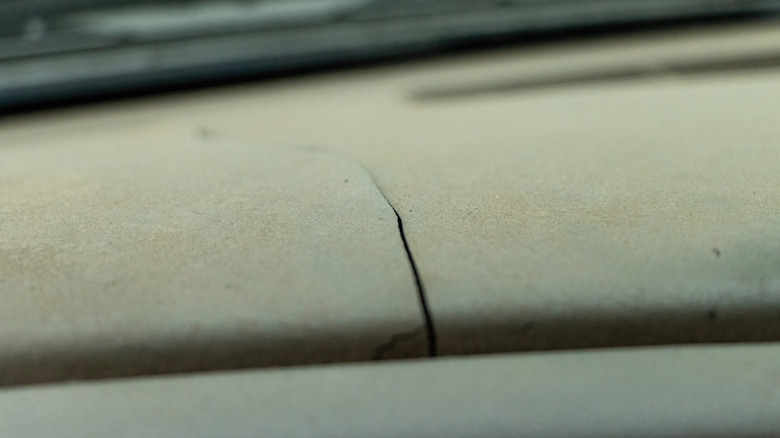
Yes, Dashboard Cracks Can Be Repaired: 4 Different Fixes To Consider

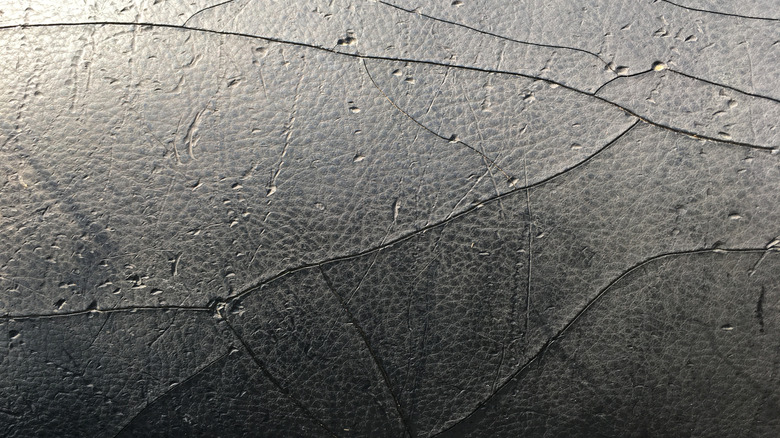
Dashboard cracks are a pretty common issue, especially in older cars. There are a few different factors that can cause this kind of damage. Temperature has a lot to do with it, but not just leaving your car in the sun for too long — any extreme temperature can damage the material. This can be made even worse by having a car that fluctuates from one extreme temperature to another in a short period of time. These kinds of rapid temperature changes cause material to contract and expand, which weakens the overall structure.
Speaking of material, that makes a difference, too. If your vehicle has a dashboard made from a lower-quality material like cheap plastic or vinyl, it's more likely to develop cracks. Cheaper materials become less flexible over time, which makes them more susceptible to damage.
Don't worry, though! All isn't lost. There are definitely ways you can fix cracks in your dashboard, and even more ways you can help prevent it from happening or the situation from getting worse in the future. Just make sure you're choosing the right method for the size and type of crack you're dealing with. We'll walk you through it so that you can get it fixed right up.
Fix #1: DIY vinyl filler
If you're dealing with small to medium cracks, the most common way to fix them is by using vinyl filler. You can do this with a DIY vinyl filler kit that lets you avoid the repair cost of having to take your vehicle in.
To apply vinyl filler, you first need to clean the area where you're going to apply it. The filler is less likely to stick to a surface that's covered in dust and debris. You should also let it dry completely before you move on to the next step of preparing the crack. To prepare it, use a small knife to slightly widen the edges. While this may sound counterintuitive, this can actually help the filler from peeling with time.
Next, use a putty knife or the applicator that came with your kit to apply the filler into the dashboard crack. Smooth the filler out evenly and make sure you push it into the damaged area. This may require multiple layers, and if you find yourself in that position just make sure you let it completely dry between applications.
Once the filler has dried, use sandpaper to smooth out any rough spots you see. This prepares the newly filled crack for the final step of applying a dye or a dashboard paint. Some repair kits even include color matching options so you can buy the kit in the specific shade you need. Once you've painted it, use a final layer of protective sealant to make sure the crack stays protected in the future.
Fix #2: Epoxy or resin
The next option is best for medium to large cracks, because epoxy and resin make a firmer bond than a vinyl filler does. The beginning steps of this repair process are similar to what you'd do with the vinyl filler. Wash the area of the dashboard that's cracked, allow it to dry completely, and then use a small knife or sandpaper to widen the edges of the crack.
Both epoxy and resin require mixing, so follow the instructions on the product you purchased to make sure that they're mixed thoroughly. Use a small applicator like a putty knife to fill the crack, letting the mixture penetrate as deeply into it as you can. You may need to smooth out the surface, but you can use the same applicator to do so. Apply as many layers as you feel are required to completely fill the crack.
Resin and epoxy both take a few hours to cure. You can even leave them overnight just to make sure they're completely solid before you continue on to the next step of sanding down the surface of the crack. Use a fine-grit sandpaper to get the smoothest blend of the repaired crack with the rest of the dashboard.
Finally, just to make sure that your fix looks as good as it holds, use dashboard paint or a vinyl dye to camouflage the repair. Once that has had time to completely dry, you can apply that final layer of sealant. Not only will resin and epoxy both hold better than vinyl filler, but the repair will also last longer.
Fix #3: Dash cover or wrap
If you feel like you're dealing with so much damage that filler fixes just won't do, you can always resort to just covering it. This is both the easiest and the most cost-effective solution. You can choose between a dash cover or a wrap.
A dash cover which is pre-molded plastic and just fits over your existing dashboard. Dash covers are generally applied using a strong adhesive or double-sided tape along the underside of the cover. Dash covers are easier to install and provide more protection in general, since they can help stop more cracks from forming. On the down side, it may be harder to find one that fits the specific make of your dashboard. Some makes and models are more prone to cracking (like the Chevy Tahoe) but a silver lining of that is you'll find covers more easily.
The dash wrap is a flexible, adhesive film that you press into the dashboard. It conforms to the shape of the dashboard, and usually makes your dash look like it's back to factory finish perfection. To apply it, you cut it to the correct size you need then peel off the backing. Once the backing is on the dashboard, you need to use a heat gun to ensure it sticks. It's also important to have a squeegee or something else long with a flat edge that you can use to smooth out bubbles.
Dash wraps may look better than covers initially, but they are more expensive and less durable. You may find yourself needing to reapply the wrap after a couple of years of normal wear and tear. To figure out which option is best for you, just consider those various pros and cons.
Fix #4: Pay a professional
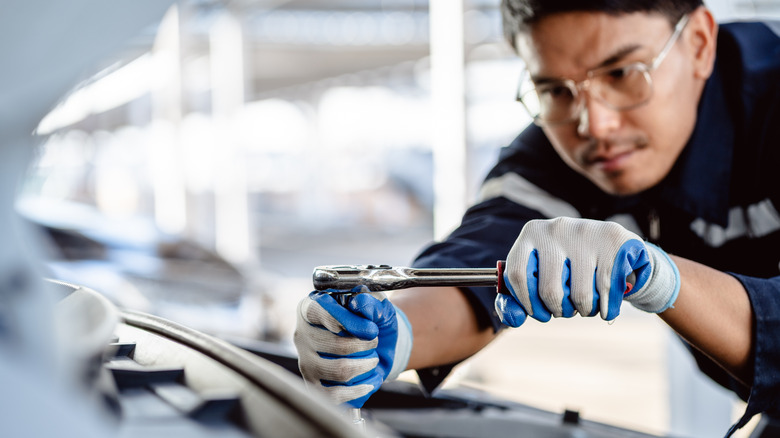
If you don't trust yourself or you don't want to put the time and energy into a DIY repair, you can always take your car in to a professional to have it fixed. This will cost you around $150 for a small repair, up to as much as $500 if the repair work needed is extensive. Compared to the $50 or so dollars you'd spend on a DIY repair kit, this can be quite a cash investment in your vehicle.
Once you've made the decision, you should make sure the repair person has experience with dashboard repairs. It's useful to make sure they have experience with your car's make and model. Ask them what kind of materials they use to do the repair to make sure they aren't using the cheapest materials just to pocket more profit.
If you do your due diligence and hire someone with experience for your fix, then you should drive away with a dashboard that looks polished and like the cracks were never there to begin with.
How to prevent dashboard cracks from happening
The best fixes to deal with cracks in your dashboard is just to avoid them happening in the first place. Here are some helpful tips to keep your car in top shape and never have to deal with crack repair!
First, keep your car out of the sun. You can do this by using a sunshade or by making sure you park in a shaded area or in a garage. This is especially important if your car would be sitting out for multiple hours exposed to the UV rays. If you can't park somewhere covered, then you can try to double-whammy the situation by spraying UV protectant on the dashboard and using a sun shade to try and cut down on exposure.
It also helps to keep your car at a stable temperature. If it's snowing outside and you turn the heat on full blast right away, don't be surprised if your car eventually takes some damage. You can avoid this by making sure you gradually warm up or cool down the car. Some newer models even come with climate control settings you can operate remotely that will let you do this, and still have it be your optimal temperature by the time you're inside.
Finally, take care with the materials you're using to clean your car. Anything that dries out your dashboard can contribute to cracking. This means harsh cleaners, alcohol wipes, and anything ammonia-based are all out. You can buy products that are specifically for dashboard cleaning, or you can just use plain old mild soap and water to help the material maintain moisture and flexibility.