6 Useful Features To Know About When Using Starlink's App

Starlink is designed to be quick and easy to set up yourself, removing the need to hire an expert and shell out extra cash, which is especially useful if you're out in the middle of nowhere. A major part of making this hassle-free DIY installation possible is the Starlink app, which conveniently works with all the Starlink dishes. With the help of the app, you can easily find the best unobstructed spot to place the dish, correct its alignment to better connect with the satellites, and configure your new Wi-Fi network. Once you have Starlink set up and working, you can use the app to manage your account and check for outages.
But there's more to the Starlink app than installation, account settings, and service monitoring. It comes with several features that you might find useful on a day-to-day basis. Here are six of the handy Starlink app tools you should try out.
Visualize and map your Wi-Fi strength
Starlink's Wi-Fi coverage is up to 3,200 square feet (297 square meters) for the Standard kit, 2,000 square feet (185 square meters) for the High Performance, and 1,200 square feet (112 square meters) for the Mini. However, this is still subject to several factors, including your router's location, the presence of large furniture and walls, and the router's proximity to interference sources like your microwave or refrigerator. If you're unsure whether you have the router in the best spot or need to add a mesh node to your network, you don't have to walk to every corner of your home and do a speed test there. One of the quickest ways to test your Wi-Fi strength is by mapping your home's Wi-Fi coverage using the Starlink app, specifically with the Check Wi-Fi Range tool. Here's how to use it:
- Launch the Starlink app.
- Select the Network option.
- Tap the Check WiFi range button. This will open your camera with an instructions overlay.
- Press I'm ready to proceed.
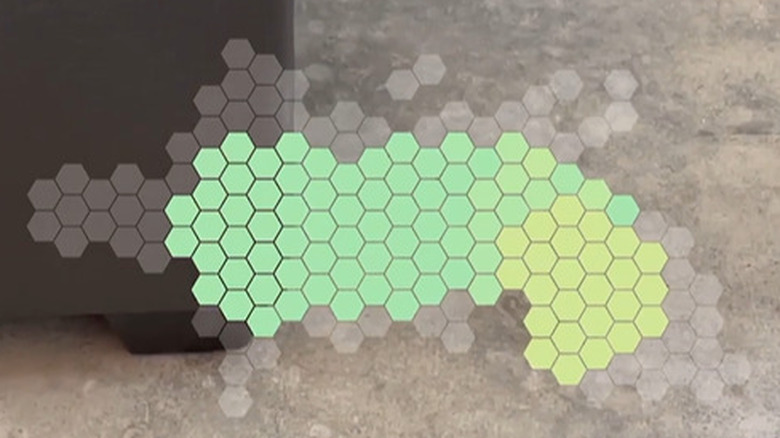
- Walk around the house to complete the map. As you're walking, you'll see colored tiles filling up your screen. The yellow and green tiles indicate good reception, while the orange and red mean poor connectivity in those locations.
- Once you've covered the entire house, hit View results.
On the results page, the average signal is displayed, along with a short interpretation of the results. You can follow the advice of moving the router to a more strategic location, or use a Starlink Mesh Router to improve your Wi-Fi range.
Put Starlink to sleep with Sleep Schedule
Like many Starlink users out in remote areas, you likely rely on off-grid power too. If you need to conserve power, you can set Starlink to sleep during your preferred hours. When Starlink is asleep, it stops connecting to the internet and melting snow off the dish. You also can't control it remotely while the sleep schedule is active. Follow these steps to create a sleep schedule for your Starlink:
- Go to the Starlink app.
- Select Settings.
- Press the Starlink tab at the top.
- Open Sleep schedule.
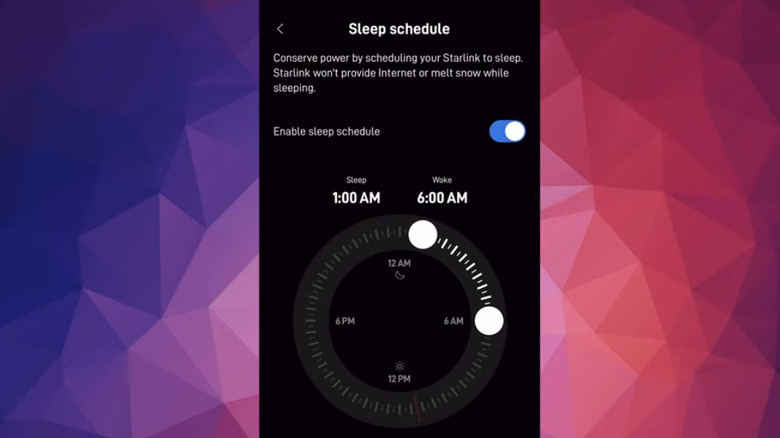
- Toggle the switch for Enable sleep schedule.
- Drag the sleep dot to your preferred sleep time.
- Move the wake dot to when you want the Starlink to start back up again.
- Press Save.
- Hit OK on the popup to confirm.
It's important to note that once your Starlink powers back on, it won't instantly melt snow buildup off the dish if there's any. If you're still offline after a few minutes, you'd need to wipe the snow off yourself. To keep Starlink on 24/7 and prevent snow from accumulating on the dish during the winter, deactivate the sleep schedule. Navigate to Settings > Starlink > Sleep Schedule and switch off "Enable sleep schedule." Then, click on Save to confirm.
Block malicious websites with content filtering
The internet isn't always the safest place — there are phishing sites that steal your personal information, malware-infected sites that can infect your device with viruses and ransomware, and adult sites that contain inappropriate content for kids. If you're using Starlink as your family's primary internet service, you can protect them and their devices by enabling Content Filtering on the Starlink app.
Content Filtering uses the DNS servers of Cloudflare for Families, which are specifically designed to block out certain websites. This, however, doesn't mean every single malicious website out there would be filtered. Some shady sites might still be accessible, and other legitimate sites may be mistakenly blocked. Starlink's Content Filtering also doesn't allow you to specify what websites to block. To turn on Content Filtering via the Starlink app, here's what you need to do:
- In your Starlink app, open Settings.
- Go to the Router tab.
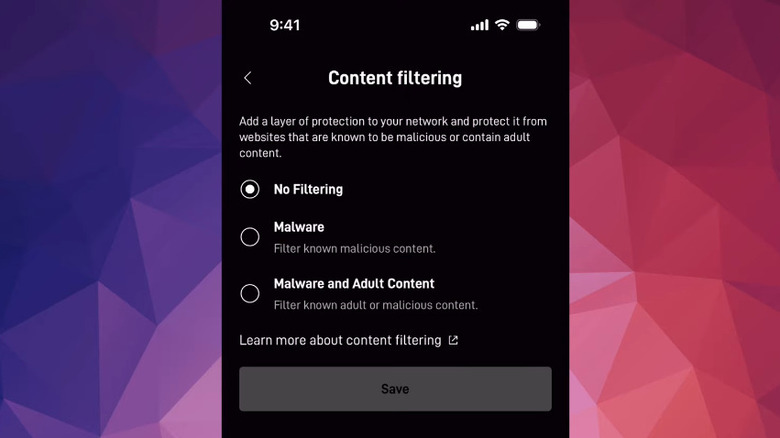
- Tap on Content filtering.
- To block only websites that potentially have malware, select Malware.
- To block access to both shady and adult websites, choose Malware and Adult Content.
- Hit Save.
It's worth mentioning that Starlink also lets you set custom DNS servers of your choice. But if you decide to turn on one of the content filters, your custom DNS will be disregarded, and you'll start using the Cloudflare for Families DNS servers instead.
Bypass Mode lets you use a third-party router
When you buy the Standard, Standard Actuated, Mini, and High Performance kit, you already get a router in the package to help you get the system up and running right away. However, the included router may not offer as many features as your standard one. It doesn't have local static IP address reservation, or port forwarding, and a limited number of Ethernet ports. Some users also find that the Starlink router provides lower speeds and shorter Wi-Fi range. In that case, a third-party router might suit your needs better.
To replace the out-of-the-box router with a non-Starlink one, use Starlink's Bypass Mode. Follow this guide to set it up:
- Connect your Starlink router to the third-party router via a standard LAN cable. If you have the Gen 2 router (which stands upright), you'll need to use the Starlink Ethernet adapter since the Gen 2 doesn't have a built-in LAN port.
- Set up your third-party router as you normally would. Check the manufacturer's instructions for this.
- Go to the Starlink app.
- Open Settings.
- In the Router tab, tap on Bypass mode under Advanced.
- Drag the slider to the right to activate Bypass Mode.
- Hit OK on the popup to proceed.
You can now connect to your third-party router and use it as you normally would. But do note that with Bypass Mode turned on, you lose the Network and Router features on the Starlink app (both will be inaccessible). This means you can no longer see your connected devices from the app, enable the Cloudflare for Families Content Filtering, and set custom DNS. To do so, you'll have to visit your third-party router's admin page. If you want to go back to using your Starlink router as the main router for your network, you can disable Bypass Mode by factory resetting the router and setting it up again.
View how much data you're using
Starlink offers unlimited and limited data subscription plans for different needs. For personal use, there's Residential (unlimited data for households), Roam – Unlimited (unlimited data for frequent travelers), and Roam – 50GB (50GB per month for occasional travelers). You can also go with the business plans — Fixed Site (unlimited standard data with 40GB, 1TB, and 2TB Priority Data tiers), Land Mobility (unlimited inland data with 50GB, 1TB, and 5TB options for Mobile Priority allotment), or Maritime (similar to Land Mobility but for offshore use).
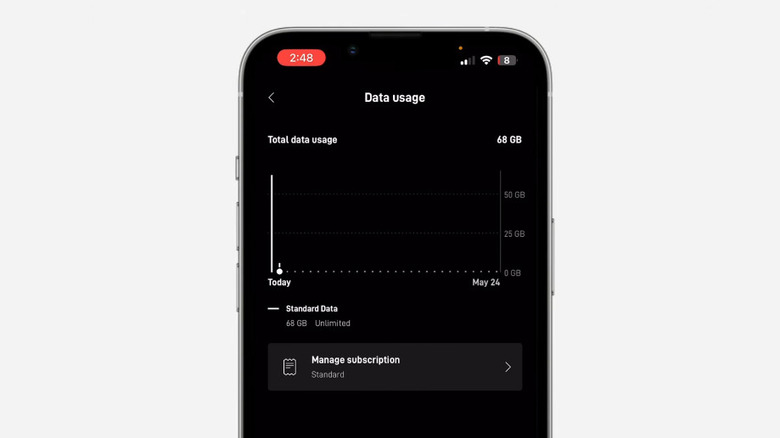
If you're subscribed to a plan that includes limited data, you'll likely want to keep track of your usage to know when you should buy more. Fortunately, you can find that information right on the Starlink app. The Data Usage page shows a breakdown of your total and daily usage for the current month, your monthly usage for the limited data, and your subscription details. The figures here, however, aren't updated in real-time. Here's how to access the Data Usage page on the Starlink app:
- From the home screen of the Starlink app, tap on Account.
- Choose Data usage.
- Check the Total data usage at the very top.
- To view the usage for a specific day, press and hold the vertical line for that day. The usage will appear at the top.
- To turn on an add-on if there's one available for your plan, toggle the add-on to activate it.
- To change your service plan, press Manage subscription, select Change Service Plan, and choose your preferred new plan.
Keep in mind that the data usage on the app doesn't include any software updates or health checks from Starlink.
Disconnect a device from Starlink
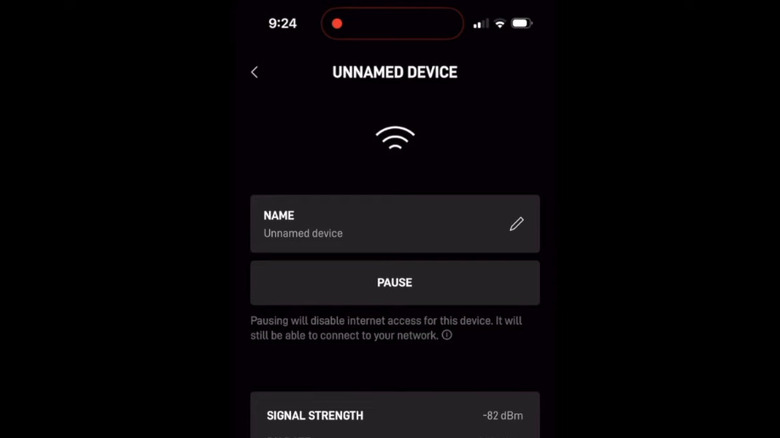
No matter how well you secure your network, you might still see some unauthorized devices connected to it. Perhaps a neighbor you once gave access to shared your Wi-Fi password with their entire family, or a former guest still uses your Wi-Fi without your permission. Unfortunately, Starlink doesn't come with an option to kick unwanted devices off your network, or blacklist them completely. But what you can do is disconnect them from the internet with the Pause client feature on the Starlink app. Paused clients will still be connected to your Wi-Fi, but they won't have internet access. This feature can also come in handy if you have kids and want to prevent them from staying up too late scrolling through social media. Follow these steps to pause a client on your Starlink app:
- From the Starlink app, press Network.
- Go to the Devices tab.
- Browse through the list of connected devices to find the ones you want to disconnect from your internet.
- If you're unsure which ones they are, tap on each device, scroll through the bottom of the page, and take note of its MAC address. Then, compare it to the MAC address of your authorized devices.
- On the device's page, hit the Pause button under the name.
- Select Pause on the popup to confirm.
- Repeat for all the other devices you want to cut the connection.
Back on the Network screen, all the devices you've paused will be grouped into a single page. Tap Paused Device to view them. If you want to allow any paused device to reconnect to your internet, simply navigate to the device's page again, press Unpause, and select Unpause on the popup to continue.