12 Accessories You Didn't Know You Needed For Your 3D Printer
We may receive a commission on purchases made from links.
3D printing is a fantastic hobby that isn't too expensive either. The printer is a one-time investment after which, you only have to spend on different types and colors of filaments. However, there's one other set of expenses that you may have to incur initially apart from simply buying a printer. We're talking about 3D printing accessories. While these accessories aren't mandatory and you'll be completely fine without them, they improve your 3D printing experience by a significant margin. From improved bed adhesion to more precise prints, we've put together some of the accessories that will help you regardless of whether you're a beginner or an expert.
I've been 3D printing for several years at this point, and I didn't have any additional accessories when I began. But, as time passed by, I started accumulating several peripherals and accessories that contributed to making my 3D printing workflow a lot smoother. Of course, you don't necessarily have to buy every single product on this list. Cherry-pick the ones that suit your usage, and the rest can be bought whenever you really need them. Most of the accessories mentioned below are quite affordable and are one-time purchases that will almost last for as long as you use your printer. Lots of them are also universal and will work with a 3D printer from any brand.
Glue stick or hair spray
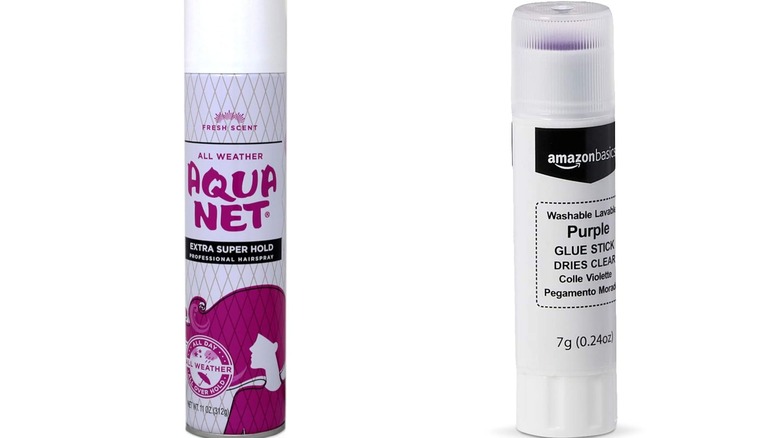
All 3D printers have a print bed on which your chosen object is printed. By default, the filament adheres to the bed and sticks until you manually snap it out after the printing process. However, there are times when some prints have low bed adhesion, and hence, they may get detached from the print bed mid-print. This isn't ideal since it ruins the entire print and you may have to start over again. While the primary way to tackle this issue is by increasing the temperature of the hotbed, it may not suffice in some cases. So, the next quick and simple fix is to use a glue stick or hair hold spray can. We like the Purple Washable School Glue Sticks and Aqua Net Professional Hair Spray from Amazon.
Simply apply a thin layer of glue over the print bed and then start your print. This ensures the filament sticks to the bed and doesn't get detached until the print is complete. Most prefer using a glue stick, but I personally have obtained similar results with a hair spray. Moreover, a hair spray is much easier to apply since you just have to point to the bed and spray a thin coat. With a glue stick, you have to carefully apply it to the print area while ensuring the layer isn't too thick. Regardless of what you choose, you should see similar results.
Hot glue gun
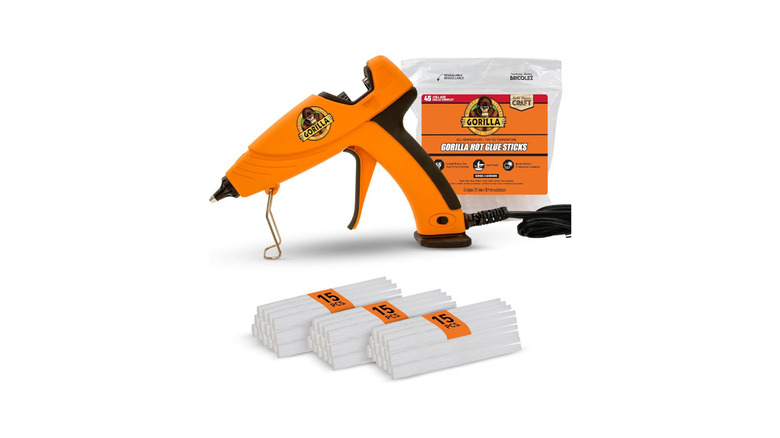
While the glue stick helps with the adhesion of the print itself, a glue gun like the one from Gorilla, available on Amazon, is essential for sticking multiple parts of a print together. Several 3D prints — especially figurines and functional prints — come in multiple parts. For example, a figurine might have separate pieces for the torso, head, arms, legs, and accessories. Once you print all of them individually, you will have to put them together to get the final product. In most cases, the best way to do this is by using a hot glue gun. The advantage of using a hot glue gun is that it dries up quickly and doesn't mess with the print in any manner.
You can also use super glue to stick parts together. However, I once tried using super glue with PLA filament, and it didn't work well. It chewed through the filament and left burn marks. If you're printing with a thicker material like PETG, ABS, or TPU, super glue is arguably a better solution since the bond is stronger.
Digital calipers
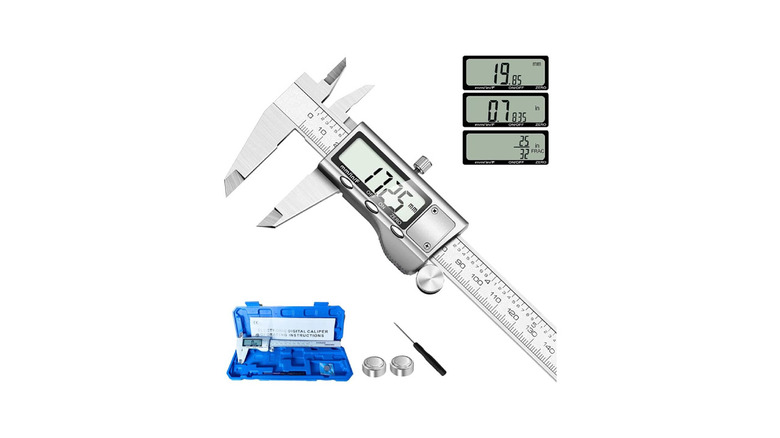
There are two ways in which the Jiavarry vernier caliper can be helpful when 3D printing. For starters, it helps you measure your printed objects to check for any issues or mismatches in dimensions. For example, a 3D printer must accurately print to the millimeter of the set dimensions. So, if print a calibration cube with sides 50mm long, you can use a digital caliper to verify if your printer has accurately matched with those exact dimensions. If there is a mismatch, you can tweak your printer settings to fix the issue. While the accuracy of dimensions isn't vital for a lot of prints, it plays an important role when you're printing something functional like a replacement screw or nut.
The second use case is when you advanced to slightly higher levels of 3D printing. If you've started creating your own 3D models in CAD, a vernier caliper is extremely useful to measure the objects you want to design and print. For instance, when I designed an Apple Watch dock, I needed the precise dimensions of the base of the Apple Watch. A digital caliper was perfect for this since I could measure and input those values into the design software.
Extra nozzles kit
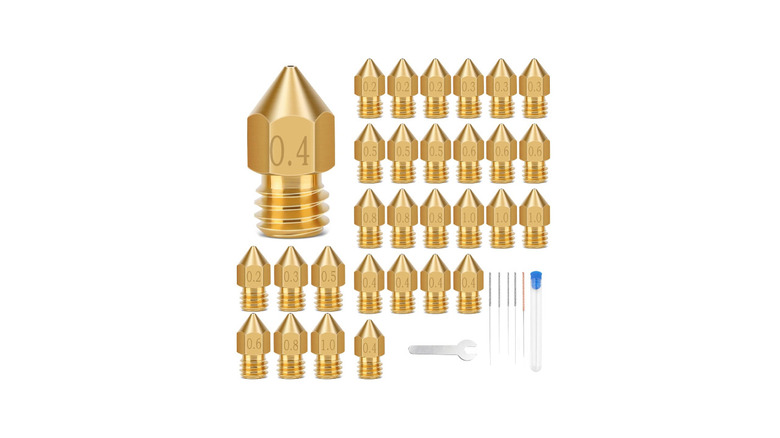
One of the most important parts of a 3D printer is its extruder. This is where the filament melts and gets pushed onto the print bed to form layers. The extruder is connected to a hot end which then extrudes the filament through a nozzle. Essentially, the nozzle determines the thickness of the filament that is extruded for printing. The larger the nozzle, the thicker the layers of your print. By default, most printers come with a 0.4mm nozzle for extrusion. It's the ideal size for most prints, so if you're a beginner, you don't really need to mess with it. But once you progress through multiple levels, you may feel the need to try different nozzle sizes.
That's where the Laihifa set of 30 nozzles from Amazon comes in handy. It has nozzles of 0.2mm, 0.3mm, 0.4mm, 0.5mm, 0.6mm, 0.8mm, and 1.0mm. There are multiple nozzles of each type, so if one conks off, you always have backups. The brand is also kind enough to provide a wrench to remove your existing nozzle and fit a custom one. Moreover, the kit also includes a nozzle de-clogger, which is quite useful if the nozzle has filament stuck inside it. Note that this product includes nozzles for a particular type of hot ends, mostly found on Creality printers. Ensure you check the compatibility with your printer before you get custom nozzles. Pro tip: Ensure you change the nozzle size before slicing your print file.
Dry filament storage box
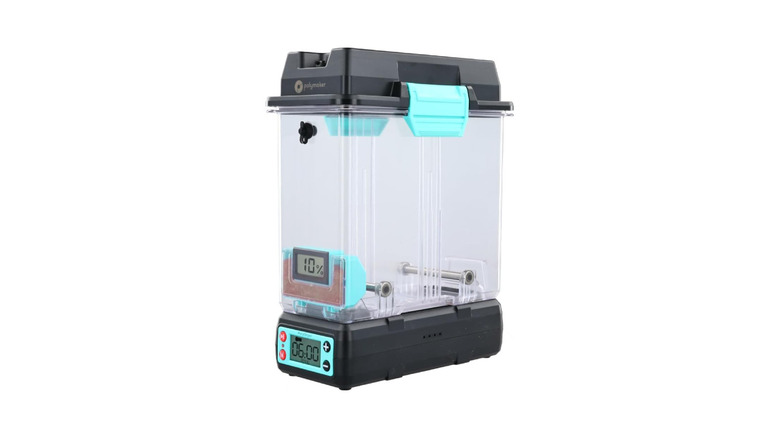
3D printing filaments come in various materials and colors. Most of them are hygroscopic, which means they absorb the moisture in the air. This isn't ideal since it can lead to several issues while printing like stringing, bubbling, poor adhesion, clogged nozzles, etc. Essentially, a filament with moisture is bad for both your printer and the print quality. Hence, it's extremely important to keep your filaments dry. This can be tricky with a spool you're currently using, as it's inevitably exposed to the environment unless you have an enclosure for filament storage, like those on several Bambu Lab printers. But what about the filaments you're not currently using? The best way to store them securely without ruining the quality of your prints is by getting a Polymaker dry filament storage box that's vacuum-tight.
When buying for the first time, you'll need both the storage container plus a drying dock that is used to suck out all the air and create a vacuum. The good news is you only need one dock; for all your subsequent filaments, you only need to purchase the container. A sophisticated solution like this ensures even drying and doesn't cause any harm to the filament. While it is a slightly expensive solution, it's the most effective one if you wish to keep your filaments safe. Another alternative is to use an eSUN vacuum sealed bag, which is a much cheaper solution.
Assorted grit sandpaper
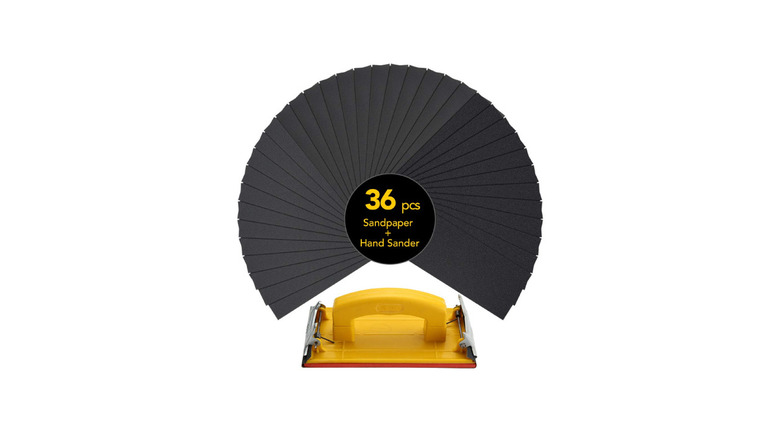
Ideally, most of your 3D prints should have smooth surfaces all over. However, that's a scenario that only happens once in a while. You may observe that a lot of your prints have rough edges or corners, and that's natural since you cannot get the precision perfectly right every single time. This isn't anything to worry about as the only thing your prints need is some sanding to make the edges smooth. You can head to your local Home Depot and pick up a few sandpapers of different grits. For utmost precision, though, I recommend picking up the Miady set of 36 sandpapers of different grits from Amazon, which also has a hand sander to make the process easier. With this set, you just have to insert the paper inside the sander and rub the paper on the rough edges to smooth them out.
I've found this to be an effective solution not only for smoothing rough edges but also making spherical objects more round. If your print has a curved surface, sanding will make it smoother and will remove any excess filament or protrusions. Several prints have multiple parts, and if you've printed them separately, they may not be of the same level or have slight deformations. In such cases, you can sand the final object after attaching all the parts with the same grit sandpaper. This will ensure your print looks uniform.
3D printing toolkit
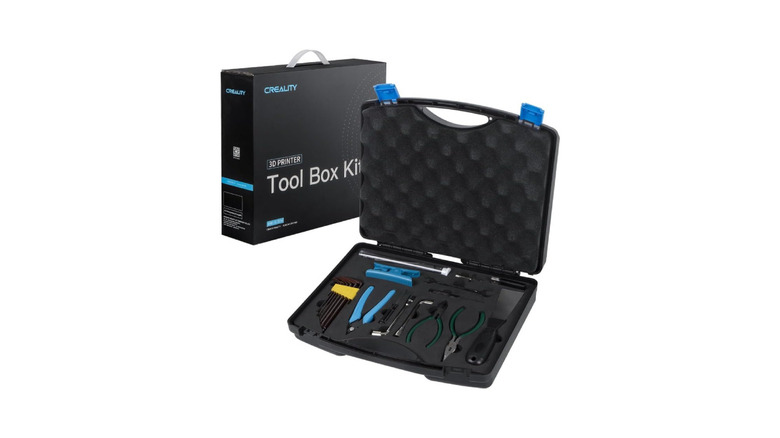
If you bought a new 3D printer, chances are that it came in a disassembled state. In that case, it may also have come with several tools that are required to assemble and put together the 3D printer. This includes screwdrivers of different bits, Allen keys, wrenches, etc. Once you assemble your printer, it's extremely important to keep these tools handy since you may need them in the future, either to disassemble the printer or remove and add parts. Along with those basic tools, you may also need some additional accessories like pliers, tweezers, spanners, clips, de-cloggers, etc. All of those items are included in this Creality 3D printer toolbox kit. Purchasing this set ensures you don't have to buy each tool separately. Plus, you get a nice storage case to keep them all together.
One item that isn't included in the toolkit but is certainly handy is a soldering iron, so I would recommend getting the Liouhoum soldering iron. A soldering iron is generally used to solder metallic parts and joints together so it can be useful if some wiring on your printer falls apart. But, that's not it. A soldering iron can also be used to burn through plastic and make cavities. So, if your print has multiple joints or parts and they need to be cut through to fit together, it will come in handy.
Creality Sonic Pad
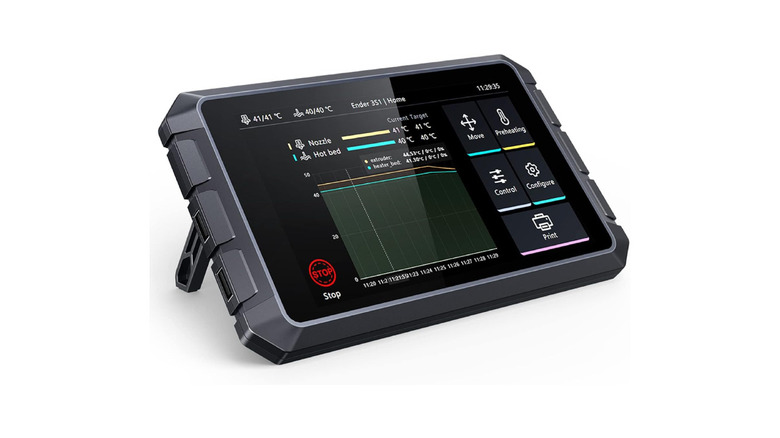
If you're new to the world of 3D printing, chances are that you opted for a Creality 3D printer. Most printers from this brand are quite affordable yet functional. It's helpful to note, though, that most Creality printers use a firmware called Marlin. While there's nothing really wrong with it, the print speeds are slower on Marlin, so it's not very efficient. If you want to get the best out of your printer, you need to migrate to a firmware called Klipper. The simplest way to do it is by getting the Creality Sonic Pad. As shown in the image, the Sonic Pad is essentially a tablet sort of device that can be interfaced with your existing Creality printer. It then takes over and becomes the brain of the printer, so all your printer functions will be controlled by the Sonic Pad instead of the controller that came with the printer.
This includes calibrating the axes, leveling, pre-heating, and printing. I've personally been using the Creality Sonic Pad with my Ender 3 S1 Pro printer, and the experience is better than ever before. It's a lot easier to control the printer since the Sonic Pad has a large touchscreen display. I can also see more stats on the screen about my print. The biggest improvement, though, is in terms of print quality and speed. The same object takes considerably less time to print when using the Sonic Pad as opposed to without it. So, if you want to upgrade your printer without splurging on a new one, get your hands on the Sonic Pad.
Note: Ensure your 3D printer is compatible with the Sonic Pad before you decide to get one.
Auto-leveling kit
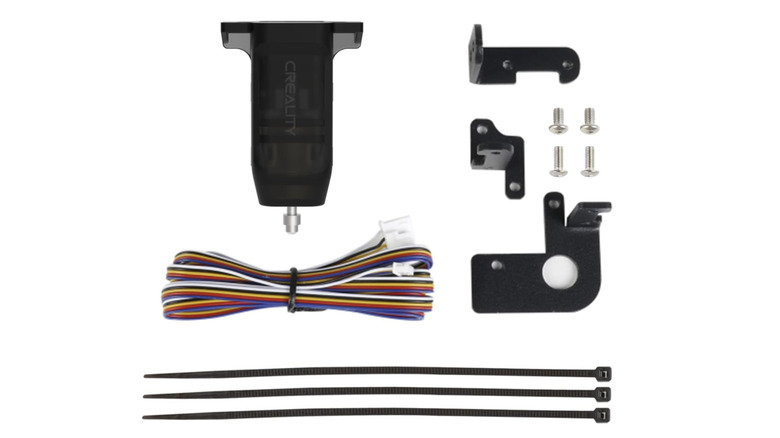
Another device that can drastically improve your 3D printing experience is an auto-leveling kit. Several new-gen printers come with an auto-leveling kit included, but if you have an entry-level printer or bought a used one that's quite old, it may not have one. In such cases, it is worth investing in an auto-leveling kit for your printer. Manual leveling can introduce multiple errors, leading to poor print quality and other issues with your 3D printer. An auto-leveling kit eliminates these issues and ensures your prints are of high quality.
The Creality CR Touch kit is a good starting point for a lot of Creality 3D printers. But, just like a few other parts on this list, this specific one only works with a select few printers. So, ensure you get an auto-leveling kit that is specifically made for your printer. The simplest way to find one is to check the manufacturer's website for accessories. Generally, auto-leveling kits are quite affordable and yet, add immense value to your printer.
Logitech Brio webcam

You may be wondering why the Logitech Brio webcam is on the list of accessories for a 3D printer. Well, it's not an essential accessory that can improve the functionality of your printer or add finesse to your prints. Instead, it's more of an extra addition to your setup that serves two purposes. One, you can connect it to your 3D printer or external controller device, like the Creality Sonic Pad, to monitor your prints. This is especially helpful when printing large files that take hours to complete. Since you cannot always be in front of the printer to monitor the progress of a print, it's best to fix a camera like this and monitor the progress remotely. If you observe any discrepancies via the camera feed, you can always stop the print.
The second use case is shooting cool-looking time-lapse videos of your build. Every time you're printing, you can trigger the camera to start recording a time-lapse. It captures multiple frames every second and stitches them together to make a video that you can then share on your social media platforms. Or, create a repository of all your prints in one place! Just about any webcam will do the job, so if you have one lying around at home, feel free to use it.
Creality 3D scanner
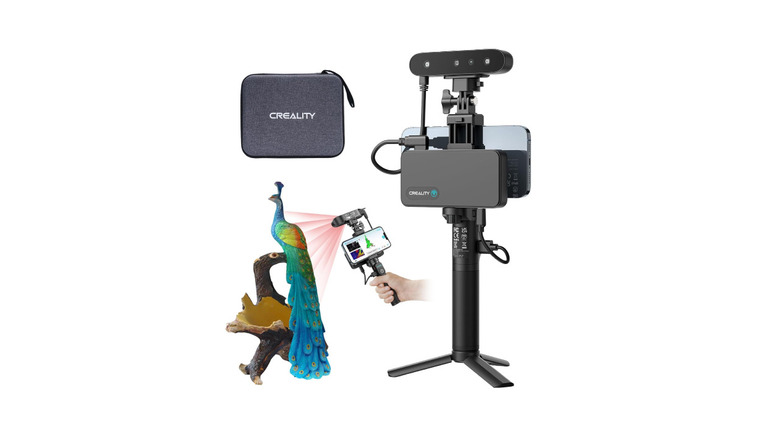
A 3D scanner is quite expensive, so it's definitely not an accessory you should be looking to get as a beginner. It's primarily for professionals who want to scan objects and replicate them on their 3D printers. The simplest way to get 3D printing files for most beginners is by using online websites that host 3D print files. These websites allow designers to upload their creations so anyone around the globe can download and print them for personal use. Once you're accustomed to the way things work, you can move on to designing your own CAD files and printing them. This needs a little bit of designing skills and the right software to create your designs. Post this, the next level is to get a 3D scanner, like this one from Creality, and scan objects around you to create 3D models.
These models are captured with color and depth information, so all you have to do is export a scanned object as a printable file and move it to your printer for printing. The primary use case for a device like this is if you are planning to start a 3D printing business. You can then ask your customers to bring you any object, and you can create a replica of it using just this scanner and your printer. There are several 3D scanners out there with varying levels of accuracy and quality.
Bed scraper
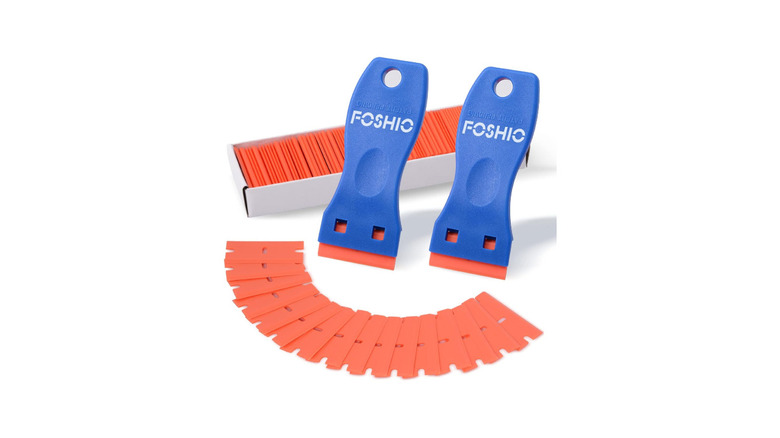
Here's an interesting tool that is extremely useful — and the best part is that you don't have to spend any money on it! A scraper helps you scrape out prints and excess filament that may be stuck on the printer bed. If you're printing something thin with very few layers, you may find it hard to get it out of the printer bed without damaging it. In such instances, a bed scraper comes in handy. I've also used it several times to remove the excess glue or hair spray that I applied before printing an object with low adhesion.
Failed prints are also quite common, and often, the filament gets stuck to the bed in small pieces. It becomes difficult to remove those fragments with your hand, but a scraper makes it much easier. While you can purchase Foshio's set of 3D printer bed scrapers online for quite cheap, the best way to get one is by printing one yourself! There are several models on the internet that you can use, but I found this scraper on Thingiverse by 3D_printing_master_ that works extremely well! Print it in PETG, and you're good to go!