MacBook Speakers Crackling? 8 Fixes & Troubleshooting Tips To Try
We may receive a commission on purchases made from links.
Whether you're streaming your favorite show, jamming to a playlist, or stuck in a Zoom marathon, your MacBook speakers suddenly crackling or popping is sure to ruin the vibe. Fast. Nothing kills the mood (or your productivity) like glitchy audio from a machine that's supposed to deliver the gold standard of sound.
The good news is that this problem is fixable — and you can do it yourself. There are both hardware and software factors that can cause your Mac to lose audio fidelity, but some of them have surprisingly easy remedies. So, before you even think about schlepping to the Genius Bar, there are plenty of simple troubleshooting techniques to try at home.
We'll break down the common causes of crackling MacBook speakers — from bugs and outdated audio drivers to dust sneaking into your grilles. Then, most importantly, we'll walk you through how to restore the sterling audio Macs are famous for.
Why your MacBook speakers are crackling
The crackling or static you're hearing from your MacBook speakers is usually caused by software hiccups. Here are some possible culprits:
-
Software bugs or outdated macOS.
-
Malware infection. Yes, Macs can get malware too, and it can mess with your audio, among other things.
Advertisement -
Wonky audio sample rate. When you play audio on your Mac, it processes sound in tiny chunks per second — that's called the sample rate. Think of it as the audio version of a frame rate for videos. If the sample rate is off — too high or mismatched with what your Mac expects — the audio can get weird, like crackling, popping, or sounding out of sync.
-
Overloaded CPU. You could also get distorted or crackling audio if your CPU is overburdened from running too many programs simultaneously.
-
Outdated audio drivers. Audio drivers are like your Mac's translator for sound. They tell the computer how to send audio signals to the speakers. If they're outdated or glitchy, your computer can mess up the signal, and the result is crackling or distorted audio.
Advertisement
There are fewer possible reasons for crackling audio on the hardware front. Some of them are:
-
Dust or debris in the speaker grille.
-
External equipment interference. Crackling speakers could be as a result of headphones, docks, or other connected gear plugged in incorrectly.
-
Physical damage. If your speaker's blown from playing audio at high volumes or accidental damage from pokes or spillage, of course your audio will be wonky.
Restart and/or update your Mac
Let's start with the simplest fix: a good old restart. It might sound too obvious to be useful, but don't knock it until you've tried it. Think of it as your Mac's version of a quick power nap — sometimes all it takes to get back on track. A restart will right any minor software glitches and wipe the slate clean of any programs that might be hogging processing power and affecting audio output. Two birds, one stone.
Next, update your Mac. Apple handles driver updates and other audio fixes through system updates, so that crackling sound might vanish with a fresh OS. Plus, it's just good tech hygiene to keep your devices up to date — running them on outdated software is one tech habit you have to kick. Head to System Settings > General > Software Update and see if there's one waiting. If there is, go ahead and install it.
You should also try restarting your apps, or/and then updating them, especially if the crackling only shows up in certain ones. Test audio across different apps and at various volume levels to pinpoint which ones are acting up, then update them. If you discover that the issue is only present with specific apps and updating them doesn't change anything, try uninstalling and then reinstalling them.
Check for malware

Minor glitches on your Mac might actually be a sign of malware or another type of virus. It's a lot less common, but Macs can get infected too. Crackling or popping audio is one possible symptom, but you might also notice performance issues such as slow app launches, sluggish response times, or sudden CPU spikes. If your Mac is behaving unusually, it's worth considering the possibility of a virus.
There are a handful of built-in features designed to protect your Mac from viruses, but they are not foolproof. A premium malware scanner can help you to know if any malicious software has made its way past your Mac's defences, and we've previously recommended Microsoft Defender as a solid option for scanning for viruses. Just note you'll need a Microsoft 365 Personal or Family subscription to use it for free on Mac. Whichever program you choose, the process is usually straightforward: install it, run a system scan, and if any threats are found, follow the prompts to remove them. It's also helpful to know how malware spreads so you can avoid it and better protect your system in the future.
Adjust sample rate and other audio settings

Sample rates on Mac default to 44.1kHz, which is the standard for CD-quality audio. Anything higher might put strain on your Mac's CPU and result in less-than-perfect audio. Here's how to check and adjust it:
-
Head to Applications > Utilities > Audio MIDI Setup, then select your MacBook speakers in the sidebar.
-
In the output tab, make sure the "Format" is set to 44.1kHz. If it's not, click on the dropdown to select that option.
If that doesn't work, some users on the Apple forum report that switching to the 48kHz format does the trick. If you're still hearing static after all that is done, it might be time to reset your Mac's audio preferences. You'll need to delete the PLIST files, which are basically how your Mac saves settings and preferences for different system functions, including audio. Think of it as your Mac's little notebook for remembering how you've set things up. Sometimes these files get corrupted, and that could cause your speakers to misbehave.
Deleting the audio PLIST files gives your Mac a fresh start to relearn how to handle audio properly. Don't worry — your Mac will automatically create fresh, working files after a restart, and you won't lose any vital data. Here's how to do it:
-
Go to Finder > Go (top menu) > Computer > Mac HD > Library > Preferences > Audio
-
Delete: com.apple.audio.DeviceSettings.plist and com.apple.audio.SystemSettings.plist
-
Enter your password to authorize the action, then Empty Trash and restart your Mac.
Reset your PRAM or NVRAM

Another feature of your Mac that saves your (in this case, audio) settings and preferences to memory is the NVRAM, or Non-volatile Random Access Memory. Older settings use the Parameter Random Access Memory or PRAM, but they essentially do the same job — make sure that your Mac retains all your settings even when it is turned off.
If a glitch or bug affects the settings in the NVRAM, you could end up with wonky audio output, so it's worth ruling out. The following reset instructions only apply to Intel-based Macs. Apple Silicon Macs use a different system for saving settings.
-
Shut down your Mac.
-
Press the power button to turn it back on, then immediately hold the Command + Option + P + R keys together for about 20 seconds. (You may hear the startup chime or see the Apple logo more than once in this process).
A NVRAM reset is likely to wipe some of your basic settings — date and time, display and wallpaper, and volume. You may have to adjust them once your Mac reboots.
Reboot in safe mode

Sometimes a rogue extension or corrupt cache is the reason why your speakers are acting up. In either case, booting your Mac in safe mode will allow you to load only essential system components and temporarily disable any interfering attachment. That way, you can determine whether the root of the problem is third-party software or the operating system itself. Safe Mode will also help to clear your Mac's cache, which gets rid of any lingering bugs.
The process for a Safe Mode reboot differs slightly for Intel and Apple Silicon Macs.
On Intel-based Macs:
-
Shut down your Mac and wait about 10 seconds.
-
Turn it back on and immediately hold down the Shift key.
-
Release the key when you see the login screen.
-
Log in, and you should see Safe Boot in the menu bar.
On Apple Silicon Macs (M1 or later):
-
Shut down your Mac and wait 10 seconds.
-
Press and hold the power button until the startup options window shows up.
-
Select a startup disk.
-
Press and hold the Shift key, then select Continue in Safe Mode.
-
Your Mac will boot into Safe Mode.
Once that is done, play some test audio. If the crackling stops, there's a good chance a third-party extension or setting is causing the problem. Restart normally, disable extensions one by one, and see if the issue returns.
Reset CoreAudio
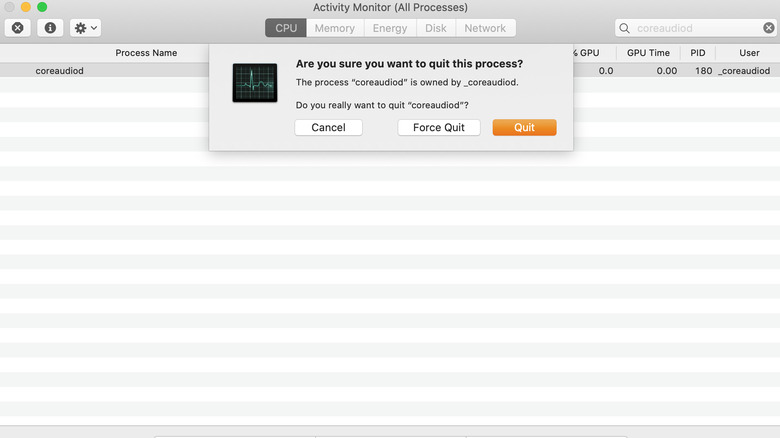
CoreAudio is your Mac's sound coordinator. It keeps audio running smoothly across apps. If it bugs out, you get an audio traffic jam and output is distorted, so you can initiate a reset to wipe the slate clean and hopefully fix your audio output.
There are two ways to kill the CoreAudio process — first is via the Terminal. It is a command-line interface that lets you use commands and scripts to perform different tasks on your Mac. To access the Terminal:
-
Go to Finder > Applications > Utilities > Terminal or use Spotlight Search.
-
Paste in the command: sudo killall coreaudiod.
-
Press Enter, then authorize the process with your admin password and press Enter again, and the reset should be done.
Quit Terminal and try playing a test audio to see if the issue is now resolved.
You can also kill CoreAudio via your Mac's Activity Monitor:
-
Open Finder > Applications > Utilities > Activity Monitor.
-
In the search bar at the top right, type coreaudiod to locate the process.
Advertisement -
Click on coreaudiod in the list to select it.
-
Hit the Quit (X) button at the top left.
-
In the pop-up window, choose Force Quit to kill the process.
Your Mac will automatically restart CoreAudio, and your audio issues should hopefully be gone.
Clean the speaker grille
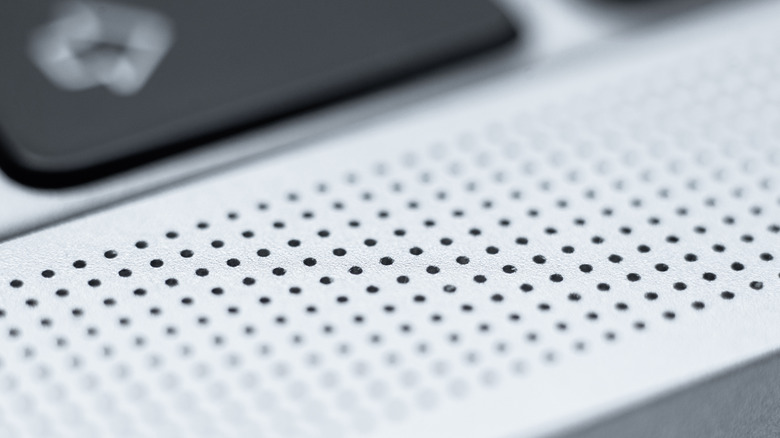
If none of these software fixes do the trick, don't tap out yet. There are a few hardware hacks to try before hauling your Mac to the Genius Bar, chief of which is to clean your speaker grille. Dust, crumbs, or even Cheeto residue (no judgment) could be what is muffling your Mac's sound.
Start with a soft-bristled brush, like a clean makeup or paintbrush, and gently sweep across the speaker grille. Use light, precise strokes to dislodge stubborn debris without damaging the mesh. If you've got a keyboard vacuum lying around, even better — they're perfect for sucking up dust from tight spots and they don't pose the risk of damage.
Some folks swear by compressed air, but here's a tip: don't blast it directly into the grille. Apple recommends holding your Mac at a 75-degree angle for this. Then, tilt the can slightly and use short, controlled bursts to nudge the dust out rather than push it deeper inside.
Whatever you do, keep liquids out of the equation. No sprays, no damp cloths, no exceptions. Moisture and electronics are sworn enemies, and introducing one to the other is asking for disaster. Also, avoid the instinct to blow into the grille yourself. It usually backfires — literally — or you might end up sending dust further inside instead of clearing it out. If this step works, consider this your friendly reminder to snack responsibly near your Mac going forward.
Disconnect external equipment, and run Apple Diagnostics
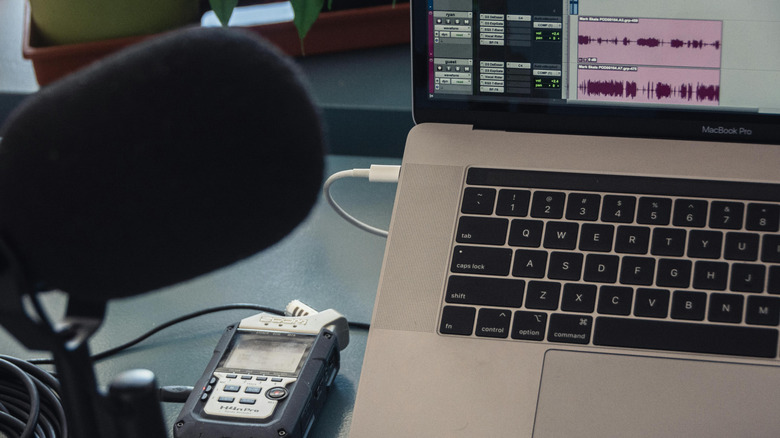
If you have any audio gear connected to your Mac, unplug it all — external mics, audio interfaces, speakers, the works. Sometimes the culprit isn't your Mac but one of these devices acting up or causing interference. Disconnecting them helps you figure out if your Mac's crackling is an inside job or just a noisy neighbor problem.
One last troubleshooting step to try before writing your speakers off is running Apple Diagnostics. It's a built-in tool that helps pinpoint hardware issues on your Mac, including potential culprits behind your audio woes.
The process varies depending on your Mac model, but the first step is always to disconnect all external devices. Leave only essentials like your keyboard, mouse, or monitor if you're using one.
For Intel-Based Macs:
-
Power off your Mac and wait a few seconds.
-
Power it back on while holding down the D key — release it only when the screen shows a progress bar, or it prompts you to select a language.
For Apple Silicon-Based Macs:
-
Power off your Mac and wait about 10 seconds.
-
Press and hold the power button until the startup options window appears.
Advertisement -
Press and hold Command (⌘) + D to launch Apple Diagnostics.
Apple Diagnostics will start running automatically and provide a report when it's done, complete with error codes if any issues are detected. Here's an Apple Guide to what the codes mean so that you know what to address after the diagnosis.
If all the above fail, it's probably time to book a Genius Bar appointment or contact an authorized repair service. If no hardware issues are found, the problem is likely software-based, and you might want to revisit previous troubleshooting steps.