Old-School Microsoft Office Features You Can Still Use (Without Downloading Anything)
Life was different in the '90s. The internet was slow, noisy, and tied up your landline, so we made our own entertainment, sometimes by creating garish graphics in Microsoft Office when we were supposed to be working or studying. Microsoft 95 gave us all kinds of options to explore our artistic ideas, and almost overnight, handwritten signs across offices and schoolrooms everywhere were replaced by needlessly elaborate signs in mindboggling colors, with ice-cream-themed borders, wingding symbols, and a ubiquitous ClipArt guy who always looked worried about life.
Many Microsoft features from the 1990s have fallen by the wayside, like Clippy, the Microsoft Office Assistant who first popped up to give unwanted advice in 1997. His reign of annoyance was brought to an end in 2001, and his legacy only lives on as Word's paperclip emoji. Similarly, clip art in Word docs is not what it was. Microsoft retired its collection of familiar illustrations in 2014. There's still an "insert stock images option," but it doesn't work if you're not connected to the internet.
There are a whole host of genuinely useful features that have been available in Office since the early days, but we're not interested in those. We're looking at the useless, artsy stuff that made '90s kids feel like graphic designers. So whether you remember the old times or are just curious about how people used to amuse themselves before Snapchat and ChatGPT, here are some old-school features you can still use in today's Microsoft 365 apps.
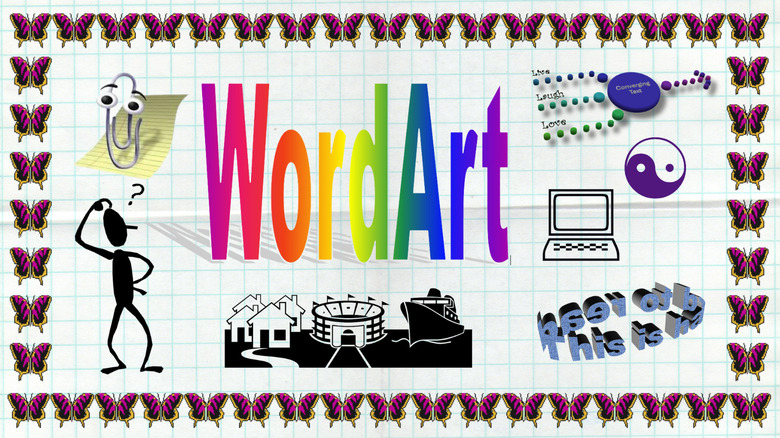
WordArt
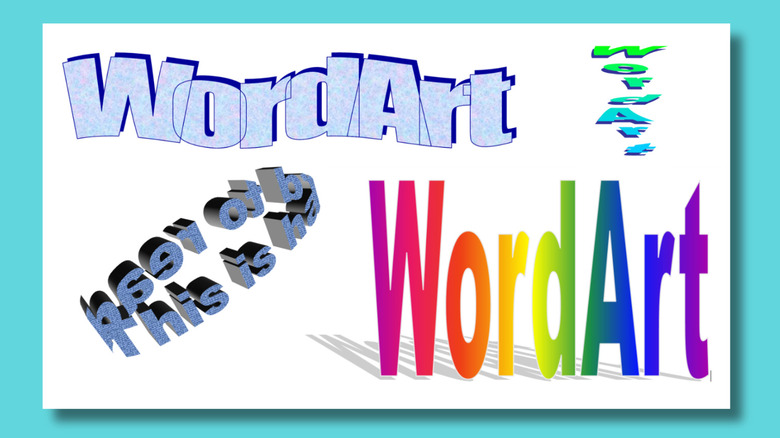
Back in the day, if you really wanted your Science Fair presentation to stand out, then Word Art was the way to go. Sure, you could manually concoct eye-catching titles by mucking about with fonts, sizes, and colors. But why go to the trouble when WordArt could do it all for you? WordArt offered a one-click solution to create text that was all the colors of the rainbow and cast a shadow behind it or make it shiny, metallic, and 3D, or maybe blue, overlapping, and a bit wobbly. It still exists in modern Word versions. You can access it by selecting "Insert WordArt" in the Insert tab. But it's a sad, diluted form of its former self, offering subtle bits of reflection or 3D. You can still make your text do stuff to make it effectively unreadable by looping around on itself, which is a nice nod to the old days, but if you want to enjoy the '90s experience fully, then happily, Microsoft makes it easy to travel back in time.
To do this, open a Word file and select Save As. From the drop-down list of file types, choose Word 97-2003 Document (*.doc). Voila! You're in compatibility mode. While this doesn't exactly give you a faithful reconstruction of what Word used to look like, it does make your WordArt options proper old-school. And you needn't stop at the off-the-peg offerings. By selecting the options on the WordArt tab, you can change colors, add texture, use 3D effects, and – yes – turn your text into an unreadable loop.
Page Border Art
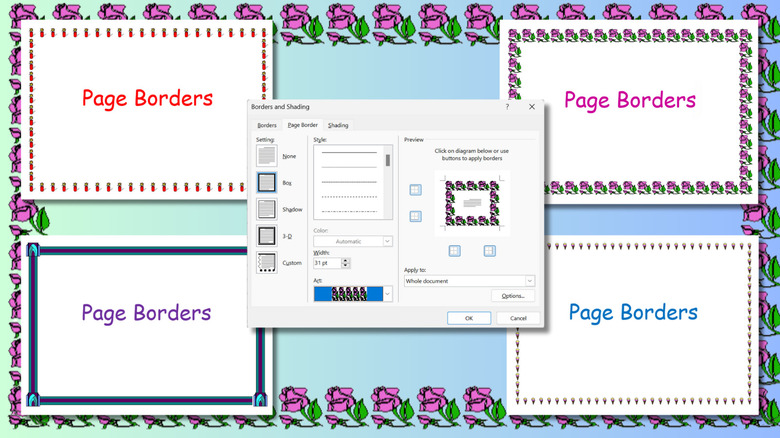
You might think you don't need poorly rendered pictures of sticks of dynamite or ice cream cones framing your Word document. And you'd be right, but you can if you want to. No one can stop you. You don't even need to save your document as an old-school .doc file for this one. Page Border Art is still available in modern-day Word, possibly because the Microsoft Office bosses have forgotten it's there.
To experience this for yourself, go to the Design tab on the ribbon and select Page Borders. This opens a window that provides options to add borders of varying weights and colors. You could just stick to adding a standard black border, but if you want to add some zing to your shopping list or an "out of order" sign, select the arrow next to 'none' in the Art options. This will reveal a drop-down list of over a hundred different decorative border options covering everything from slices of chocolate cake to ladybugs to Art Deco-style spiky patterns.
My memory of using art borders in the 1990s is that it often didn't work properly. When you printed it out, it would trim off parts of the border or leave the lower border line off altogether. When I tested it in 2025, this no longer seemed to be an issue. I don't know whether it's because Microsoft resolved the issue or because I've completed a degree in computing since the last time I used it, and I've gotten better at printing stuff.
Wingdings
WingDings is not, strictly speaking, an office feature. It's a font. It was, however, developed by Microsoft in 1990. The "Win" part of its name is a reference to Windows. The 'Ding' part refers to 'dingbats, ' a term dating back to the days of printing presses for decorative print types. There are three different Wingding fonts: WingDings, Wingdings 2, and Wingdings 3. You can access all of them from your font drop-down on the Home tab in Word, Excel, and PowerPoint, but you probably don't have much use for them these days.
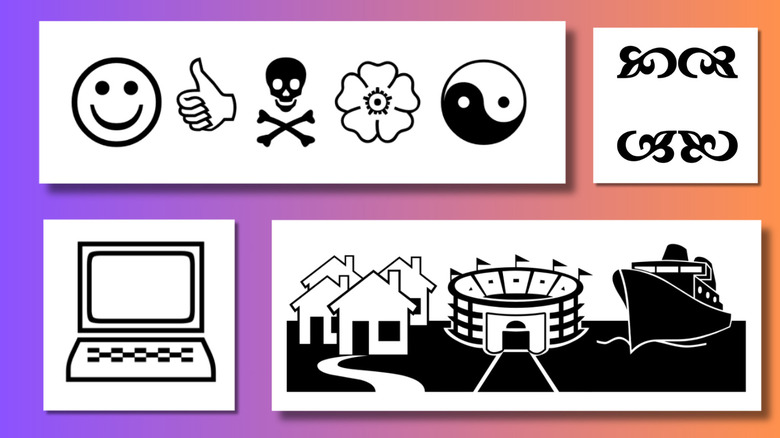
Back in the 1990s, it was a lot trickier to add graphics to documents, and not just because we weren't always just one click from the internet. Graphics take up a lot of file space and were often too much for computers to deal with. So, instead, Wingdings gave us a library of over 600 images that we could insert into our documents without slowing anything down. Everybody used WingDings back in the pre-emoji era. If you wanted to add a smiley face or a thumbs up, you simply had to remember to use Wingdings and uppercase J or C.
The font also includes all the horoscope symbols, which was presumably very handy for astrologists and precisely no one else. (They account for almost half of the lowercase alphabet, so if you're inclined to turn chunks of text into Wingdings, you see a lot of them.) If you want something really fancy like a row of houses, a sports stadium, and a steamship, then Webdings –- another dingbat font that Microsoft introduced slightly later -– can take care of that. They're all still there, but you'll need some kind of cheat sheet to find what you want.
SmartArt
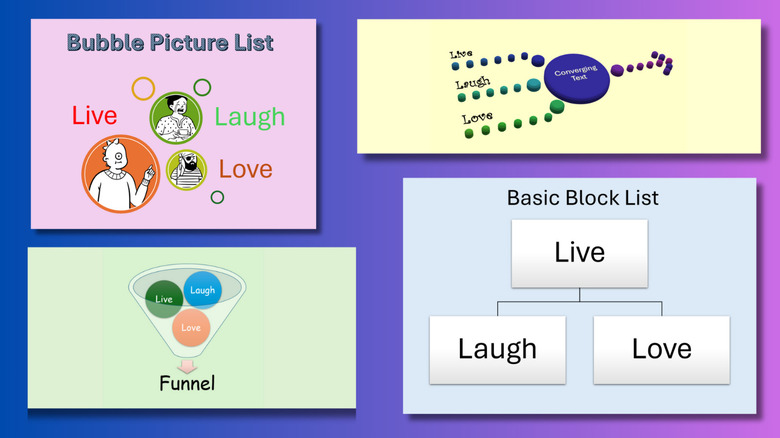
SmartArt provides a way to add diagrams and charts to your document. You can access it from the Word or PowerPoint Insert tab. Designs come in a range of preset styles, from the straightforward Basic Block list to the rather more niche Converging Text, Funnel, and Bubble Picture lists, shown above. You can edit text fields, which appear in a separate window, and then play with the colors and effects if you think a day-glo 3D version of your gizmo manufacturing process will get your point across better at the company presentation.
It wasn't called SmartArt until 2007, but it's been around since Office 95. It used to be called the Organization chart feature. It's not available in Excel, but that application has its own raft of chart and diagram options. If you use the time-traveling method described in the Word Art section and save your Word file as a .doc, you can see the much more limited version that was originally available. This version gives you the option of inserting a hierarchical organization chart or cycle, radial, pyramid, Venn, or target diagram.
Don't get excited about the Venn diagram feature. The old-school Office version doesn't let you add text to it all, and even the new, improved version only lets you add text to the main circles and not the overlapping bits. The current version offers over 200 options. SmartArt might not be widely used, but it can certainly give your Word docs and PowerPoint presentations a bit of retro flair.