How To Change The Transmission Fluid In Your Car Yourself: A Step-By-Step Guide
We may receive a commission on purchases made from links.
Your vehicle relies on many different components and systems to keep you moving down the road. When it comes to creating the power necessary to propel your car, the engine is the main player. However, the engine is all but useless without something to scale that power and send it to the wheels. That's where the transmission or gearbox comes into play. It relies on a huge amount of internal parts, including sets of planetary gears, clutch plates, a torque converter, valves, and more to tailor engine power to specific driving scenarios. The transmission is what allows you to travel at different speeds, accelerate from a stop, and slow down when you reach your destination. However, while the transmission is responsible for scaling the engine's power, it doesn't perform that job on its own — it also relies on hydraulic transmission fluid to actuate those internal parts and provide lubrication.
Like all automotive fluids, though, transmission fluid requires regular service. When it comes to servicing the transmission and transmission fluid, there are generally two options: a transmission fluid flush or a simple drain and fill. A drain and fill — commonly referred to as a transmission fluid change — is the more basic job.
As the name implies, it involves draining the old fluid and replacing it with fresh clean fluid. On the other hand, a flush typically means purging all old fluid from the transmission by connecting a professional machine or DIY tools to the transmission cooler lines. A simple transmission fluid change is much more accessible to car novices and DIYers, and that's what we're going to cover today. As a former professional mechanic with years of experience changing and flushing transmission fluid, I'll walk you through the entire process. Let's dive in.
Determine the type of transmission your car has
Before you can get started changing your transmission fluid, you need to determine the type of gearbox your car has. That's important because, depending on the type of transmission, you may need to buy special tools to replace the fluid. There are two common styles of transmission that you're likely to encounter in modern vehicles: sealed and unsealed. Both automatic and manual transmissions can be either sealed or unsealed, so this step involves more than just knowing whether you have a standard gearbox or not.
Sealed transmissions do not have a dipstick in the engine bay. That means that you can't fill them with new fluid or check the fluid level from the engine bay. Instead, you have to pump the fresh fluid into the transmission from beneath the vehicle, and you'll need a special tool to accomplish this feat. In comparison, unsealed transmissions do have a dipstick in the engine bay. For cars with this style of gearbox, you can fill the transmission with clean fluid using the dipstick tube, which is significantly easier than pumping fluid into the gearbox beneath the vehicle.
To figure out whether your car has a sealed transmission or an unsealed transmission, check your engine bay for a transmission fluid dipstick. They're usually located toward the back of the engine bay and may be emblazoned with the word "transmission" or something similar. Once you know the type of transmission your vehicle has, you can move forward with preparing your car for its transmission fluid change.
Prepare your vehicle

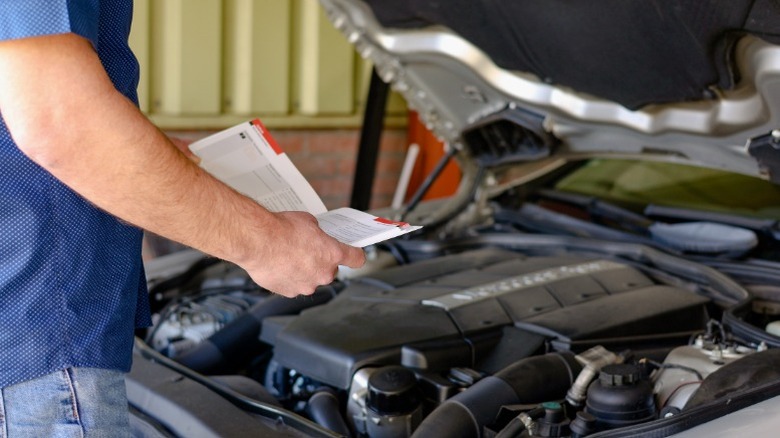
Once you determine the type of transmission that your car has, you can begin preparing it for a transmission fluid change. First, you need to understand the recommended replacement intervals for your vehicle's transmission fluid. Most cars need a transmission fluid service every 30,000 to 100,000 miles. That's a pretty big window, so it's important that you do your research to learn the correct intervals for your vehicle. You can find the information by reading your owner's manual, or you can call your local dealership and ask for advice.
Once you're confident that it is indeed time to replace your car's transmission fluid, you need to figure out what type of fluid to buy. Not all transmission fluid is the same. Some contain various detergents and additives to help prevent friction and wear, while others are designed for specific transmission styles, like continuously variable transmission (CVT) fluid or manual transmission fluid. It's critical that you fill your gearbox with the appropriate type of fluid to avoid damage. You can find this information by checking your owner's manual, reaching out to the dealership or a mechanic, or visiting your local auto parts store and asking an employee to look the information up in their system.
After you've determined when to change your transmission fluid and bought the correct type of replacement fluid, it's also a good idea to confirm your vehicle's transmission fluid capacity. You can find this info in your owner's manual or by consulting an authoritative source. Then, you're ready to physically prepare your car for the service. For this step, you should park in a level area, set the parking brake, and allow your vehicle to cool down.
Collect the tools you'll you need to change your transmission fluid
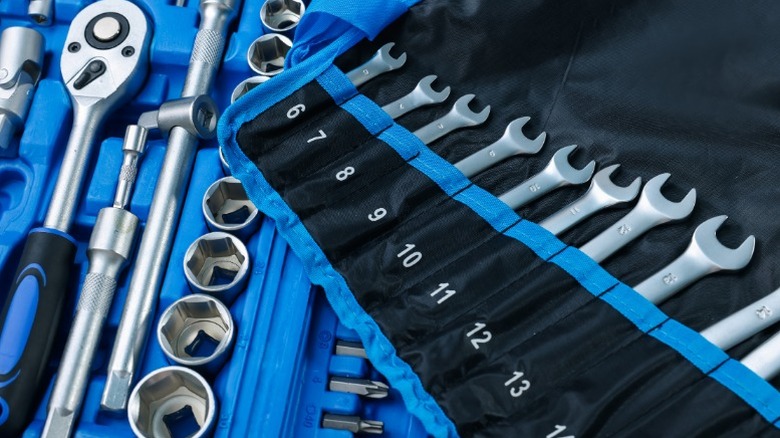
Before changing the transmission fluid, you'll need a few tools. First, unless you drive a tall pickup truck or SUV, you'll need something to raise your car off the ground. If you don't have a vehicle lift at home, there are various automotive jacks you can use for this step.
Next, you'll probably need a ratchet and socket to remove the transmission drain plug. Different vehicles use different sized plugs, so the best move is to purchase a quality socket set that includes various sizes. However, not all transmission drain plugs use a hex head fastener — some of them use Allen heads, so it's important that you have a decent selection of tools beforehand, or you check first, so that you can buy or rent the necessary equipment. Technically, you'll also need a torque wrench to reinstall the drain plug. Your vehicle's manufacturer provides a specified torque or tightness rating for the drain plug, so look that information up if you want to reinstall the plug correctly.
You also need to catch the old fluid that you drain out of the transmission. If you have a sealed transmission, it's smart to use a clear container with marks that indicate how full it is — this will help ensure that you add the correct amount of fluid back into the gearbox, although you should look up your transmission's fluid capacity before getting started.
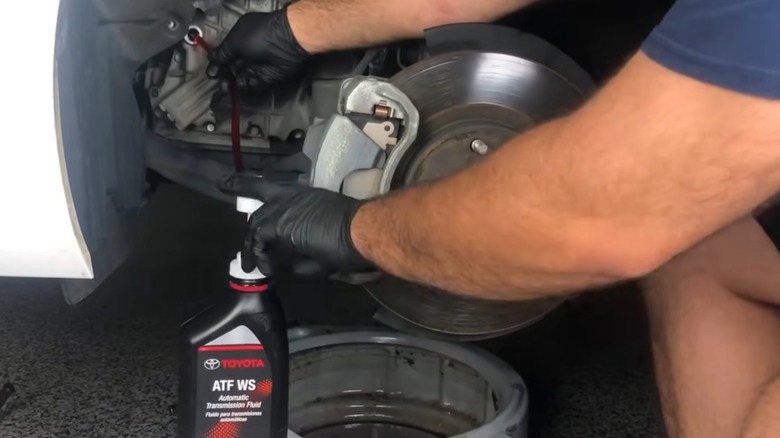
Finally, you'll need a tool to add the new fluid to the transmission, and you may want a creeper to help you slide under the car. For sealed gearboxes, you'll need a pump, like the Slippery Pete Hand Pump. If your transmission is unsealed, you can use a funnel to pour new fluid through the dipstick tube.
Lift your vehicle off the ground
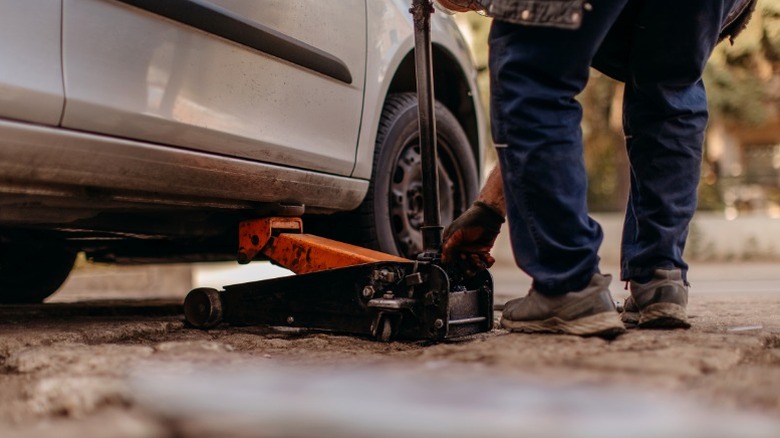
After gathering your tools and preparing your car, it's time to roll up your sleeves and get started with your transmission fluid change. The first step is to raise your car off the ground. However, before lifting your vehicle off the ground, you may want to remove the transmission dipstick if you have an unsealed transmission. This step is optional, but it will allow the fluid to drain more rapidly.
If you have a sealed transmission, you can disregard that tip and get started lifting your car. You can use various jacks for this step. However, one of the quickest and safest ways is to use a floor jack paired with some jack stands. While lifting your vehicle, remember to place the jack below a secure lifting point, like the pinch welds, frame, or control arms, and place jack stands beneath the pinch welds or car frame after raising the vehicle to a suitable height.
You'll want to raise your vehicle high enough off the ground to give yourself enough space to slide under it. Depending on you and your car, as well as the type of tools and equipment you plan to use, that may translate to anywhere from 1 to 2-inches of lift to 6 inches or more. Once your vehicle is high enough off the ground, grab your drain pan, hand tools, and a creeper and slide underneath.
Drain the old fluid

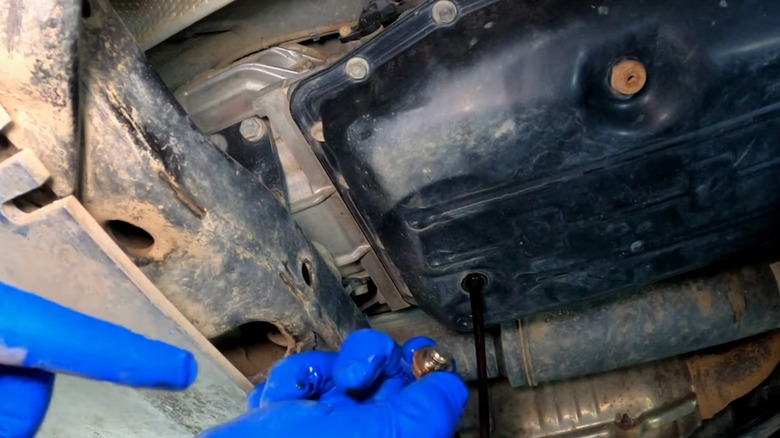
After you slide beneath your car, you need to locate the transmission fluid pan. Your vehicle's transmission should be toward its middle section and slightly behind the oil pan. It can be painted in various colors. However, it's common for the transmission pan to be a gray-silver color or black. Once you've located the transmission pan, identify the drain plug and remove it. Note that some vehicles contain replaceable transmission fluid filters. If you want to change the filter as part of your fluid replacement, you'll need to remove the transmission pan and replace the gasket. If you're performing a simple drain and fill, though, you can just remove the plug and allow the old fluid to spill out.
Once the old fluid is completely drained, reinstall the drain plug (and the pan if you removed it). Remember that virtually every fastener on your car has a specified torque rating. So, you should use a torque wrench to reinstall the plug, as well as the bolts securing the pan if you chose to replace the filter, too.
If you don't have a torque wrench, tighten the plug until it's snug, and then give it another quarter turn. That said, if you're not an experienced mechanic, you should use a torque wrench if possible. Under or over-tightening the plug can have disastrous results, ranging from stripped threads to catastrophic leaks.
Refill the transmission with clean fluid
After reinstalling the transmission fluid drain plug, it's time to fill the gearbox with clean fluid. Depending on the type of transmission your car has, though, the steps will differ.
For unsealed transmissions, lower your vehicle and locate the transmission fluid dipstick. Place a funnel in the dipstick tube and start pouring in fresh fluid. Remember to check your vehicle's transmission fluid capacity first, and don't add all of your fluid right away. Then, start the engine and check the transmission fluid level. Read the dipstick in the same way that you would an oil dipstick. If the level is within the appropriate range, as indicated by the dipstick marks, you can start wrapping things up. However, if the level is too low, add more fluid incrementally until it's within the proper range. If the level is too high, allow the engine to keep running for a while to see if the fluid settles. But if the level never drops down to the correct range, you'll need to drain some back out to avoid causing damage.
As mentioned, you'll need a special pump to fill sealed gearboxes. First, locate the fill port — it should be higher up on the transmission than the drain plug, usually on the side of the pan. Remove it and use your pump to fill the gearbox with the same amount of fluid that you drained out — this is why it's wise to use a clear container to catch the old fluid. Once you've added the correct amount of fluid, replace the fill plug, tighten it to its proper torque spec, and lower your vehicle. Note that sealed transmissions are trickier to work on, and if you're not experienced with cars, you should consider visiting a professional for your sealed transmission fluid service.
Check your work

Once you've refilled your transmission with clean fluid and lowered the vehicle, you're almost done with your transmission fluid change. However, before you can wrap things up, there are a few additional steps you need to complete.
First of all, clean up any messes you made while replacing the fluid. If you spilled any liquid, be sure to wipe it up — otherwise, it may drip down onto the ground, which could give the appearance of a leak, or it may begin burning and smoking if it comes into contact with an extremely hot component. Next, check to make sure any and all parts that you removed or loosened are secure. That includes the drain plug and dipstick, as well as any other fluid caps or reservoirs that you checked during the service.
Finally, before you put all of your tools and supplies away, take your vehicle for a quick test drive. This is a vital step that allows you to check your car's performance and ensure that the transmission shifts smoothly and properly. When you get back to your driveway, check the level once more to be sure that it's within the appropriate range.
Then, you can clean up any remaining mess and put your tools away. One final thing to remember: you can recycle the old transmission fluid that you drained out of your car. Don't simply pour it out into a sewage drain or onto your lawn. Instead, you can take it to your local auto parts store, where it will be recycled properly.