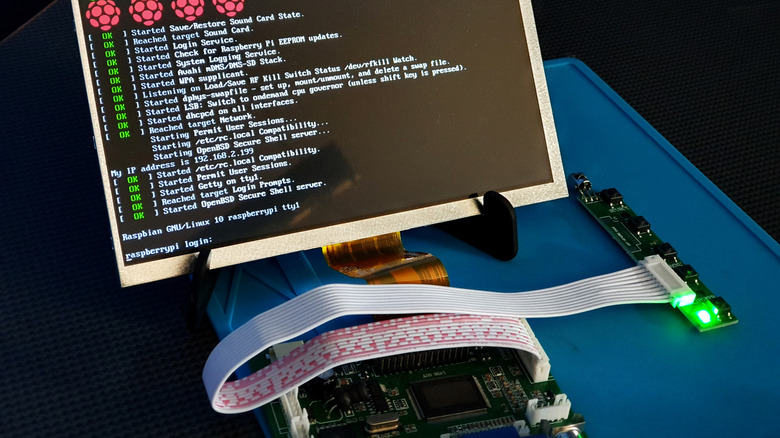
How To Screen Record On Raspberry Pi
Screen recordings are the best way of capturing what's happening on your screen, offering more flexibility than a standard screenshot. It especially comes in handy when you're making a tutorial or sharing your gameplay with your friends. If you're on Windows or macOS, recording your screen is easy with its built-in tools. You have the Snipping Tool and Game Bar on Windows, and then, there's Screenshot on macOS.
On the other hand, screen recording isn't as quick on the Raspberry Pi. While it includes a pre-installed tool for taking screenshots (an app named grim that's already tied to the Print Screen key on an attached keyboard), there's no option to record your screen out of the box. That means you'll have to rely on third-party utilities. The problem, though, is that the latest version of Raspberry Pi OS, Bookworm, no longer uses the usual X11 display system, so most screen recorders for earlier releases won't work.
So, now, how do you screen record on a Raspberry Pi?
Method 1: Using wf-recorder
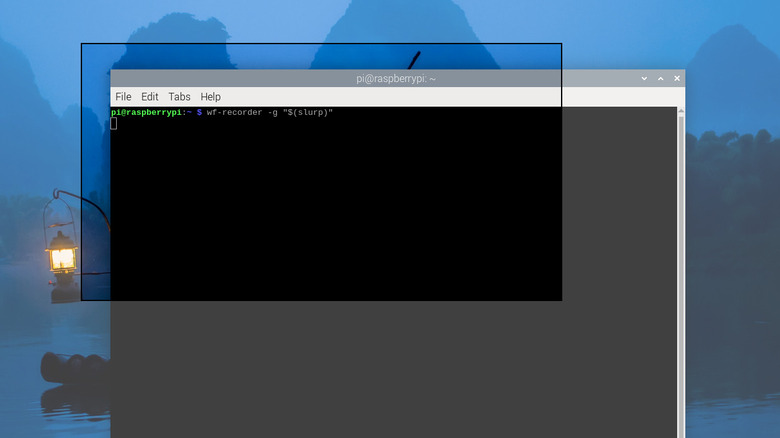
Unlike other screen recording utilities with user interfaces, wf-recorder is accessible only from the command line interface (CLI). This makes it particularly useful if you're running a CLI-only OS, like the Raspberry Pi OS Lite. To use wf-recorder, all you have to do is install the utility by running the following command in Terminal:
sudo apt install wf-recorder
You can then use wf-recorder's default settings to record your screen — simply type wf-recorder into Terminal. From here, the recording will automatically start, and you can stop it by pressing Ctrl + C. A recording.mp4 should then appear in your current directory.
If, however, you want to customize the screen recording settings, use these command line options:
- To save the recording with a specific file name: -f [filename]
- To record the audio: -a
- To record only a certain area: -g "$(slurp)" with the quotation marks. Make sure to install slurp first by typing:
sudo apt install slurp
- To use a specific video codec: -c [codec]. To see which codes you can choose from, enter:
ffmpeg -hide_banner -encoders | grep -E '^ V' | grep -F '(codec' | cut -c 8- | sort
For example, if you want to use a specific filename for the screen recording, record audio, and set a different video codec, your command should look like this:
wf-recorder -a -c rawvideo -f newrecording.mp4
Method 2: Installing Kooha
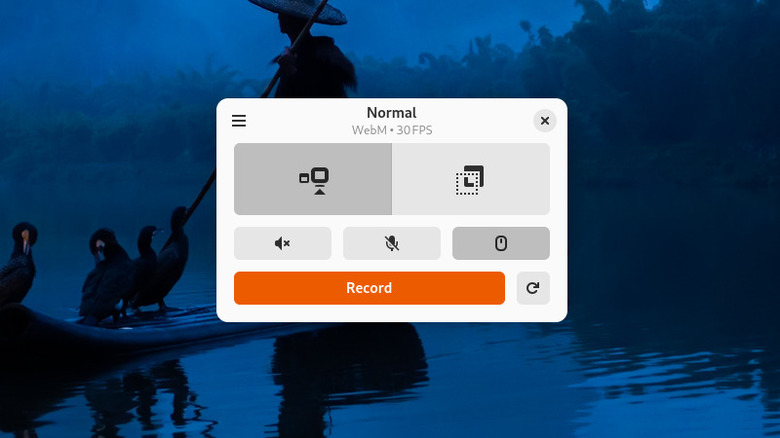
If you're not a fan of CLI commands and want a more interactive way of recording your screen on the Raspberry Pi, try Kooha. It's a free and open-source screen recording app with a basic and user-friendly interface. Follow this guide to use it:
- Install Snap by running
sudo apt install snapd
- Restart the Pi with
sudo reboot
- Complete the Snap install with the Terminal command
sudo snap install snapd
- Install Kooha by running
sudo snap install kooha
- To run the app, type kooha on the command line. It should automatically open.
- To enable/disable the desktop audio and microphone, click once on the speaker and mic icons above the Record button.
- To hide the mouse pointer from the screen recording, press the mouse icon.
- To record only a section of the screen, select the Capture a Selection of Screen option (represented by two squares on top of each other).
- To create a full-screen recording, press the Capture a Monitor or Window option at the top.
- To set a delay before the recording starts, navigate to the hamburger menu in the top-left corner and click on Preferences. Increase the Delay (Seconds) by however long you prefer.
- To change where the recordings are saved, go to Preferences and choose a different Recordings Folder.
- After configuring the app, hit Record.
- If it's a full-screen recording, simply click anywhere on the screen.
- If it's an area recording, choose the specific section in the window that appears.
- To hide the recording window, right-click on it and choose Minimize.
- To stop the recording, click on Kooha in the status bar at the top and press Stop in the recording window.
- Wait for the app to finish saving the recording.
You can now find the video file in the destination folder you initially set.
Method 3: Recording via vokoscreenNG
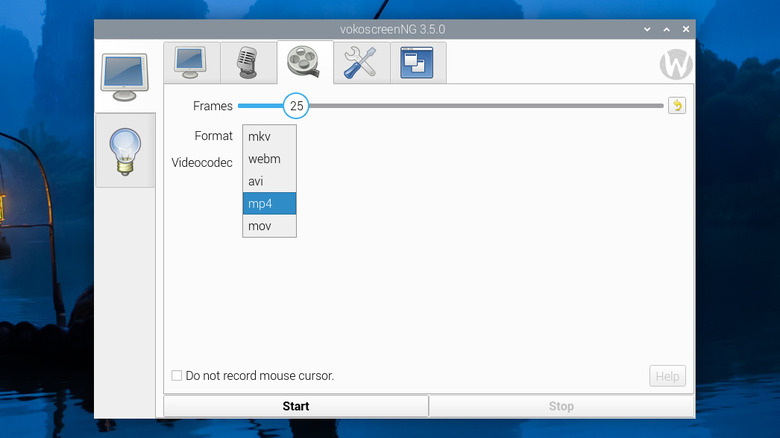
While Kooha works pretty well with the Raspberry Pi, its supported video formats are limited to only WebM and GIF. If you prefer your screen recording output as MP4 but don't want to use the command line-based wf-recorder, vokoscreenNG might be worth checking out. It's initially designed for the X11 display system, but it has since been updated to work in Wayland too (although in the experimental phase only). Here's the step-by-step of recording your Raspberry Pi screen with vokoscreenNG:
- Install vokoscreenNG using Terminal by typing
sudo apt install vokoscreen
- Install the app's dependency. Type
sudo apt install gstreamer1.0-pipewire
- Open vokoscreenNG from the Raspberry Pi icon > Sound & Video.
- To change the video format, click on the video settings tab (film icon) at the top and change the Format to MP4, AVI, MOV, WEBM, or MKV.
- To set the frame rate, go to the video settings tab again and drag the Frames slider to your preferred rate.
- To hide the mouse pointer in the screen recording, click the box for "Do not record mouse cursor" in the video settings tab.
- Go back to the screen selection tab (monitor icon).
- To record your whole screen, choose Window.
- Hit Start.
- Click outside the vokoscreenNG app to start the session.
- Minimize vokoscreenNG if you need.
- To stop the recording, open vokoscreenNG and press Stop.
- When prompted, select the folder where you want to save your recording.
It's worth noting, though, that since vokoscreenNG is still in the experimental phase for Wayland, it doesn't come with full features compared to the X11 version. Expect some bugs here and there too.
Method 4: Downloading a Chromium extension
Another nifty way to record your screen on Raspberry Pi is by using a Chrome extension for screen recording right on your Chromium app. One extension that offers free and unlimited recordings is CaptureScreen. Here's how to use it on your Pi:
- Go to the CaptureScreen Chrome Web Store page on Chromium.
- Press "Add to Chrome" to install it.
- Pin CaptureScreen to the toolbar at the top by clicking on the Extensions icon and pressing Pin next to the extension.
- Right-click on the extension in the toolbar.
- Select "View web permissions."
- Change the permissions for the Camera and Microphone to "Allow."
- Press on CaptureScreen in the toolbar again.
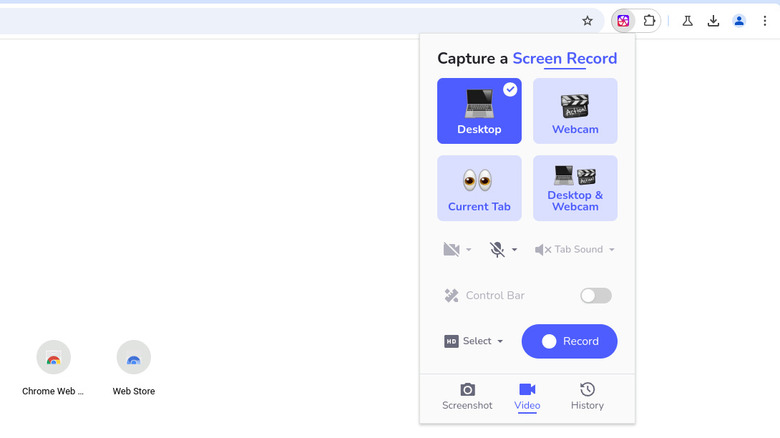
- Go to the "Video" tab.
- Select your preferred screen capture area: Desktop (your entire screen), Current Tab, Webcam, or Desktop & Webcam.
- To enable the microphone, click on the mic icon and select the microphone device available.
- To turn on the webcam, select the video icon and pick the webcam connected to your Pi.
- To use the sounds coming from the tab (if you're recording in Current Tab mode), press "Tab Sound" and click on "Enable."
- To set the video resolution, go to HD and change it to 720p, 1080p, or 4k.
- Press "Record" to start the screen recording.
- In the "Choose what to share" panel, select either "Entire Screen" to capture your entire desktop or "Window" to screen record a specific program window only.
- Tap "Share."
- Click on "Hide" in the "is sharing your screen" popup.
- Minimize Chromium if you need to.
- To stop recording, open Chromium, click on CaptureScreen, and select "Stop."
- In the new window that opens, download your recording by selecting "Save as WEBM."
To view the recording, you can head over to your Downloads folder and open the video via VLC Player.