5 Ways To Make Windows 11 Look Like Windows 10
Windows 11 has brought about a wide range of improvements over its predecessor — from the personalized Widgets to the convenient Snap Layouts to the updated look of most of its system apps. Despite the new features, some people actually aren't fans of the latest OS. One of the things people hate about Windows 11 is the complete redesign of the interface. The Start menu, taskbar, and context menus have been overhauled to look simpler, more modern, and generally less box-looking. However, users actually prefer Windows 10's flat and sleek style.
Unfortunately, with Microsoft officially ending support for Windows 10 in October 2025, you can't simply go back to the previous OS without compromising on software compatibility and your security. You'd want to stick to Windows 11 if you're after long-term support. Instead of installing Windows 10 outright, you can just turn your Windows 11 machine into a Windows 10 look-alike with these methods.
Preliminary steps
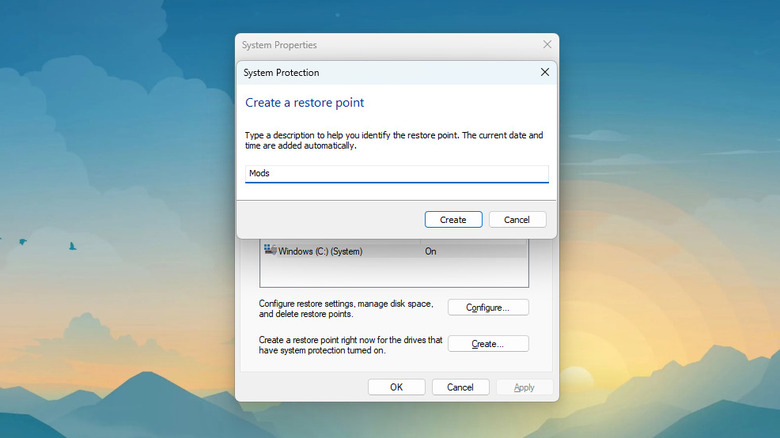
Before making any changes to your machine, it's best to create a restore point first. This way, you can easily bring back your current setup in case you run into any issues or simply want the old look back. To set a restore point, here's what you need to do:
- Search for "Create a restore point" from the Start menu.
- Under Protection Settings, make sure the Protection is on for the drive. If not, press Configure, select Turn on system protection, and set how much disk space the restore point will use. Then, hit Apply and OK.
- Choose the Create button.
- Name your restore point.
- Press Create.
- Wait for the system to finish making the restore point.
Once that's done, a popup will appear indicating that the restore point was successfully created. Simply click on Close to exit. To restore Windows 11 to the restore point you created, search for Recovery in the Control Panel and choose Open System Restore. Select the Recommended restore option, press Next, and hit Finish. Then, click on Yes to confirm. Your PC should eventually restart, and once it boots, you should be back to your original settings.
Method 1: Configure built-in personalization settings
Windows 11 comes with features specifically designed to help you personalize your computer. Some of these can give your PC the look of your old Windows 10 machine. Here's how to enable those built-in customization settings:
- Change the taskbar to look more like Windows 10:
- In the Settings app, navigate to Personalization > Taskbar.
- Click on Taskbar items.
- Toggle off Task view and Widgets since both aren't included in the Windows 10 taskbar.
- Set the Search item to Search box to mimic Windows 10's search box in the taskbar.
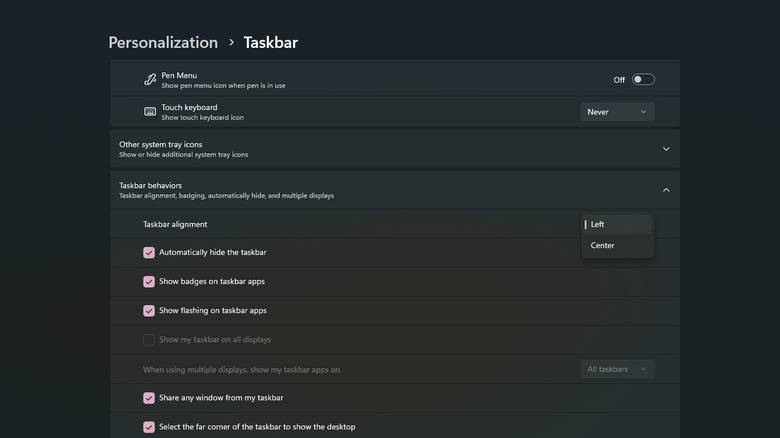
- Expand Taskbar behaviors.
- Change the Taskbar alignment to Left.
- Set your taskbar buttons and labels to never combine (if that's your setting in Windows 10) by switching "Combine taskbar buttons and hide labels" to Never.
- Bring back the folder buttons on the Start menu:
- Go to Settings > Personalization > Start > Folders.
- Turn on the folders you want to access from the Start menu. The default options on Windows 10 are Settings, Pictures, and Documents.
- Set the Start and taskbar color to your preferred accent color, like in Windows 10:
- From the Settings, head over to Personalization > Colors.
- Select Accent color.
- Choose from the preset Windows colors or click on View colors to set to a custom one.
- Turn on "Show accent color on Start and taskbar" to use the same color on the taskbar and Start menu.
- Switch out the wallpaper:
- Download the Windows 10 default desktop wallpaper from Internet Archive.
- Navigate to Settings > Personalization > Background.
- Expand the "Personalize your background" option.
- Click on Browse photos.
- Choose the Windows 10 wallpaper you've downloaded.
When you go back to the desktop screen, Windows 11 will now look closer to Windows 10 with the taskbar, Start menu, and wallpaper changes.
Method 2: Install Stardock Start11
The Start menu and taskbar in Windows 10 are two of its most prominent features. If you're just looking to change those elements, the Start11 app by Stardock can easily do the trick. It essentially changes the style of the Start menu and taskbar to look like Windows 10 but also brings back some of the previous OS's functionalities, like the taskbar's right-click context menu. It's important to note, though, that Start11 is a paid app. If you're not ready to buy it for US$9.99, you can try the free 30-day trial. Here's how to use Start11 to make Windows 11 look like Windows 10:
- Visit the Start11 webpage.
- Click on Try Free. It should automatically download the Start11 installer. If it doesn't, hit "click this link."
- Install Start11 as you normally would.
- When you open the app, select Start 30 Day Trial, enter your email address, and hit Continue. Then, look for the activation email in your inbox and press Activate 30-Day Trial. You should now be able to access it without restrictions.
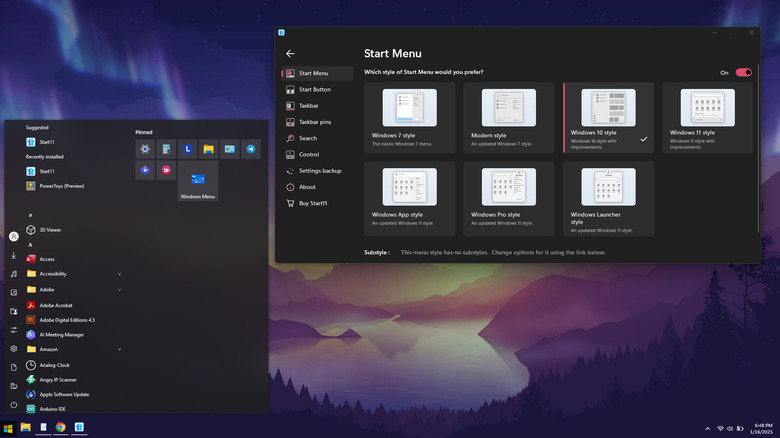
- Go to the Start Menu tab.
- Turn it on if it isn't already.
- Choose the Windows 10 style.
- Click on Configure menu.
- Select Customize menu visual appearance.
- Under Visual touches, turn off "Round the corners of the menu and menu elements" to bring back the Windows 10 sharp edges.
- Go to the Taskbar tab.
- Enable "Let Start11 enhance the taskbar."
- Press Yes to confirm.
- Click on Configure enhanced taskbar.
- Under Taskbar button combining, choose your preferred display (e.g., never combine, always combine, combine pinned).
- Under Taskbar button appearance, change the Taskbar button style to Windows 10 style.
There are also other nifty configurations you can enable from Start11, so feel free to explore them yourself.
Method 3: Use ExplorerPatcher
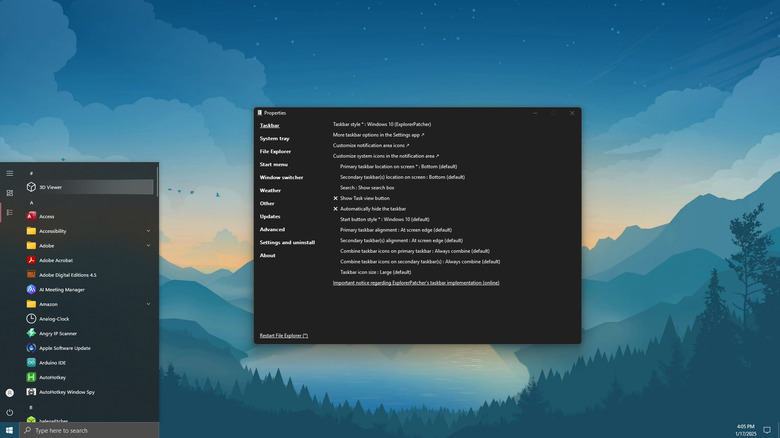
If you're looking for more customization options than what Windows 11 can provide, one third-party app worth checking out is ExplorerPatcher. It allows you to revamp the look of your taskbar, window frames, and control buttons to mimic that of Windows 10's design. The app is an open-source software, unlike Start11, so you can download and use it completely free of charge. Follow these steps to install and configure ExplorerPatcher to turn your Windows 11 machine into a Windows 10 copycat (at least design-wise):
- Download the ep_setup.exe installer from the ExplorerPatcher GitHub page.
- Double-click on the EXE file to run it.
- Wait for the necessary files to download.
- When you receive a notification that all files have been downloaded, go back to the app and click Restart File Explorer on the bottom.
- Head over to the Taskbar tab on the left side panel.
- Click on the Taskbar style option.
- Switch to Windows 10 (ExplorerPatcher).
- Click on Start button style.
- Change the value to Windows 10 (default).
- (Optional) To move the taskbar of your Windows 11 machine, press the option for "Primary taskbar location on screen" and set it to Top, Left, or Right.
- (Optional) To change the icon size, press Taskbar icon size and select the Small option.
- Navigate to System tray on the side panel.
- Disable the Control Center button (the panel that pops up in Windows 11 when you click on the Wi-Fi, speaker, mic, or battery icon in the system tray).
- Go to File Explorer.
- Turn on Disable the Windows 11 context menu to bring back the old right-click context menu from Windows 10.
- Change the Control Interface to Windows 10 Ribbon to make the File Explorer top ribbon similar to Windows 10.
- Select Start menu from the side panel.
- Set the Start menu style to Windows 10.
- Go to Window switcher.
- Change the style to Windows 10.
Once you're done, hit the Restart File Explorer to apply the changes.
Method 4: Use StartAllBack
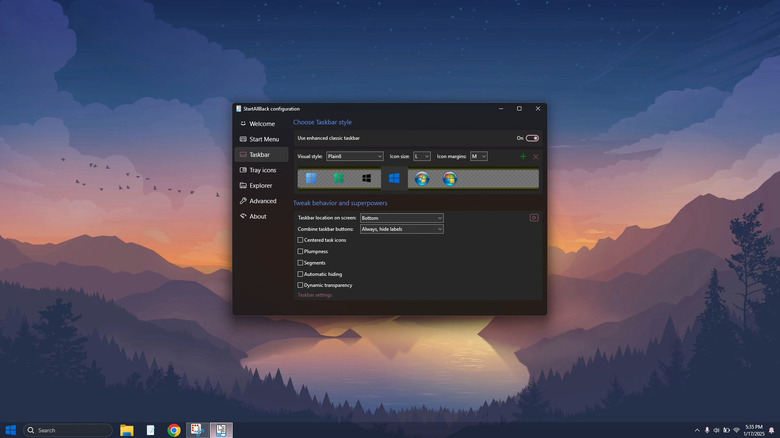
StartAllBack is another paid third-party application that can change how your Windows 11 computer appears. Although it mainly offers Windows 7 and 8 UI styles, there are also a couple of customization settings inspired by Windows 10. Here's how you can use StartAllBack to give your Windows 11 PC a Windows 10 look:
- Download the Windows 10 Start menu icon from Icons8. Make sure to use the SVG format.
- Download StartAllBack from the official website.
- Run the installer as you normally would.
- Open the app by right-clicking on the taskbar and selecting Properties.
- Click on the Welcome tab.
- Select the Kinda 10 theme to change the UI of the active programs in the taskbar from soft translucent background to the more glassy square background.
- Go to the Taskbar tab.
- Click on the green plus icon.
- Select the Windows 10 Start menu icon you downloaded earlier.
- (Optional) Set your taskbar location to either left, right, or top, depending on your preference.
- Navigate to Tray icons in the side panel.
- Set the flyouts style to Windows 10 (middle option with sharp edges). Now, when you click on the time in the system tray, you should see the Windows 10 sharp-cornered calendar and clock instead of the Windows 11 round-cornered design.
- Choose Explorer in the side panel.
- Under Explorer style, choose Win10 Ribbon UI to make the menu of your File Explorer window similar to Windows 10 instead of the Windows 11 command bar.
StartAllBack comes with other personalization options that you can check out to make Windows 11 work better for you.
Method 5: Use some mods from Windhawk
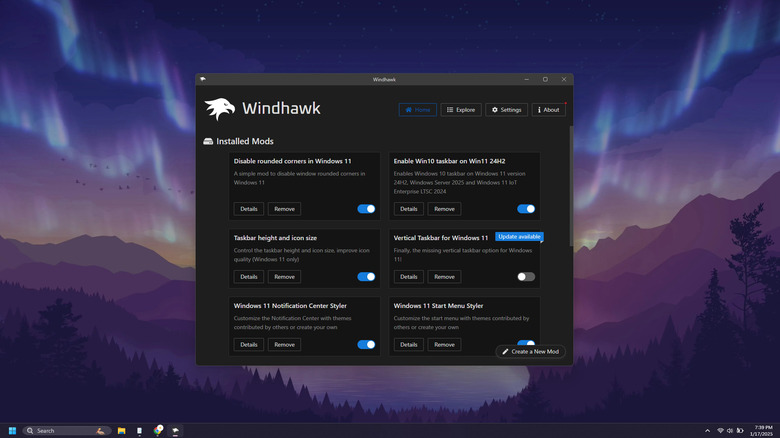
Windhawk is an open-source app where you can easily browse and install open-source and free modifications for several Windows programs like Chrome and Notepad and for Windows itself. You can find a host of UI mods here that can readily recreate the Windows 10 look on your Windows 11 PC. Follow this guide on how to install and setup the mods from Windhawk:
- Download and install Windhawk on your machine.
- In the app, click on Explore.
- Search for the Windows 11 Start Menu Styler.
- Install the mod by clicking on Install and selecting Accept Risk and Install.
- Still in the Windows 11 Start Menu Styler details page on Windhawk, press Settings.
- Set the Theme to Windows 10.
- Hit Save settings to apply the change.
- Go back to the Windhawk Explore page.
- In the search bar, type Windows 11 Notification Center Styler.
- Install the mod.
- Go to the Settings tab on the mod's details page.
- Change the Theme from None to 10JumpLists.
- Press Save settings. When you right-click on an app on the taskbar, the context menu should now appear as sharp-edged instead of round-cornered.
- Install the "Taskbar height and icon size" mod.
- In the Settings tab of that mod, set the Icon size to 18 and Taskbar height to 38 to make the taskbar and icons smaller. You can also experiment with different values until you get your preferred size.
Browse through the other mods in Windhawk and install the ones you want to use, such as the Vertical Taskbar for Windows 11 to make the taskbar sit on the left or the Disable rounded corners in Windows 11 to bring back the sharp-cornered windows.
