10 Easy Raspberry Pi Projects You Can Tackle With Basic Gear
The first version of the Raspberry Pi was released in 2012 and designed to get accessible, customizable computers into the hands of the next generation of computer programmers. Intended for the education market, the Raspberry Pi's simplicity, affordability, and flexibility made it widely popular among hobbyists.
Starting as an individual single-board computer (a single circuit board featuring all of the processors and functions necessary for a working computer), the Raspberry Pi has evolved into a variety of devices, attachments, and accessories. If you want to learn to build and program computers, they are the perfect entry point, and for more experienced hobbyists they're the perfect platform for a little homebrew tinkering.
The Raspberry Pi isn't as powerful as more conventional computers, but it's also not as power hungry, which is perfect for newbies and experimentation. After all, when you're learning to drive or going off-road, you don't need a sports car. If you've been curious about a Raspberry Pi or you've picked one up and you're not sure what to do with it, here are some of the best and easiest projects you can pull off with basic supplies and a little elbow grease.
Music player
From the Walkman to the iPod and everything in between, we're constantly looking for the next way to listen to our favorite tunes. With a Raspberry Pi and a few extra parts, you can build your very own music streaming device for listening to your music library. This project from Reddit user plasman30 uses Volumio software and incorporates a small touch screen to navigate the user interface. Of course, you can customize your music player with a different case, software, navigation method, etc. That's the magic of the Raspberry Pi.
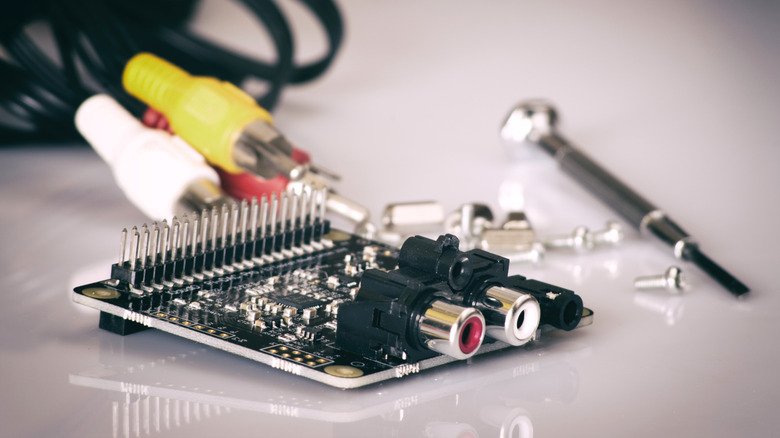
To build this music player, you'll need a Raspberry Pi 3 or 4 to do all the thinking. You're also going to need a digital-to-analog converter (DAC) hardware attached on top unit (HAT), to transform audio files into something your speakers can play. Plug in a Raspberry Pi touch screen, a USB-C power supply, 40-pin GPIO ribbon cable, heat sinks, and RCA cables, and wrap it all up in the SmartPi Pro Case.
Importantly, the SmartPi Pro Case which is compatible with the Raspberry Pi touch screen, don't provide easy access to the Raspberry Pi or SD card once they're closed up, so you may need to install Volumio or your preferred software in advance.
Choose your own adventure story
If you grew up reading choose your own adventure books, a Raspberry Pi can bring that experience into the future and put you in the author's seat. You can use a Raspberry Pi to create a text-based story, a visual 3D novel, or an audio tale with voice controls. No matter which storytelling format you choose, the user will be able to make decisions and the Raspberry Pi will process everything.
The Raspberry Pi Foundation has free instructions for a text-based choose your own adventure story called "The Magic Library." You can actually practice this project in a browser without needing to get a Raspberry Pi in advance. From there, you can use those same skills to create your own story, charting different paths for your readers to take. You'll create different web pages for each part of your story and link them together so that the reader can make decisions and move from one story point to another.
If text isn't your thing, the Raspberry Pi Foundation also has resources for crafting 3D visual stories, and you can run the whole thing on your Raspberry Pi. You could also get really creative and make an audio adventure by recording bits of story and making a decision tree which plays the appropriate section when triggered by voice cues. The possibilities, just like the stories you can tell, are limited only by your imagination.
Stop motion camera
Stop motion animation is one of the most accessible forms of filmmaking. You can use toys, Lego figures and bricks, paper cutouts, or anything else you have readily available. All you need is something to capture images. You can build your very own stop motion camera with a Raspberry Pi and just a few extra supplies.
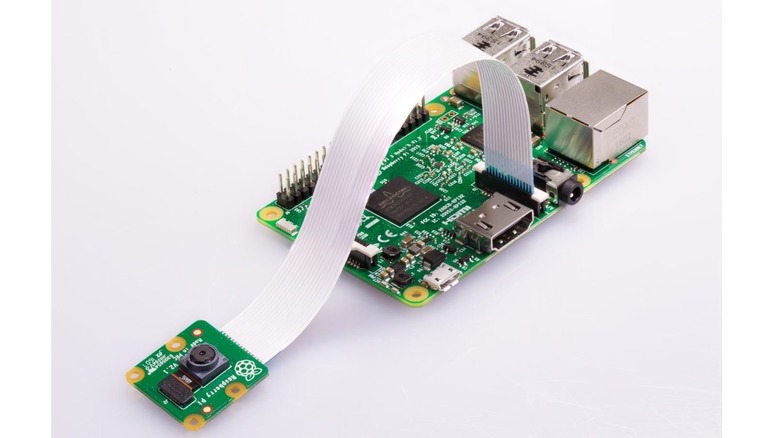
To get started, you will need a Raspberry Pi, a camera module, two pin-socket jumper leads, a tactile button, a breadboard to hold that button, and the Python picamzero software. Throughout this simple project, you'll install and modify software to your specifications, connect and test the camera module, then set up a button using the jumper leads to trigger image capture. With every button press, you'll snap an image for later animation.
Once you've gathered all of the still images for your movie, it's time to animate them. Using Python, you can tell the Raspberry Pi to create a video, even specifying how many frames (images) to play every second. In general, the higher the frame rate, the smoother the animation will appear. You can find detailed instructions for this project courtesy of the Raspberry Pi Foundation.
Remote control robot
While a Raspberry Pi is perfect for building virtual creations, it can also control physical machines in the real world. You can use your tiny computer to build an autonomous car, then use additional components to control that car remotely using the latest version of Raspbian OS. This project can be taken in stages, building a simpler preprogrammed robot buggy and upgrading it for remote control later.
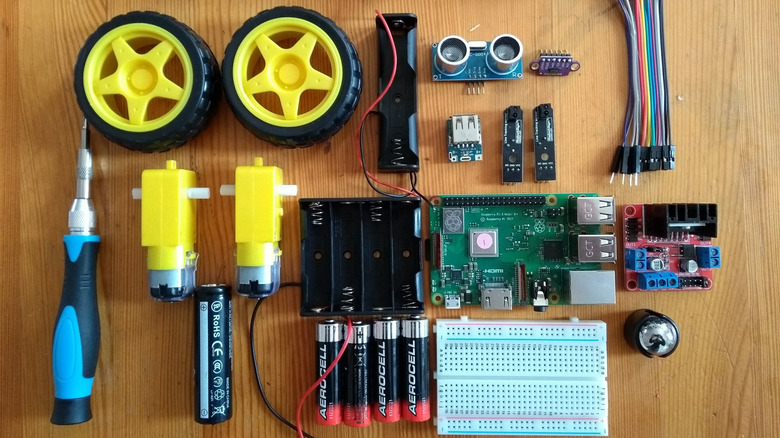
You will need a Raspberry Pi 3 or better, a motor control board, two DC motors, two wheels, one AA battery holder and four AA batteries, a ball caster, wire or jumper leads, a soldering iron and solder, a USB battery pack, and common supplies like tape, glue, wire strippers, and a screwdriver. If you're planning to upgrade your robot for remote control, you will need some additional supplies.
Throughout this project you'll wire the motors to the motor board, connect the battery bank, and wire everything up to your Raspberry Pi. You'll test and orient the motors, program your buggy with forward, backward, right, and left controls, and build a chassis to house your contraption. There's a lot of flexibility at this stage; as long as it can house your electronics and handle mounting a couple of wheels it'll do the job. Be creative. Once assembled, you can program your bot to drive a preplanned route. You can get complete instructions for this build and the remote control upgrade from the Raspberry Pi Foundation.
TV streaming box
These days, streaming your favorite movies and TV shows is easy enough on a computer, tablet, or smartphone, but TVs haven't always been internet capable. If you're still using an older television, you're probably familiar with peripheral streaming devices like Roku, Apple TV, and other streaming dongles. You plug them into a power source then dock them into an HDMI port and they'll feed you all of the streaming content you can stomach. However, you could also build your own streaming machine with a Raspberry Pi.
You'll need a Raspberry Pi 3 or better, a case, heat sinks, a micro SD card, a micro USB charger and cable, an HDMI cable, and some sort of controller. You can use a game controller, TV remote, or a mouse and keyboard, just so long as they are Raspberry Pi compatible.
Add your heat sinks and assemble everything in the case. Install your chosen operating system, something like Raspbian or whichever version of Android your Raspberry Pi is compatible with. You'll also need something like Raspicast to facilitate streaming. Once you've installed your software of choice, you can download and log into your streaming apps, then you're off to the races.
Keyboard computer
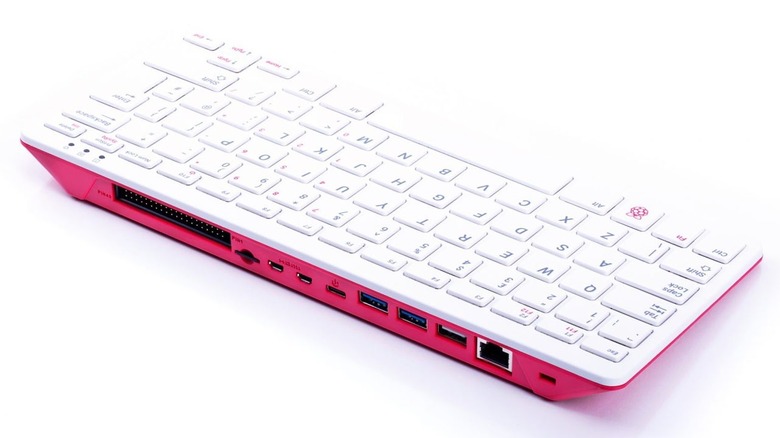
One of the key advantages of the Raspberry Pi is its tiny size. It's a computing solution you can literally fit in your pocket, or inside of a keyboard. In fact, Raspberry Pi offers a self-contained computer keyboard called the Raspberry Pi 400. It features a Raspberry Pi 4 with a quad-core 64-bit processor, 4GB of RAM, wireless connectivity, USB ports, and access to the GPIO pins in case you want to add modules or components down the line. The kit also comes with a mouse, power supply, HDMI cable, and an SD card preloaded with the Raspberry Pi OS.
If you want to go the DIY route, you can build your own keyboard computer using a Raspberry Pi, a couple of Frankensteined keyboards, and a few other basic tools. Instructables user crkjak2001 tucked a Raspberry Pi 5 inside a chunky old Mitsumi keyboard, with plenty of room to spare.
In addition to the Pi and the old keyboard, they used a flexible USB keyboard, a USB hub, a rotary tool, marker, sandpaper, and tape. You'll begin by disassembling your old keyboard and removing its guts. Keep the shell to house your contraption. Figure out where you want to mount your Raspberry Pi and cut away any excess plastic with the rotary tool. Mount your Raspberry Pi, connect the new USB keyboard, and button everything back into place. The results are guaranteed to be less elegant than the Raspberry Pi 400, but more satisfying.
Retro gaming rig
Nobody would claim a Raspberry Pi can keep up with more powerful modern computers, but they are perfect for recreating the gaming technologies of yesteryear. Using a Raspberry Pi and some creativity, you can create a retro gaming machine capable of playing all of your favorite Atari, NES, SNES, N64, and Sega games. It's an entire arcade you can fit inside your pocket.
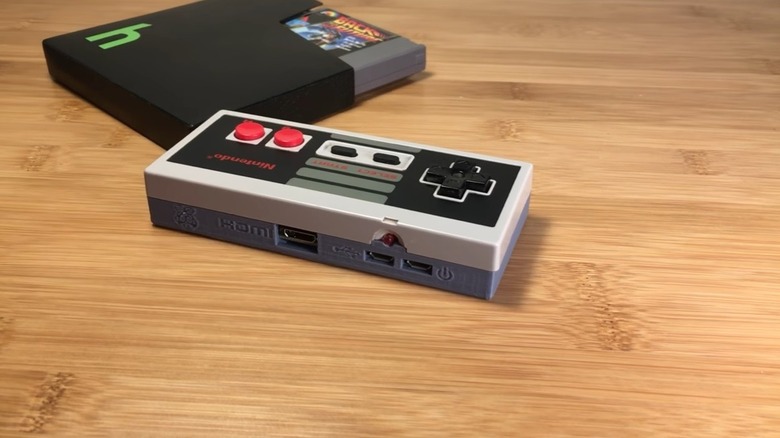
This project from Howchoo tucked a Raspberry Pi Zero inside an old NES controller for what is possibly the coolest retro gaming setup we've seen in a while. You'll start by taking your controller apart and tossing the bottom half. You'll be swapping it out for a 3D printed replacement with a little bit more breathing room. Cut the wires leading from the NES buttons and solder them to the Raspberry Pi Zero's GPIO pins. Later, you'll be able to map those pins to the appropriate controls using the RetroPie software.
Once everything is wired and mounted, you can close the case and screw it back together. Plug in the power supply, run and HDMI from the controller to a TV or monitor, and you're set. Of course, no one says you have to build your gaming rig into an NES controller. Tuck it into an ordinary box case or stick it inside whatever piece of retro tech you love most.
Minecraft server
Minecraft remains the highest selling video game of all time and much of that popularity comes from its flexibility and multiplayer options. You can play couch co-op with friends or link up online but if you want a private space to play, you'll need a server of your own.
You can pay a monthly fee to host your own server or you can make your own with a Raspberry Pi and run everything off your home network. You'll want a Raspberry Pi 3 or better with at least 2GB of RAM to be able to run the software and handle hosting the game and it's worth noting that all traffic will run through your network. You'll want to take that into account if your ISP has usage limits.
It's also worth mentioning that your Raspberry Pi server won't be as powerful as one that you pay for. You may not be able to host as many players but it also won't cost you anything after the initial investment. This is one of the simplest projects you can do with a Raspberry Pi, all you'll need is a micro SD, ethernet cable, power supply, and a keyboard and mouse. Check out our guide for setting up your very own Raspberry Pi Minecraft server.
Personal cloud storage
In the old days, we kept all of our files on disks or drives at home, school, or the office. If you needed to move a document from one place to another, you had to copy it onto a portable drive and physically move it. These days, cloud storage allows us to access our files from anywhere by keeping them on a remote server. Platforms like OneDrive and Google Drive allow users to keep files in the cloud and access them from any compatible device. A Raspberry Pi lets you create your own cloud storage.
You'll need a Raspberry Pi, a Micro SD card, and an external hard drive to house all of your files. Start by installing the Raspbian Raspberry Pi operating system. You'll need to change some configurations and update some packages before installing the Owncloud software. Mount the hard drive, login, and you'll have access to a private Owncloud server to store and retrieve your files from anywhere.
Digital calendar
We've all got too much going on and could use a better system for keeping track of all of our upcoming appointments. A wall calendar can help, but space for writing down appointments is limited and they're only useful if you're at home. Using a Raspberry Pi and an old TV, tablet, or computer monitor you can create a digital wall calendar you can access and update from anywhere.
This project uses Google Calendar, which is easily accessible, free, and syncs across devices. You'll be able to make updates from your phone or computer and see them on your digital home calendar. You can even create a shared calendar with family and friends to keep up on everyone's activities and keep the crew on the same page.
All you need is a Raspberry Pi, a micro SD card, power supply, ethernet cable, and a screen. You can set up your calendar to open at start up so that it triggers automatically anytime you turn your Raspberry Pi on. Mount it to the wall or tuck it inside a custom frame and you'll have the perfect calendar for managing your life.
