10 Settings You Might Want To Change In Your iPhone Email App
You'd think the only functions worthy of notice in Email Land are type and send, but the iPhone mail app begs to differ. The devil is in the details, and the email settings on an iPhone offer a decent suite of options that tailor your email experience to your style. Some mimic the likes of a digital mom, reminding you to respond or follow up, while others are more oriented toward organizing and sustaining your inbox and notifications. You can even change your default email app on your iPhone.
The cherry on top is the fact that each of your email accounts can be set in different ways, making it extremely easy to manage personal and professional mailboxes without added chaos. And as with most other iPhone apps, privacy settings are within your control to ensure you don't leave a data trail the length of the Great Wall. Before you try out any of the features in this list, though, make sure you're updated to the latest iOS software so you won't find yourself looking for features that don't exist on older versions.
Customize email signatures for all accounts
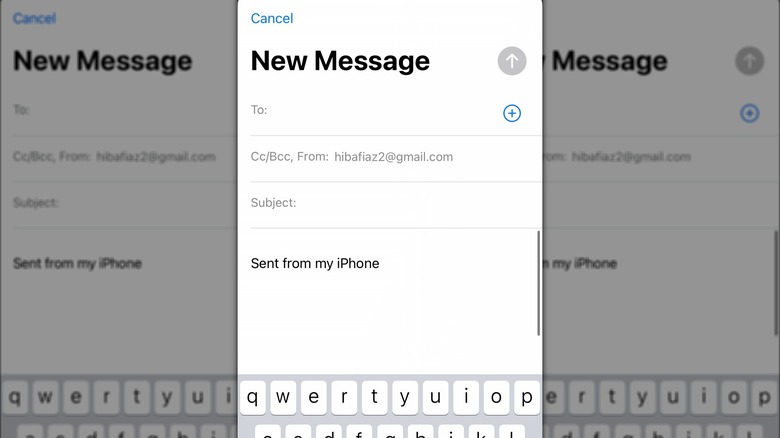
Signing a professional email with "Sent from my iPhone" feels a lot like showing up to a black tie event in Crocs. Changing your email signature does wonders for digital communication, lets bits of your personality peek through, and leaves a nice first impression. Whether you run a small business or are a student or an employed professional, a solid signature is a necessity.
You can customize your email signatures for all of your email accounts separately — think sleek and polished for your work email, a dash of humor or a quick tagline for your personal email, and so forth. You also can add another email address to your iPhone's Mail app if you don't have multiple ones.
The Signature option can be found under Composing in the Mail settings, and the Per Account button will let you customize your signatures for different email accounts. Upon testing, we didn't seem to find a word limit to the text field provided, so you don't need to force in acronyms if you don't want to. And if you can't think of anything or aren't interested in a signature, you can just erase the previous text and leave it blank.
Change swipe options on an email
"Swiper, no swiping!" — well, unless you're an iPhone user. Almost every app on the iPhone makes good use of swipe, and it is an iPhone gesture you should master. Sometimes it's to delete something, sometimes to pin, and other times to entirely move an item — a flick opens up a pool of possibilities. The Mail app on your iPhone is no different, except it's a little bit of an overachiever in this department and has a decent arsenal of swipe features.
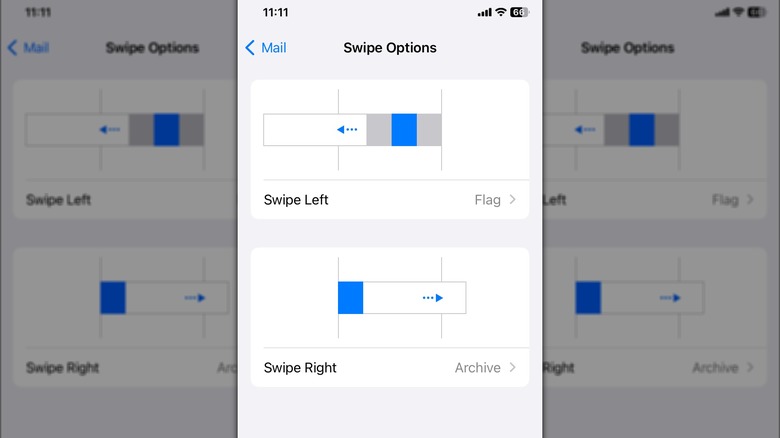
Different accounts on your Mail app will show different swipe options. For example, the Gmail account we tested on our iPhone shows that a quick swipe to the left on an unread email in your inbox displays three options: More — which opens a pop-up list of extra choices — as well as Flag and Archive. Swiping right presents two more options: Remind Me and Read. If you swipe all the way left or right, the option on the rightmost or leftmost is automatically performed.
The option to alter what function swiping performs is readily available in Swipe Options under Message List, where you can pick from choices like Move, Archive, and None. Unfortunately, these changes are implemented on all your email accounts and you cannot make customizations for each account individually. You are, however, allowed to switch from Archive to Delete for each account separately by going to Accounts > Select account > Account > Advanced, and choose from Deleted Mailbox or Archive Mailbox.
Set your email preview length
This one's bound to be a crowd-pleaser, because let's be real; most of us would rather read a message or email in preview mode than actually open and respond to it right away. Email previews are a nice blend of productivity and procrastination — you can sift through to decide what's important enough for your full attention and what can be dodged as spam. Most importantly, you can avoid that all-too-familiar "Sorry, I opened your email but completely forgot to reply" moment (and we'd all love to retire from that).
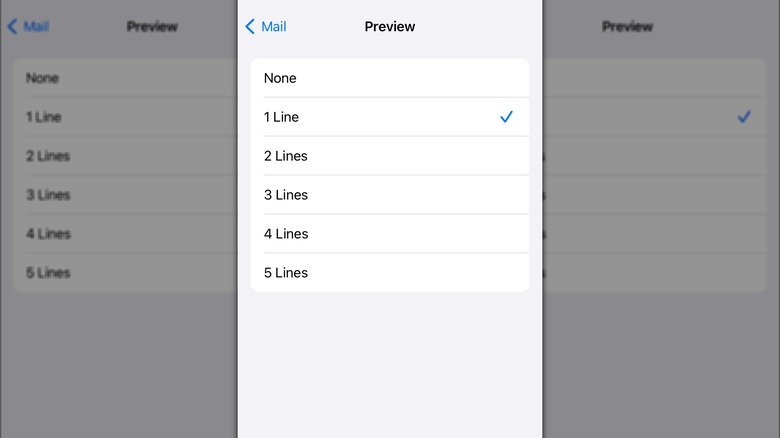
On the other end of the spectrum are the brave souls who'd prefer to forgo previews and stick to the subject line only. Either way, you can see 2 lines of text for each preview by default — something easily changed. Apple, ever the champion of choice, the pioneer of preference, lets you call the shots from the Preview feature under Message List. You can choose up to 5 lines of text for each preview or select None for nothing at all. Your inbox, your rules.
Never miss replying to an email with Remind Me
While we're still on the subject of avoiding the infamous "forgot to reply" situation, let's throw in the Remind Me feature to add another layer of security. In a busy meeting, having your lunch break, or just dealing with an overwhelming inbox in general? This one is definitely a must-have in your toolbox.
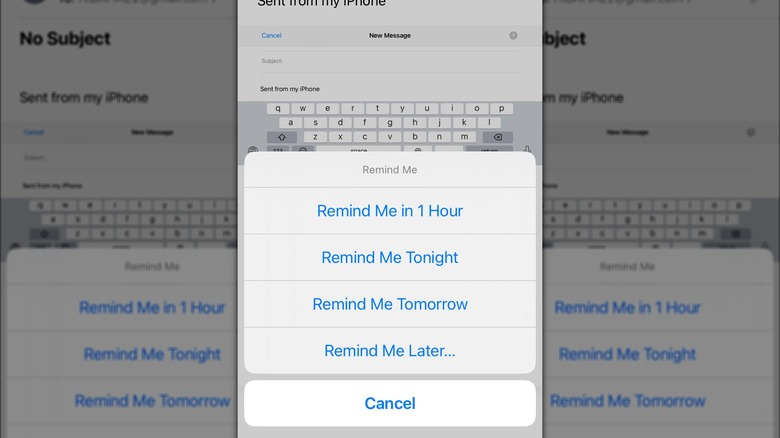
All you have to do is open the email you want a reminder of, then tap on the reply button at the bottom. You'll notice that Remind Me is the very first option you will see on the list. When you tap on it, a pop-up presents you with four different timeframes: 1 Hour; Tonight (where a reminder is set for 9 p.m. local time); Tomorrow (sets it for 8 a.m. local time), and Later, which lets you manually set a date and time for your reminder, no matter how far you want it to be.
If you choose Tonight or Tomorrow, you can tap the Reply button again and select Edit Reminder to alter the default timing. (I mean, who really wants to wake up at 8 a.m.?) And if you don't even want to open the email, you can swipe right on it, hit the Remind Me button and choose there.
Protect your email activity
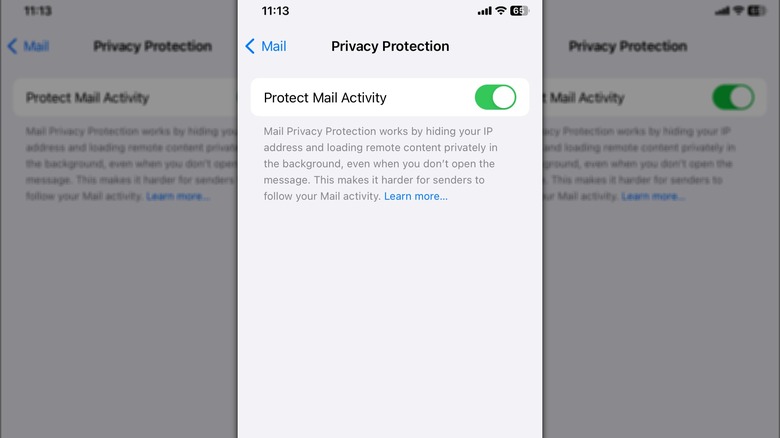
Since 2021, Apple has taken strong steps to redefine the rules in the privacy and confidentiality handbook, even if it ruffles a few corporate feathers along the way. At the expense of an ensuing backlash from ad agencies and marketing moguls, features like the iPhone's privacy-enhancing App Tracking Transparency and private browsing are part of the mainframe today. Mail Privacy Protection is the email counterpart of this regime, and the toggle for Protect Mail Activity can be found under Privacy Protection. Make sure it's toggled to the right and there's green to the left of it.
Did you know that just by opening an email, you might be handing over a heap of information to the sender, whether you realize it or not? How many times you've opened their email, if you've forwarded it to anyone, even your location and IP address — it's practically an all-you-can-eat buffet for data-hungry marketers, giving them all the puzzle pieces they need to build a profile of your digital habits and use it to their liking. Enabling the toggle prevents all of this from happening and lets remote content load in the background instead of when you open the email.
Customize notification settings for emails
There are people glued to their email inbox like it's 2005 because "the socials" are too baffling, and then there are people who live life with the perspective that email is as outdated as a flip phone. No matter which end of this wild spectrum you fall on, you'd be wise to tweak your email notification settings to reflect it. Otherwise, you might have a flooded inbox because of the new richie-rich scheme from that Nigerian prince — which you actually can block on your iPhone mail app.
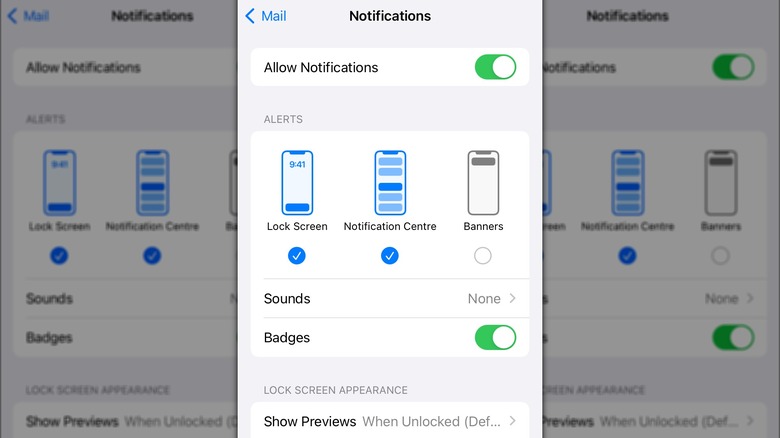
Once you open Notifications under your Mail settings, the Alerts section shows Lock Screen, Notification Center, and Banners. Other options like Banner Style, Sounds, Show Previews, and Notification Grouping can also be altered by a quick tap. What makes this really efficient is the option to enable or disable Alerts and Badges for each email account separately, and you can do so by selecting Customize Notifications at the bottom of the screen.
Apart from the Settings app, there are a couple of important tweaks you can make from the Mail app itself, although these pertain more to individual emails or threads rather than your email accounts as a whole. When you open an email and tap on the arrow from the toolbar at the bottom, a pop-up with multiple different options appears on your screen where you can choose Mute or Notify Me accordingly.
Push, Fetch, or Manual?
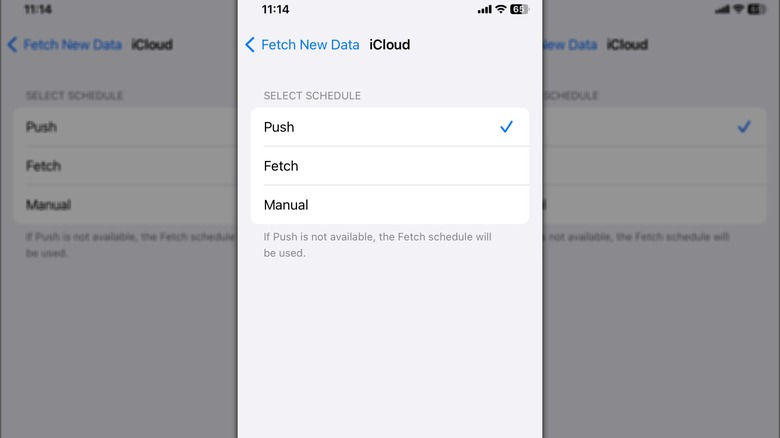
No, we didn't just shake up a dictionary and pull out three random words. These terms actually indicate three choices you can make when deciding when and how often your inbox receives new emails. The terms are pretty self-explanatory but before we delve into them, it's important to note that some email providers like Google and Yahoo do not offer the Push option. If you want to look at what options are available for each of your accounts, go to Accounts > Fetch New Data and have your pick.
Push is kind of like a personal email butler on standby — your emails are "pushed" to your inbox as soon as they hit the server so you're provided with real-time updates, prioritizing efficiency and productivity. Fetch, on the other hand, is more like that laid-back buddy who checks in every once in a while — your iPhone will look for new emails and "fetch" them to your inbox after a specific time interval that you can choose (specifically 15, 30, or 60 minutes), prioritizing battery life and reduced distractions. Manual is another step down the ladder where updates are processed only when the app is in use. What you choose is based entirely on your preference.
Undo send delay
This may be a personal bias, but there's just something about typos in an email that makes you cringe a little, right? Imagine sending one with "pubic" instead of "public" — pure embarrassment, that one. And as mortifying as it is to be on the receiving end of that email, being the one who sent it is just grounds for getting locked up behind bars.
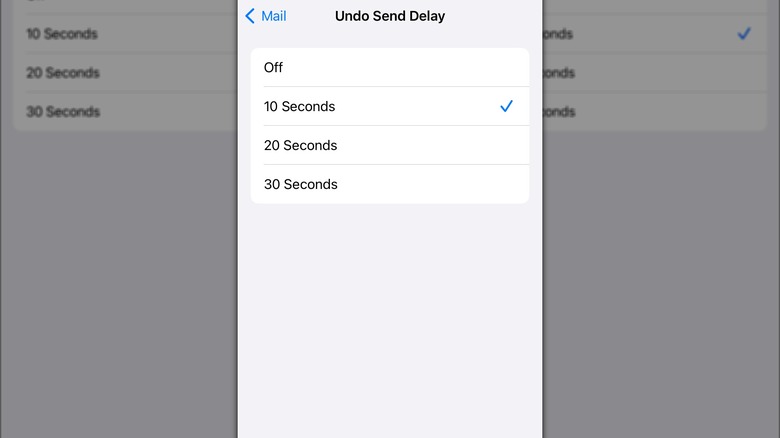
Contrary to popular belief, though, all is not said and lost once you tap on that send button. You actually get an insanely long 10 entire seconds to tap Undo Send at the bottom of the Inbox to halt the sending process. Sounds like plenty of time, until you have to sneeze, check a notification, or, well, blink. But you can increase the amount of time you have to prevent a "pubic" humiliation from taking place. Undo Send Delay is found at the bottom of your Mail Settings under Sending, and you can choose among 10, 20, or 30 seconds (or Off if you just happen to like permanently dangling a foot over the edge).
Customize follow-up settings
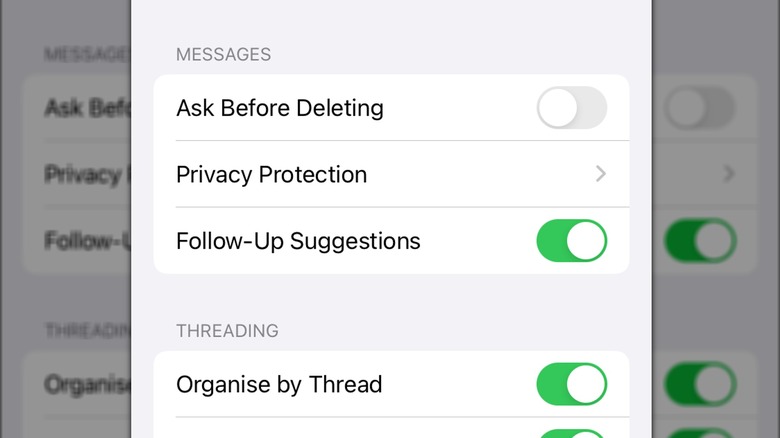
Released with iOS 16, Follow-Up is a feature to help you stay on top of the large pile of emails you've sent and may have forgotten about. It will ensure that nothing slips through the cracks — especially all those emails you sent into the abyss, waiting to hear back from but totally forgot about in the meantime. You won't see the Follow-Up button on all your sent emails, though. Apple uses an algorithm to determine whether an email includes a question or is awaiting a response and shows you the Follow-Up option for those emails only. Once you press on it, a new email addressed to the same recipient opens up.
You can toggle Follow-Up Suggestions on or off in your main Mail settings. For those who prefer a more streamlined, organized inbox, it's worth noting that emails identified as requiring a follow-up are automatically moved to the top after a few days, so you might just want to opt out of this one, remain blissfully unbothered, and check out this simple iPhone email trick to help organize your mailbox further. However, people unfortunate enough to have a job description that demands annoying others with relentless reminders will thank Apple for the extra help.
Include attachments with replies
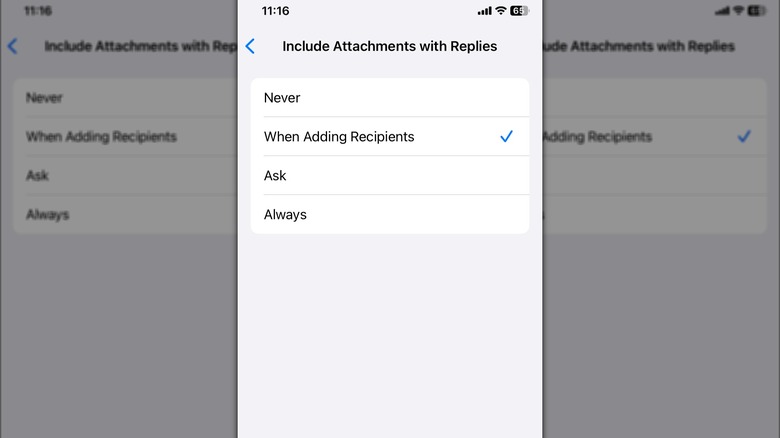
Tucked away in your list of Mail settings is a little feature labeled Include Attachments with Replies. Upon opening it, choices like Never, When Adding Recipients, Ask, and Always are listed. What it does is quite simple; when you're replying to an email that has one or more attachments, it lets you choose whether you want the attachments to be included in your reply. If you're replying to emails and only see the ghostly names of attachments instead of the actual attachments, chances are you've ticked Never on this list.
While Never and Always are two extreme ends on this scale, When Adding Recipients and Ask tend to be the most frequent choices for those sending emails often. The former ensures that all new folks on the email will be able to view previous attachments while the usual suspects won't get bombarded with repeat images or documents in every reply. Pretty much the Goldilocks choice — not too cold, not too hot: just right. The latter is a perfect choice for when you just can't seem to decide whether to share or spare; when in doubt, just Ask.
