How To Clean And Prepare Your Laptop Before Selling It
We may receive a commission on purchases made from links.
Isn't it annoying when you're in the middle of writing an urgent report for class and your outdated laptop just freezes on you? If this happens more often than you'd like, then it's likely already due for replacement. However, don't rush to the nearest big-box retailer just yet. There are five important questions to ask before buying a new laptop — what specs you need, what OS to go with, how long you plan on using it, whether you'll use it for gaming, and whether you're after a connected ecosystem with your other devices.
Once you've decided on the type of laptop you want, you can then go ahead with selling your old one to help cover a part of the cost. But don't make the mistake of just throwing it in a box and sending it off. You first need to make sure it's clean — both physically and digitally. You definitely don't want your buyer to see dirt and grime on it, nor do you want your personal files and information exposed for anyone to see. We'll guide you through the steps to clean and prepare your laptop for selling.
Step 1: Clean your hardware
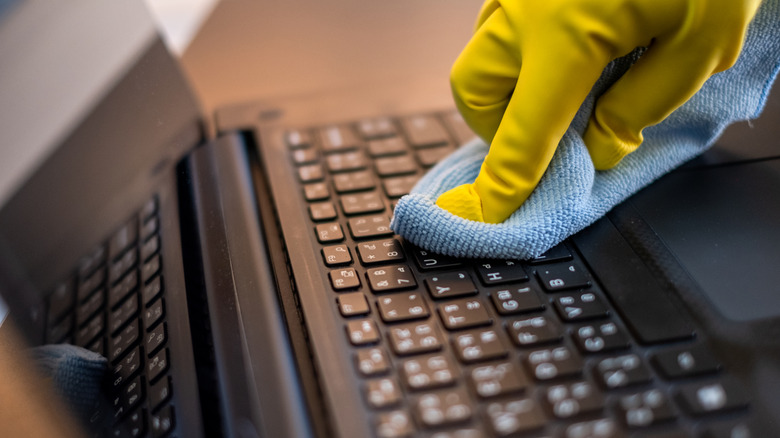
Naturally, you'll want your laptop to be presentable in pictures and in person, so it's a must to clean the hardware. Regular cleaning is one of the top computer maintenance activities you should already be doing to keep your device running in tip-top shape. If it's your first time cleaning your laptop, though, there are a few things you need to keep in mind.
To start with, consider the materials you'll be using. For the exterior, microfiber cloths, instead of typical paper napkins or abrasive towels, are widely recommended since they're soft and won't easily scratch your hardware. For the crevices and air vents, you can use a brush with soft bristles and a bottle of compressed air. Don't use a vacuum cleaner to prevent unnecessary static electricity that can compromise your sensitive components. If you opt for compressed air, keep the nozzle at a safe distance from the hardware and make sure you're blowing the debris away from the computer. For the liquids, it's safe to use water, special screen-cleaning solutions (no alcohol, laundry detergents, and harsh kitchen cleaning agents!), or diluted white vinegar to remove tough grime on the exterior. However, they shouldn't be sprayed directly onto the hardware. Here's a quick step-by-step guide on cleaning your laptop:
- Unplug your laptop from the charger and power it off.
- Remove the battery and any external components, such as USB keyboard and mouse, LAN cable, HDMI cable, and SD cards.
- Use the microfiber cloth to remove visible dirt from around the laptop, including the screen, keyboard, and body.
- Clean the surfaces and crevices (especially the fans and vents, where dust typically accumulates) with your brush or compressed air.
- Gently wipe the surfaces with a lightly dampen (not dripping wet) microfiber cloth.
- Remove any extra moisture with a dry and clean cloth.
After cleaning your laptop, let it sit to air dry with the screen open. Then, you can turn it on to test it.
Step 2: Back up your data
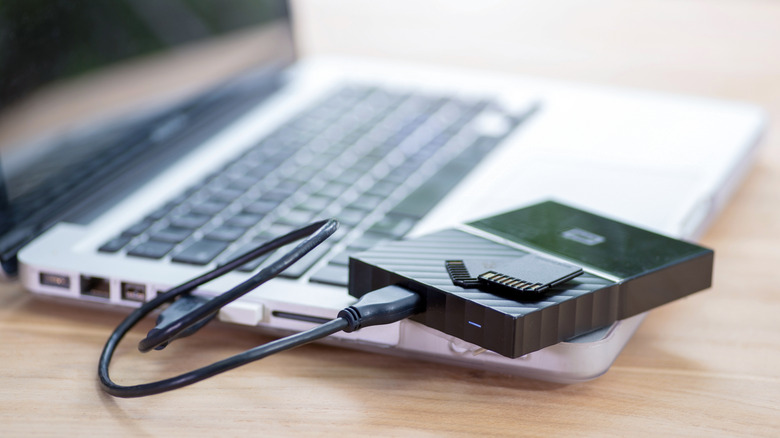
You'll definitely need all the files from your old laptop on your new computer, so before erasing the laptop clean, it's crucial to back up your data first. The easiest way to do so is by manually copying your files over to an external drive. However, if you also want to save your installed apps and settings, you can use your laptop's built-in backup tool — Windows Backup for Windows and Time Machine or iCloud for MacBooks. Here's how to use Windows Backup:
- Make sure you have enough storage in your OneDrive as this is where the backup will be stored.
- Sign into your Microsoft account from Settings > Accounts > Your info.
- Open the Windows Backup app.
- Customize the folders, apps, settings, and credentials you want to have a backup of.
- Press Back up on the bottom to begin the process.
This may take a while, depending on how large your data is. To check the progress, simply press the down arrow in the Windows Backup app to see which files have already been backed up and which are still underway. If you have a MacBook instead of a Windows laptop, follow these steps to back up your data with Time Machine:
- Plug in an external drive to your MacBook. This will serve as the storage for your backup.
- Press the Apple menu on your laptop.
- Navigate to System Settings > General > Time Machine.
- Click on "Add Backup Disk."
- Input your password to proceed.
- Press "Modify Settings."
- Select your external drive from the available options.
- Hit "Set Up Disk."
- (Optional) Encrypt your backup by enabling "Encrypt Backup" and setting up a password and hint.
- Press "Done."
Your external storage will then be prepared for the backup, and you should see the backup process automatically start once the drive is ready. If you prefer to keep your backup in a cloud storage, you can also back up your Mac using iCloud.
Step 3: Remove the licenses for your paid software
If you have any paid apps installed on your laptop, make sure to remove them. This way, you won't breach any license (since most paid software can only be used on one device), and it should allow you to transfer the software license to your new laptop. The process is different for every app, though, so it's best to check the vendor's official support pages or contact their customer support to know how to remove and transfer the license. However, this generally involves either deactivating the license from the app on your laptop and signing out of the app, and then uninstalling it from your device.
For Adobe apps, all you need to do to deactivate the software license is to sign out of the specific app. In the app, go to the Help tab and press Sign out. If you're using Microsoft Office 365 apps, you just need to sign out of the app too. Launch any Office app on your laptop, click on Account found on the bottom of the home page, and select Sign out. Uninstall the apps from your laptop to avoid any issues. Then, simply sign in to the Adobe or Office app on your new laptop to activate the license again.
Step 4 (for Windows with removable drives): Take out the laptop's drive
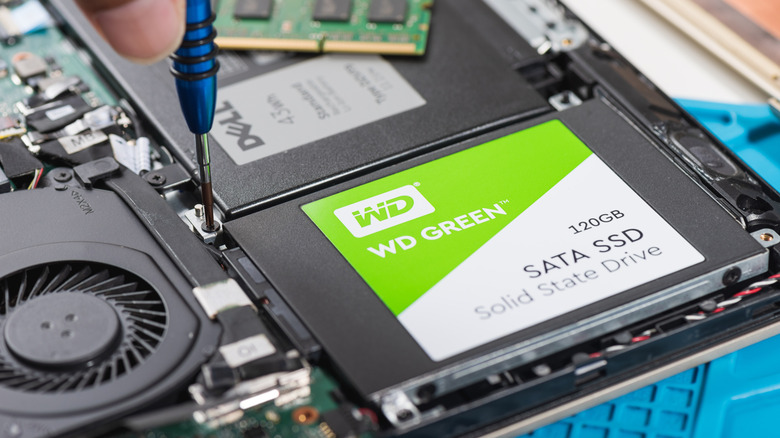
With your files safe in a backup, the next step is to take out your laptop's storage drive. This is arguably safer than just wiping it, since some data recovery tools can still retrieve information even from a formatted drive. Simply formatting and reinstalling the OS doesn't 100% guarantee that your files and information are gone, so to avoid any risk of recovery, it's better to hang on to the drive itself. You can then sell the laptop without the drive (make sure to inform the buyer, though) or get a new drive for the laptop and install a fresh OS on it. If you're unsure how to do this yourself or don't want to mess around with the hardware, you can take it to an authorized service center or local repair shop and let them handle the rest. However, if you want to save, here's a general guide on how to take out your laptop's storage drive:
- If you have a removable battery, DVD drive, and rubber feet, remove them.
- Take out all the screws from the back. Make sure to look for hidden screws in the removable battery slot, DVD drive slot, and under the rubber feet.
- Gently pop open the backing with a pry tool. You can also use something thin but sturdy like a card as long as it fits through the seams.
- Unscrew the drive from the laptop.
- Disconnect the storage drive from the connector on the laptop.
- Remove the drive's holder, if it has one.
- (Optional) Place a new drive in the holder.
- Screw the drive's holder back on the laptop.
- Use compressed air to clean any dust off from the boards. Make sure not to blow too closely to the components.
- Reinstall the backing.
You can now store the drive in a secure place or destroy the drive for peace of mind. If you replaced the drive with a new one, install a fresh Windows OS using a USB stick.
Step 4 (for Windows with non-removable storage): Wipe your data
Some Windows laptops are, unfortunately, equipped with non-removable storage drives. In such cases, you can't simply unplug them without destroying the entire device. What you can do instead is wipe the drive. No, this doesn't involve basic formatting and OS re-installation. Wiping a drive clean means securely erasing it. When you secure erase the drive, all your data is effectively deleted as it is overwritten with zeros or random data. The drive then becomes impossible to recover, keeping your personal files and information safe.
Before you secure erase your drive, retrieve the Windows product key of your laptop first. This is an important step if your laptop came with Windows pre-installed. You'll need this product key to reinstall Windows later. Open up Terminal and type:
wmic path softwarelicensingservice get OA3xOriginalProductKey
Then, take note of the value that pops up. Now, to secure erase your non-removable drive, turn to the support pages of your laptop's manufacturer. Many brands offer a built-in secure erase feature to make the process more accessible to you. For instance, certain Lenovo, Dell, and HP laptop models can be secure erased through the BIOS. Microsoft Surface laptops, on the other hand, require an external USB for the erasure. Once you've followed the manufacturer's instructions on how to secure erase your laptop, you'll end up with a device with no data and no operating system. You would now need to reinstall Windows using a bootable flash drive. Here's how to do so:
Create a bootable Windows installer flash drive on a different computer:
- Download the Windows Installation Media from the Microsoft website.
- Run the download EXE file.
- Accept the notices and license terms.
- Choose your preferred language and Windows edition.
- Select USB flash drive as your media.
- Plug in your USB drive. Make sure it has a capacity of 8GB or more.
- Press "Refresh drive list" for your drive to appear.
- Click on your USB drive to start the process.
- Wait for the USB drive to be ready before disconnecting it.
- Insert the bootable drive in your laptop.
- Turn on your laptop.
- If it doesn't automatically boot to the Windows Setup screen, shut down the laptop and turn it on again. This time, go to the BIOS and set the USB drive as the first boot option. Don't forget to save before exiting the BIOS.
- Wait for your laptop to reboot to the Windows Setup screen.
- Follow the on-screen instructions.
- When prompted, type in your product key and select "Custom: Install Windows only" as the type of installation.
Once the installation finishes, your laptop will restart. Simply turn it off to let the new user configure the Windows by themselves.
Step 4 (for macOS): Erase your data
Unlike most Windows laptops, newer MacBook models come with the storage drive built into the motherboard, so you can't readily take it out. The good news, however, is that these models automatically encrypt the storage drive, thus making your data unrecoverable when wiped. You can then use the Erase Assistant, a preinstalled app on macOS Monterey 12 and later, to erase the data on your MacBook. Erase Assistant automatically performs a factory reset on your MacBook, meaning it logs you out of Apple services and deletes all the data, settings, user accounts, and volumes. The app also disables Find My and Activation Lock to remove the MacBook from your Apple account. Here's how to use Erase Assistant:
- Cancel your AppleCare subscription if you have one:
- From the App Store on your MacBook, navigate to [your name] > Account Settings.
- When prompted, enter your Apple ID credentials.
- Scroll down until you find the "Subscriptions" option.
- Press "Manage."
- Select "Edit" next to your AppleCare plan.
- Click on "Cancel Subscription."
- Choose "Confirm" on the popup to proceed with the cancellation.
- Back on your home screen, click on the Apple menu.
- Go to System Settings > General > Transfer or Reset (or simply System Preferences on macOS Monterey 12).
- Press the "Erase All Content and Settings" option.
- Type your password to proceed.
- Hit "Unlock."
- Press "Continue" on the summary of the data the app will erase.
- Enter your Apple account password to sign out of Apple Services.
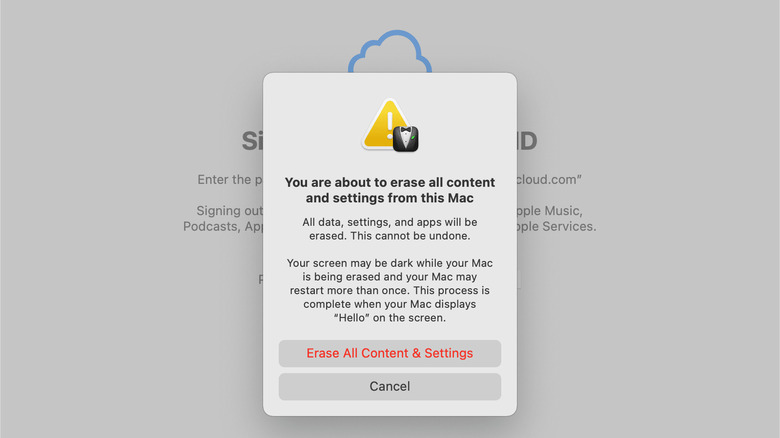
- In the warning popup, select "Erase All Content & Settings."
Your MacBook will then reset, and a progress bar with the Apple logo will appear on the screen. Once the process completes, you'll see an Activate Mac page. Simply press Restart to restart your laptop. When you reach the setup screen, press and hold the power button to turn off your laptop and skip the setup process.
Step 5 (for Windows only): Remove your device from your Microsoft account
While wiping your MacBook with Erase Assistant automatically removes the device from your Apple account, Windows, unfortunately, doesn't do the same. You need to unlink your PC from your Microsoft account manually. Follow these steps to do so:
- In the browser of a different computer or your phone, visit account.microsoft.com.
- Enter your Microsoft account credentials to log in.
- Click on "Devices" on the left side panel.
- Locate the laptop you're selling.
- Press "See details" to open the laptop's info page.
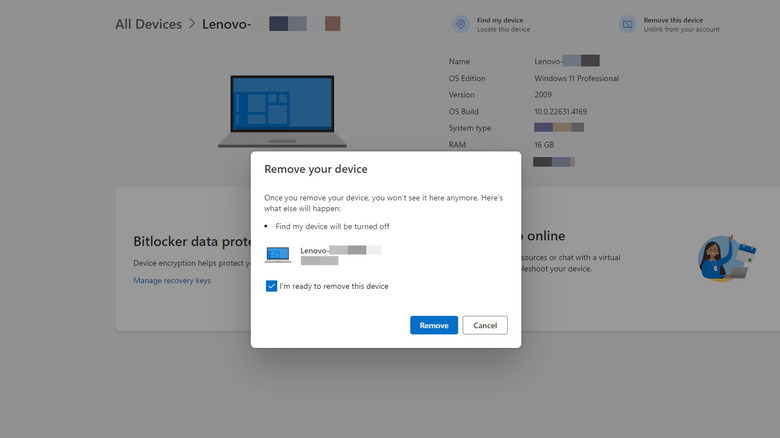
- Hit "Remove this device" in the top-right corner.
- In the dialog box that appears, check the option for "I'm ready to remove this device."
- Press "Remove" to proceed.
- In the Device removed dialog box, select "Remove from Microsoft Store" instead of OK.
- Click "Unlink" next to the laptop you want to remove.
- Choose "Unlink" on the dialog box to confirm.
Once you remove the laptop from your Microsoft account and Microsoft Store, Find my device will be disabled, and the Microsoft Store will no longer count the laptop towards your device limit. This means you can now link one more device to your Microsoft Store (only up to ten devices can be added).

