5 Tips For Editing In DaVinci Resolve 19
Blackmagic Design's DaVinci Resolve has been a trusted video editing and color correction platform for beginners seeking quality equipment, individuals making videos for clients, and professionals on larger-scaled teams alike. Even if its interface takes a bit of time to get used to, the array of features offered by the program, in particular its extensive color grading and audio editing capabilities, make it more than worth the time it takes to get over the learning curve. Users have the choice between downloading the paid studio version that's been used on major Hollywood releases such as "Avatar," "Star Wars: The Last Jedi," and "Top Gun: Maverick" and a free version that is considered one of the best-budget friendly video editing apps out there.
In August 2024, Blackmagic unveiled its most recent set of alterations to its popular editing platform with the release of DaVinci Resolve 19. The list of updates that you'll find in this newest version is massive, to put it mildly. From accelerated proxy generating to cinematic color correction controls to enhanced AI-integrated functions, the new DaVinci opens the floodgates to a whole new world of creative possibilities for content creators and editing teams. Whether you consider yourself a DaVinci pro or have just downloaded the software for the first time, there's plenty you're going to want to explore. To start you off on the right foot, we put together a list of five of some of the coolest new features of DaVinci Resolve 19 and how they can come in handy during your next editing session.
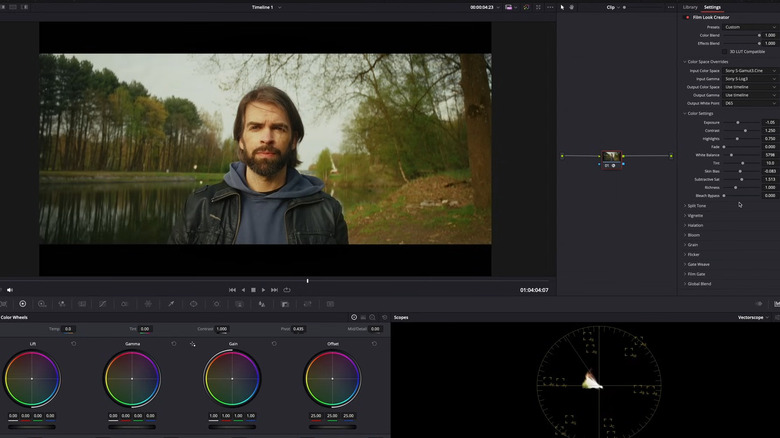
Get a vintage look with the Film Look Creator
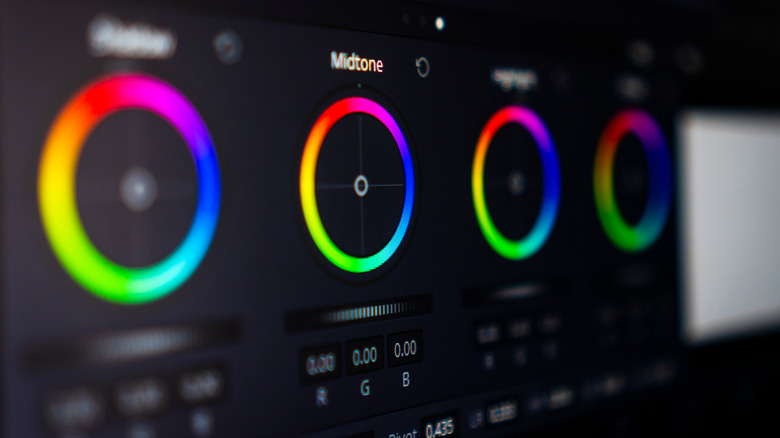
Since its beginning, DaVinci Resolve has been revered for its exceptional coloring capabilities. Blackmagic has taken the color page to another level with DaVinci Resolve 19, with advanced features ranging from enhanced noise reduction to improve image quality to 3D depth matte generation for better control of foreground and background elements.
With the aesthetic of analog film having become a popular trend in recent years, DaVinci has responded with a direct method of achieving this look and feel. The Film Look Creator is among the most talked about new color correction elements from the update, allowing users to mimic the many aspects of film more instantly. While in the past you'd have to manually apply numerous effects to an extensive node tree, now you can simply pull up the Film Look Creator effect and control everything from a simple node. You can use the Color Space Overrides section of the effect to identify the specific setting of your footage. From there, you can adjust everything from white balance to skin bias to subtractive saturation to your desire.
It's important to keep in mind that, like numerous updates that come with DaVinci 19, the Film Look Creator effect is only available to those with a studio subscription. Nevertheless, this is still a worthwhile enhancement that is sure to please plenty of creators.
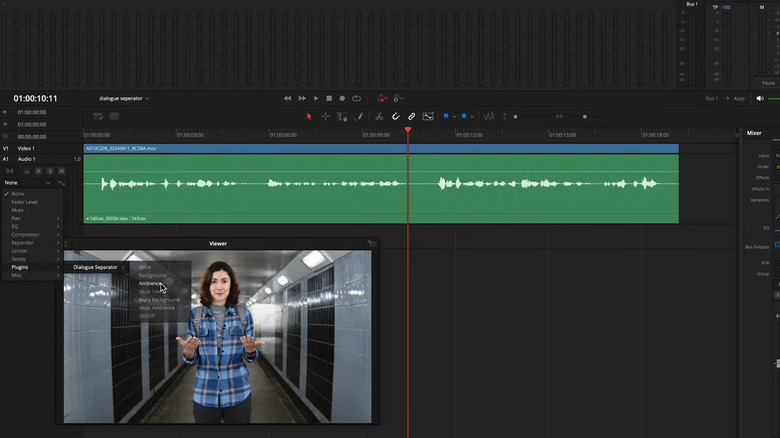
Using enhanced AI tools to edit audio
While Blackmagic has employed artificial intelligence technology to power many DaVinci features since 2019, it's safe to say that the platform's 2024 version has implemented AI in the most efficient and effective ways, particularly with its new audio editing options. For music, there's the Music Remixer, which allows users to see all the different vocal and instrumental elements of a particular track and alter them to your liking. So if you have a song where the drums and bass sound great, but you're not a fan of the vocals, you can simply mute that aspect by unchecking it on the Music Remixer.
There's also Dialogue Separator, which evolves from the already impressive Voice Isolation feature. Whereas Voice Isolation can cut out dialogue so cleanly that you miss the natural ambience that comes from speech, Dialogue Separator lets you adjust or completely mute voice, background noise, and ambience to best suit your mix. You can also go to Resolve's Fairlight page to automate the volume of these individual elements to increase or decrease.
You can use the Ducker to have Resolve automatically sense when one audio track needs its volume lowered to make way for another track. For example, if you have background music that needs to go down when someone starts talking, you can apply the effect to your music layer and have it correspond to the dialogue layer. You can further alter how low you want the music to go and the speed in which it does so. While both Music Remixer and Dialogue Separator are only available in the studio version, ducking works in both the free and paid editions of Resolve.
Using ColorSlice for more natural color adjustments
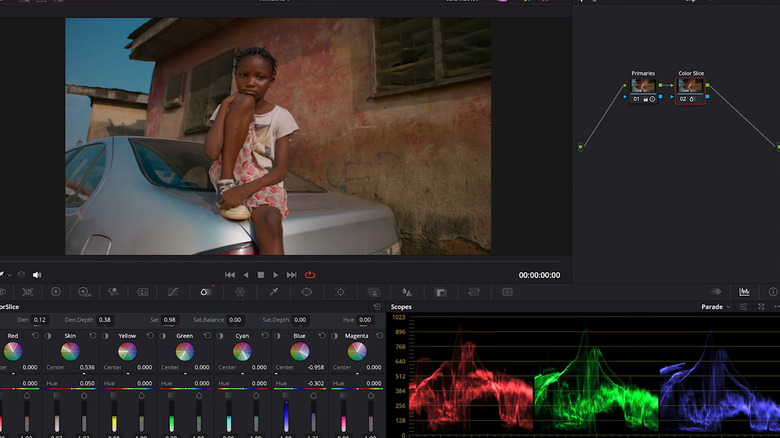
As we've stated before, color correction is one of DaVinci Resolve's claims to fame among the industry. So it should come as no surprise that one of the most impressive updates to DaVinci Resolve 19 is ColorSlice. Similar to Film Look Creator, this function helps give your digital footage a more film-like look. While Film Look is more focused on achieving the textural and lighting aspects of this aesthetic, ColorSlice gives users a fine-tuned way to enhance and adjust the color of their footage.
Located next to the curves section on your color page, the ColorSlice tool contains seven palettes for red, yellow, blue, cyan, magenta, green, and skin. You can specifically see the areas where each palette will affect your clip and go into each one to individually customize the density, hue, and saturation, as well as a global set of controls that let you apply these effects to the entire image. What helps set ColorSlice apart is that it employs a subtractive method to its process, as opposed to other platforms that will simply add on excess color and create a less natural look. Thankfully, this is another innovative feature that can be found on both the studio and free versions of DaVinci Resolve 19.
Auto subtitles to caption videos faster
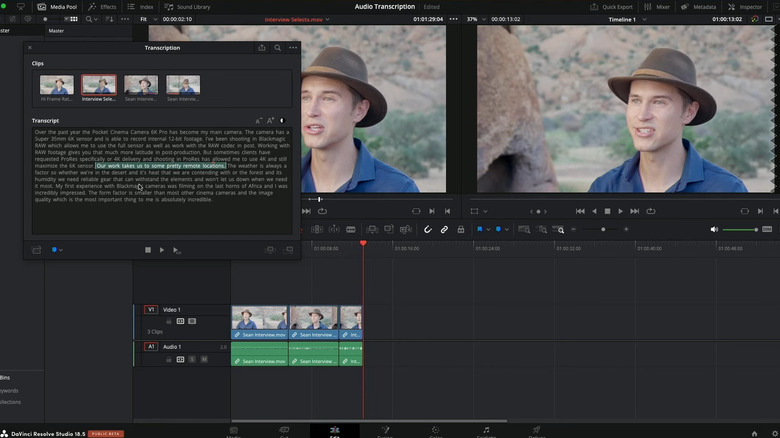
Captioning videos is more necessary than ever before. Along with helping those who are hard of hearing, some may prefer to have their videos muted, especially if watching something on social media where videos are often muted by default. Recognizing this need, DaVinci Resolve 19 has yet another solution to help content creators implement this aspect in an easy and efficient manner.
The automatic subtitle feature uses AI to go over the audio in your timeline and instantly create subtitles that correspond with the speech. The subtitles will show up as their own individual track, which you can go into to further analyze and adjust any words that don't match up, as well as change the font, color, size, and so forth. This feature is also great if you're using DaVinci to edit a podcast or similar audio piece and are looking to make a transcription, as you can choose to export the subtitles as a transcription or embedded captions.
While not always producing the most full-proof, accurate results off the bat, it's still a far superior option to manually adding subtitles and timing them to each section. Sadly, this is another feature only available to those with a DaVinci studio subscription.
Share work using Blackmagic Cloud
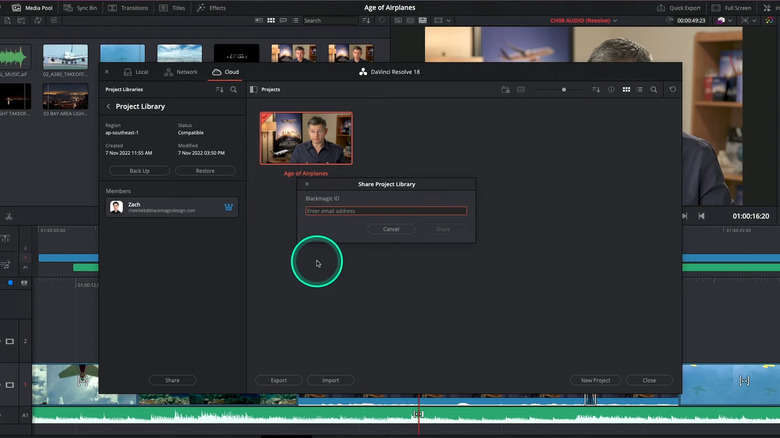
A lack of organization is a telltale sign of a novice editor. Whether you're an individual creating work for a client or are part of a large post-production team, sharing and receiving feedback on your progress is a part of the process that's easy to overlook. Sure, you can send individual clips or even entire files on Google Drive or Dropbox, but the immense amount of time it can take to make certain files compatible and upload or download large items can greatly cut down on efficiency. The newest DaVinci update thankfully addresses this concern with the implementation of Blackmagic Cloud, allowing users to share their projects through a shared project server.
Alongside the Local and Network projects you see on your Resolve homepage, you'll find the Cloud option. After creating a free account on the Blackmagic Cloud website, you can host and share your Project Libraries on the server, with each library costing $5 a month. The good news is that each library can host an unlimited amount of project files, meaning if your team is fine working on multiple files in the same library, you only have one subscription to worry about. You can even adjust the time zone and geographic location to best match where the majority of your team will be working.
While Blackmagic Cloud can be used and shared between both paid and free, those part of larger companies and teams can take advantage of even more advanced features such as the Organizations app, Studio Rental Licensing, and Camera Sync.