Everything You Need For A DIY DeWalt Train Horn
We may receive a commission on purchases made from links.
Ever wanted to be able to make a truly massive sound without much effort? Regardless of what your reason for it is – crowd management, unconventional sound design, DIY experiments with your kids, or just plain fun – you could be in the market for a new noisemaker. If you've got a spare power drill, or don't mind picking one up, you might even have some of what you need lying around to make a DIY train horn at home.
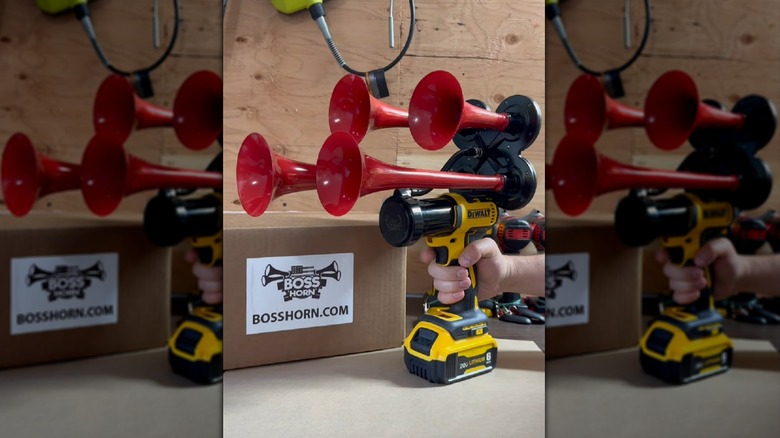
This DIY train horn kit from BossHorn is packed with everything you'd need to transform your DeWalt into a super-powerful, 140 decibel (dB) instrument. It comes loaded with four trumpets, a compressor, an air pipe, a harness, and a remote control plus receiver, alongside all the necessary screws and bolts for mounting it onto your drill. The kit comes in at about $160 — although you will of course need to factor in the price of your DeWalt impact driver on top of that — and is available in black, chrome, or red. (There are also plenty of DIY kits on Amazon to peruse.)
Looking for something a little louder? BossHorn also has an "Extreme Trumpet Upgrade" available, so you can push it all the way up to 150 dB. Just be mindful about noise pollution and any quiet zones, which are sometimes the reason why actual train honks are limited in some areas. Be sure to make use of the wireless remote control, too, so you can trigger the horn from a comfortable distance without running the risk of causing any damage to your hearing.
How to turn your power drill into a DIY train horn
Setting up the DIY train horn kit is relatively uncomplicated, although you're probably going to want to make sure you're not relying on your DeWalt for any other DIY anytime soon. To build your new train horn, you're going to need to unscrew your drill's case, ready to take out a couple of internal components. You might even benefit from using another drill or electric screwdriver for this step. You're going to be taking out the motor, gears, and harness. Cut the motor wires, making sure it's safe to do so by removing any power supply.
Next, you need to connect the terminals to the drill's inner workings and carefully cut the shell with a pair of wire cutters before moving on to the compressor. Cut the compressor down to the right size, then connect its terminals to the ones you fitted in the drill. After that, you can screw your drill back together and reattach the power supply. This is where the fun part comes in – and when it really starts to look like a noisemaker. Grab your four train horns and start working it apart by hand.
This leaves you with a brace, which you can drill holes into for the screws to mount it onto your drill. Again, you'll probably want another drill for this part. You're nearly done at this point. Connect the hose to the brace and your drill and start reattaching the trumpets onto the brace by hand. Now, it should sound whenever you pull the trigger, except instead of sounding like the inside of a woodshop, you'll sound like you're driving a train. But prepare yourself for it being really loud.

