Every macOS Sequoia Window Tiling Shortcut (And How To Use Them)

Windows and macOS let you accomplish your tasks on a computer in largely similar ways, with a few fundamental differences in UI and system behavior thrown in here and there. There are a few apps to consider if you're switching to Mac from Windows — ones that help ease the transition by porting some of the utilities you may have grown accustomed to.
The ability to quickly tile windows by snapping them to either side, or any corner of the screen, dates back to Windows 7. The feature lets you organize apps on your screen without the need to manually resize each one of them. While this functionality is almost taken for granted in the Windows ecosystem, it has been deemed a luxury when it comes to Macs.
For years, macOS users have had to depend on third-party apps like Rectangle to achieve similar functionality. Though these workarounds have served their purpose, the release of macOS Sequoia has finally introduced windows tiling as a built-in feature. There are a few ways to effortlessly snap app windows to different areas of the screen on your Mac, which we will be exploring in this guide.
A convenient way to snap a window on macOS
While macOS Sequoia isn't an overhaul of an update, we have been blessed with some genuinely intuitive additions to the operating system — like the ability to mirror your iPhone on your Mac. Still, nothing comes close to the convenience of the window tiling shortcuts that all Macs now have. The quickest way to snap a window to a certain portion of your display is to click and hold an app by its title bar and drag it to the extreme ends of your screen.
You will notice an animation suggesting the layout of the tiled window when you bring an app to the edge of the display — simply let go of the app's window, and you'll see it automagically snap into place. Currently, macOS lets you tile app windows in several different layouts, including all four corners, side by side, or maximizing a single window by dragging it to the very top.
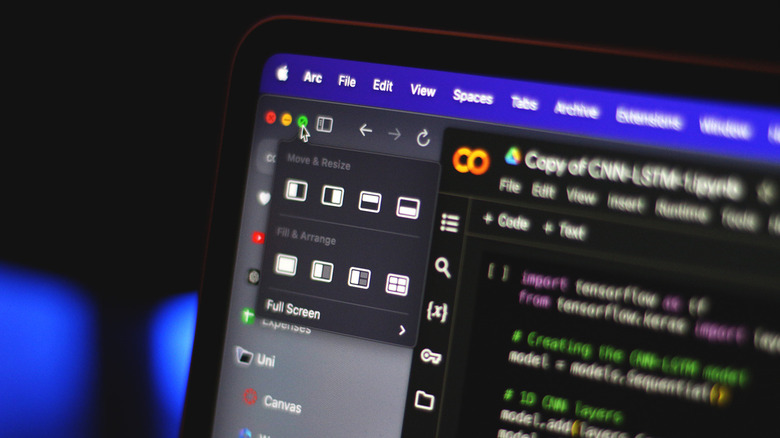
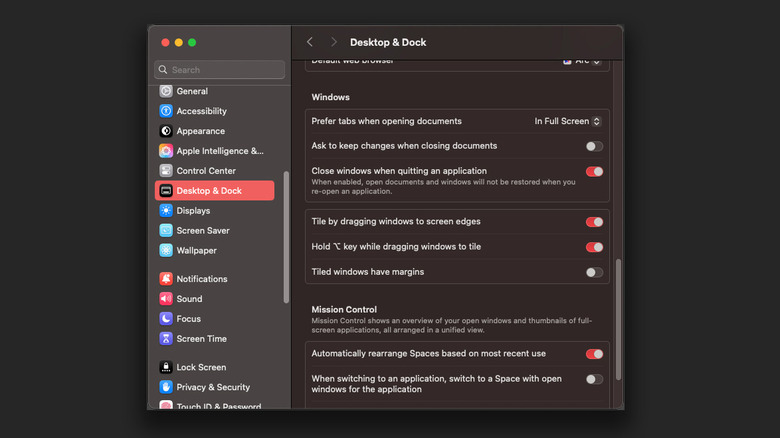
You may notice that these acrobatic gestures might not be the most ergonomic, especially when using a trackpad. Luckily, holding down the Option button on your keyboard will let you snap windows with more ease. You can always hover your cursor over the green maximize button to tile the active window through a pop-out menu, too. If you don't prefer the padding that macOS adds by default, navigate to the Apple menu, go to System Settings > Desktop & Dock, and uncheck Tiled windows have margins.
Do it faster with keyboard shortcuts
There are a few keyboard shortcuts on Mac that will make your life easier, like being able to quit an app or switch between different apps without having to find and click the notoriously tiny minimize button. MacOS Sequoia takes this further by giving you a few keyboard shortcuts to quickly tile windows. Notably, you can hit the following combination of keys to snap windows on your Mac accordingly:
- Fn-Control-F: Fill the screen with the current window
- Fn-Control-C: Center the current window
- Fn-Control-Left Arrow: Snap the current window to the left
- Fn-Control-Right Arrow: Snap the current window to the right
- Fn-Control-Up Arrow: Snap the current window to the top
- Fn-Control-Down Arrow: Snap the current window to the bottom
- Fn-Control-R: Revert the window to its original size
Besides tiling a single app, you can hold down Shift while performing these shortcuts to arrange different windows on your screen. For example, pressing Fn-Control-Shift-Left Arrow will move the active window to the left, and bring the second window to the right. These behaviors change depending on how many windows you have tiled on your display.
Much like this long-awaited addition, with just a bit of digging around, you can discover several other hidden macOS Sequoia features that offer similar levels of convenience.