Windows 11 Search Not Working? Here's How To Fix It

The search function in Windows 11 is incredibly useful for finding almost anything on your PC, whether it's your apps, settings, or locally stored files. Additionally, it allows you to search the web directly from the taskbar. But what if the Windows 11 search suddenly stops working, and you can't use it?
A malfunctioning search function can make it difficult to locate important items quickly and disrupt your workflow. Whether you're unable to open the search bar, seeing no results, or experiencing slow performance, there's no need to panic. It's possible to fix the underlying problem with a bit of patience.
Fixing this issue can be as simple as restarting search-related services or as involved as rebuilding the search index or performing a system restore. Rest assured, the following tips should help you get Windows 11 search working again, ensuring a smooth and efficient search experience.
Start with basic fixes
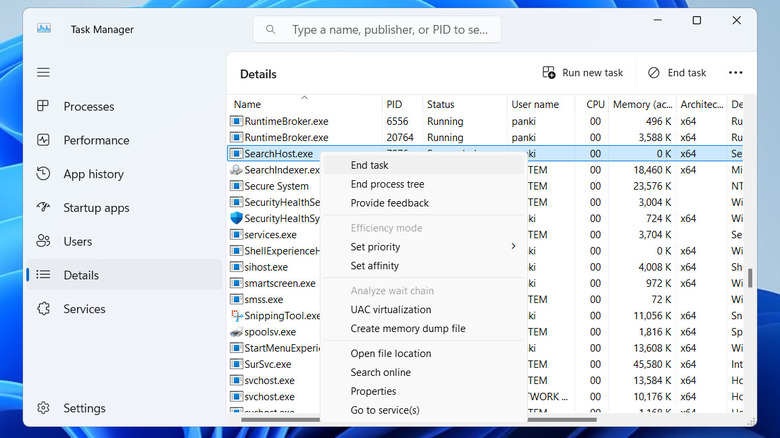
The SearchHost.exe process is responsible for indexing your files and helping Windows find them quickly. If this service is malfunctioning, restarting it may resolve your search issues. To do this, press Ctrl + Shift + Esc to open the Task Manager. Navigate to the Details tab, right-click on SearchHost.exe, and select End Task. The process should force close and restart the program, potentially fixing the problem.
If Windows is not responding when you click the search icon on the taskbar and you're unable to input search queries, the issue may lie with the Windows Explorer process. To fix this, open the Task Manager again and go to the Processes tab. Then, right-click on Windows Explorer and select Restart. Your taskbar will briefly disappear and then reappear, which should resolve any UI glitches affecting the search function.
Sometimes, a buggy or outdated version of Windows can also cause such problems. Hence, it's a good idea to keep your Windows 11 PC up to date. For that, press Windows + I to launch the Settings app, head to the Windows Update tab, and click the Check for updates button. Download and install pending updates and check if that gets the search function to work again.
Configure and restart the Windows Search service
The search function in Windows relies on a system service called "Windows Search." Typically, this service starts automatically every time Windows boots, just like your startup apps, and manual intervention isn't necessary. However, if the Windows Search service is not running as intended, you could experience problems. Here's how to fix it:
- Press Windows + R to open the Run dialog box.
- Type services.msc in the box and hit Enter.
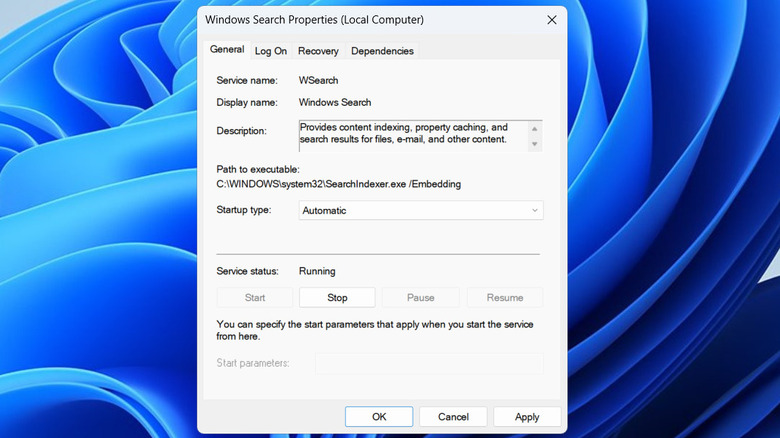
- In the Services app, scroll through the list to find and double-click the Windows Search entry.
- In the Properties window, click the drop-down menu next to Startup type and select Automatic.
- Hit Apply followed by OK.
- Right-click on the Windows Search entry in the Services app and choose Restart. If the service is not running, select Start.
Once you complete these steps, the Windows Search service will run automatically, which should restore the functionality of your search bar.
Configure Windows to search the entire PC and run the indexer troubleshooter
If Windows 11 is struggling to locate only some of your files, it could be because the search function is configured to scan only specific folders and not the entire PC. This limited scope can make it seem like the search tool is not working. To configure Windows to search the entire PC, follow these steps:
- Press Windows + I to open the Settings app.
- Head to the Privacy & security tab in the left pane.
- Under Windows permissions, click on Searching Windows.
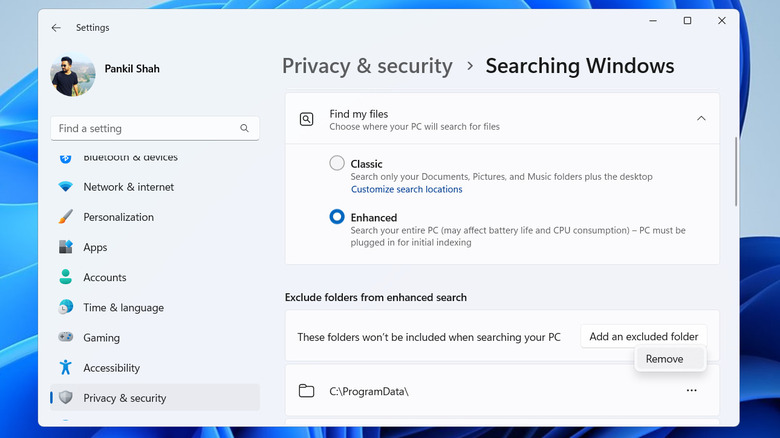
- Expand the "Find my files" menu and select the Enhanced option.
- If you see any folder under the "Exclude folders from enhanced search" section, click the three-dot menu next to it and select Remove.
Once you enable the "Enhanced" search option, Windows will need some time to index all the files on your computer. Following that, you should be able to find any file using the search tool. However, if the issue persists, return to Settings > Privacy & security > Searching Windows and click on Indexer troubleshooting. Here, you can use the checkboxes to select the problems you're experiencing and follow the on-screen prompts to run the troubleshooter. This tool will then attempt to resolve the specified issues.
Rebuild the search index
The search index is a database that Windows uses to speed up searches, and if it becomes corrupted or outdated, it can lead to problems. So, if Windows 11 is taking longer than usual to locate your files or displaying incomplete search results, you can try rebuilding the search index. Here's how to do it.
- Press Windows + I to open the Settings app.
- Head to Privacy & security > Searching Windows > Advanced indexing options.
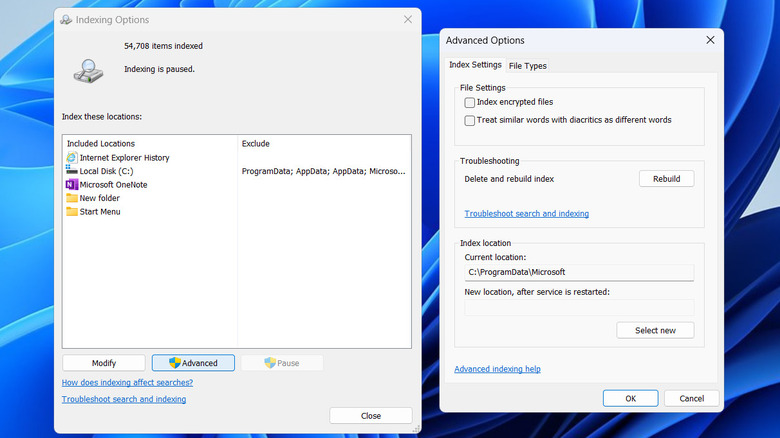
- In the Indexing Options window that appears, click the Advanced button.
- Under the "Index Settings" tab, click the Rebuild button next to "Delete and rebuild index."
- Click OK to confirm.
After completing the above steps, wait for Windows to rebuild the search index. This process might take some time, depending on the number of files on your PC. You can continue using your PC as usual while Windows rebuilds the index. Once the indexing is complete, try using the search feature again to see if it works correctly.
Perform a system restore
System restore is a useful feature that allows you to undo changes made to your PC and revert it to a previous state. So, if you're still experiencing issues with Windows search, consider performing a system restore as a last resort. Before you proceed, note that while System Restore won't affect your personal files, it may remove any apps and drivers installed after the selected restore point. So, make sure you backup any important data and then follow these steps to perform a system restore:
- Press Windows + R to open the Run dialog box.
- Type rstrui.exe in the box and hit Enter.
- Click Next in the System Restore window.
- Select a restore point before the issue appeared and click Next.
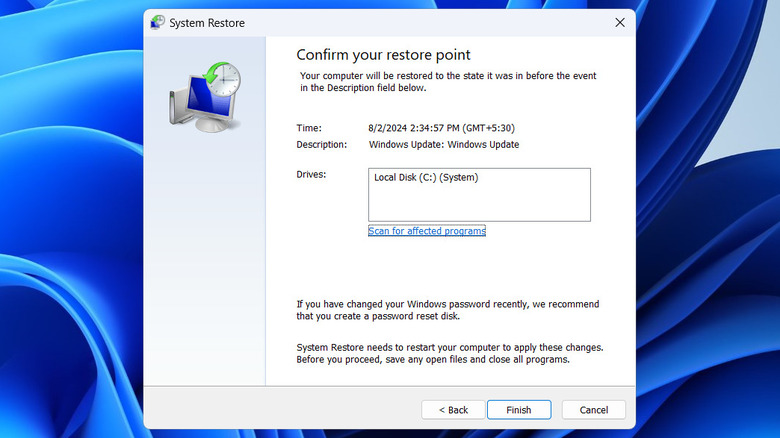
- Review all the details and click Finish.
Once you've completed these steps, Windows will revert itself to the specified restore point. If everything goes smoothly, your search feature should start working again in Windows 11.