The 10 Easiest Ways To Remove A Stripped Screw
Even if you aren't the handiest person in the world, you've probably encountered a stripped screw or two in your time. They are a common enemy of the home do-it-yourselfer and can throw a wrench in the works of even the simplest renovation. Fortunately, stripped screws are so common that people have invented countless methods for pulling them loose. Most methods for removing a stripped screw require only common household items and a surplus of determination, but a few might require a trip to the hardware store.
Be warned, each stripped screw is its own unique challenge and there is no one-size-fits-all solution. Variables like screw length, what the screw is made of, and the type of wood or other material it's screwed into can all affect your ability to pull it out. In some cases, you may need to attempt multiple methods before finding one, or a combination of several, that will work. In the end, the best method is the one that works, but these are 10 of the most reliable.
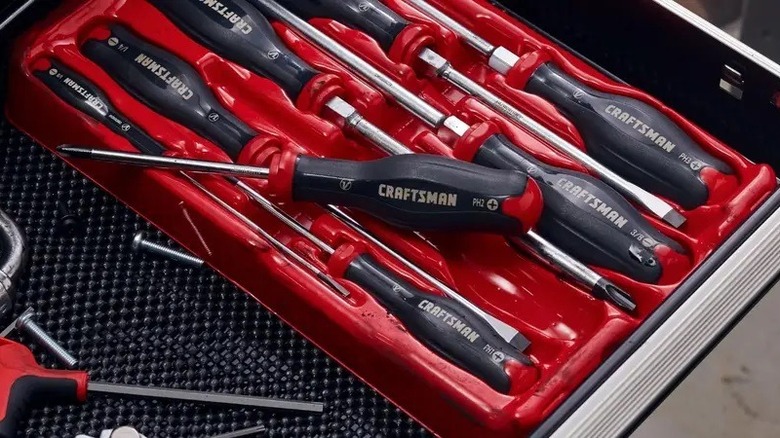
Try multiple manual screwdrivers
When a screw isn't cooperating, you may be tempted to give it all you've got — to crank the drill to full speed and really put your back into it to pull the thing loose through sheer force of will. But a stripped screw often requires a gentler touch.
Using a manual screwdriver allows you to really feel when or if the driver is biting into the screw. You can make subtle movements and back off before you strip it even more. While you're at it, try every screwdriver you have available to you. Each screw is designed to work with a particular type and size of driver, but once a screw is stripped all bets are off.
If you've got a wider driver or one with a differently angled profile, you might just catch a lucky break. If a Phillips head isn't working, a strategically angled flathead just might. It's also worth trying screwdrivers of different lengths, while length doesn't directly impact how much torque you can get, it may change the user's ability to apply force to the screw. Before you start hatching more complicated schemes, it's worth checking the tools you have to see if they'll do the job.
Break out the hammer
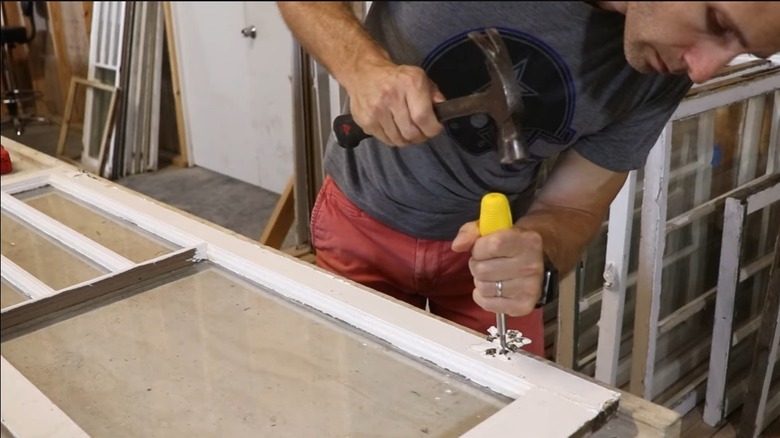
A hammer is usually the exact wrong tool for dealing with a screw, but it can be helpful in this case. When working as designed, a screw and screwdriver fit nicely together and move smoothly, with minimal damage to the tool or the fastener. When things go wrong, as they so often do, the screw usually takes the brunt of the damage.
Stripped screws are usually the result of the bit slipping out of the screw head, the wrong size bit, improper angle, the wrong type of metal for the wood you're using, or a whole host of other common mishaps. No matter the source, the result is a screw head with a mangled internal surface and no hard angles for a screwdriver to grab onto. That's where having the right kind of hammer can be handy.
Pick your favorite screwdriver (it really doesn't matter at this point, though a Phillips might be easier to keep stable) and place it into the screw head, then smack it with a hammer. Take care not to injure yourself, you don't need to slam it home but you do need enough force to put a dent in the screw. The goal is to create a new seat for the screwdriver and allow you to turn the screw loose.
A washer and a drill
Some screws have channels which extend to their edges, allowing you to use either a Phillips or flathead screwdriver. Those long channels also mean you can get a little more creative with how you unscrew them. In a pinch, you can use a washer and a power drill in place of a flathead screwdriver to get a stripped screw loose.
User Criatividadesdanet on Instagram illustrated how they removed a screw with a stripped interior. Placing a thin metal washer into the jaws of your drill and tightening them turns the washer into an ad hoc flathead. You'll want to take care in choosing the washer. It needs to be slim enough to fit into the groove, but snug enough to get a good bite when the drill turns.
It's not necessarily the most stable configuration and it's certainly off label, so use caution and wear all appropriate safety gear. As long as the edge of the washer fits into one of the channels in the screw head, you should be able to back it out. Make sure to apply gentle pressure and turn the washer slowly.
Get a grip with locking pliers
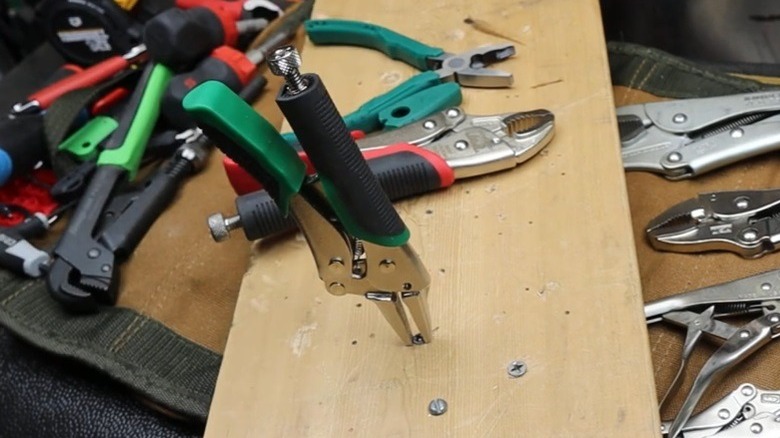
If the screw isn't driven all the way in, then you can use locking pliers and avoid the stripped screw head entirely. Try pinching the head of the screw and locking the pliers into place. It might take a couple of tries to get the pliers to stay in place, especially as you turn them, but you should be able to unwind the screw without needing a driver. If that doesn't work, you can always try grabbing hold of the neck of the screw and turning it from there.
This method can also be combined with any other method of removal to finish the job once you've inched it out of place. That's particularly useful when the level of stripping is severe. Do what you have to, to get the screw head above the surface of the wood, then switch to pliers from there. Depending on the size of the screw head and the nature of the damage, you might even be able to use one leg of the pliers as an oddly shaped and unwieldy screwdriver to wriggle it loose.
Add an abrasive
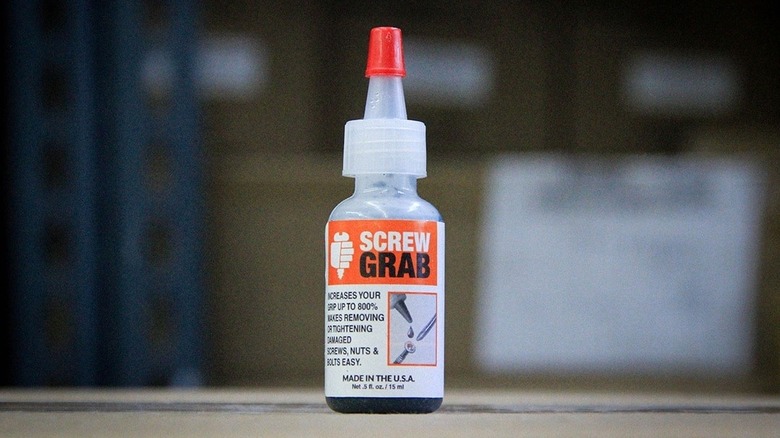
If your screw isn't too badly stripped and you just need a little extra grip to get it turning, adding an abrasive might do the trick. There are various commercial liquid abrasives available on the market which create a little assistive friction to help loosen stripped screws. The trick is to recognize that you've got a lightly stripped screw on your hands before you try and force it and make it worse. In my experience, by the time I drive to the hardware store for an abrasive, the screw is too far gone for it to help. If stripped screws are a common occurrence, you might want to keep a tube of your favorite brand on hand.
Common liquid abrasives like Screw Grab and Tank Bond contain a gel with a 35% mixture of silicon carbide. As the name suggests, it's a chemical compound made of silicon and carbon, and it's incredibly tough. When pressed together into larger pieces it can be used in things like brake pads for its ability to take a beating. You'll also find it in grinding tools and sandblasters, courtesy of its abrasive properties. When in a gel, tiny silicon carbide fragments provide extra points of friction between the driver bit and the screw head. Just swallow your pride and use it sooner rather than later, the earlier you apply an abrasive the more effective it will be.
Elastic band

Often, the difference between a permanently stuck screw and glorious victory over a simple machine is a little bit of extra traction, courtesy of an elastic band. Rubber bands are mostly made from natural rubber, processed out of sap from rubber trees. After tapping into the tree's bark, harvesters collect a white sticky sap with the potential to become rubber bands, tires, gloves, flooring and a wide range of other products. Processing prevents it from becoming brittle in the cold or sticky in the heat, and a vulcanization process makes it durable, flexible, stretchy, and strong. By the end of that process, rubber becomes the perfect sort of material for squeezing into uneven spaces and latching on.
If your screw isn't too badly stripped, a rubber band can provide the extra traction your screwdriver needs. Lay the elastic down on top of the screw head and pin it down with the driver. Press firmly into the screw head to force the rubber into the uniquely grooved surface of your stripped screw. You're building a rubber bridge between the screw and the driver, making it easier to turn. Be warned, it's highly likely the rubber band will be sacrificed in the process and you may need to trot out a few of them before the job is done.
Duct tape
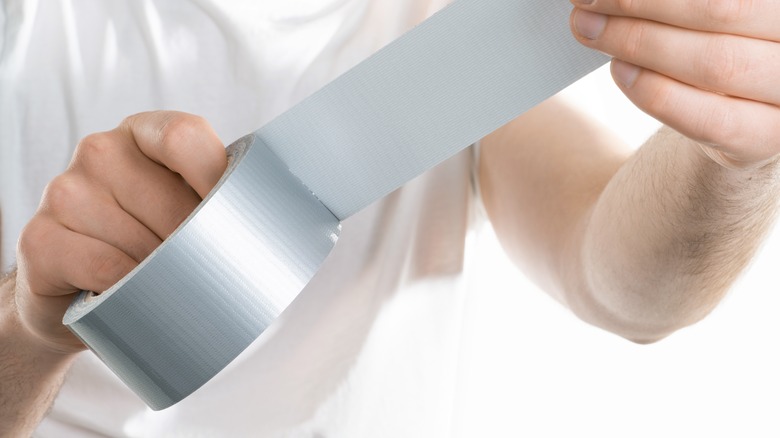
In addition to sticking just about anything to anything else, you can use duct tape to help your screwdriver get a grip. Similar to the common rubber band strategy for loosening a stripped screw, duct tape relies on its combined stickiness and strength to create a bridge between the driver and screw.
Duct tape is so universally useful at sticking things together that it's become a bit of a cliche, but it's a cliche with some merit. Contrary to popular belief, duct tape was originally called duck tape, not the other way around. The original duck tape was made of "cotton duck" a fabric that's name is commonly shortened to "duck," despite having no involvement with its namesake bird. Over time, the duck tape evolved and so did its name.
Today, duct tape is made from natural rubber combined with sticky resin. The resulting paste is slathered over a strip of cloth material similar to gauze and then covered with a characteristic gray backing made of waterproof plastic film. It's a powerful combination that is both sticky and strong, perfect for getting into the uneven grooves of a stripped screw. Place a small piece into the screw head, jam your screwdriver into the tape, and turn slowly.
Steel wool
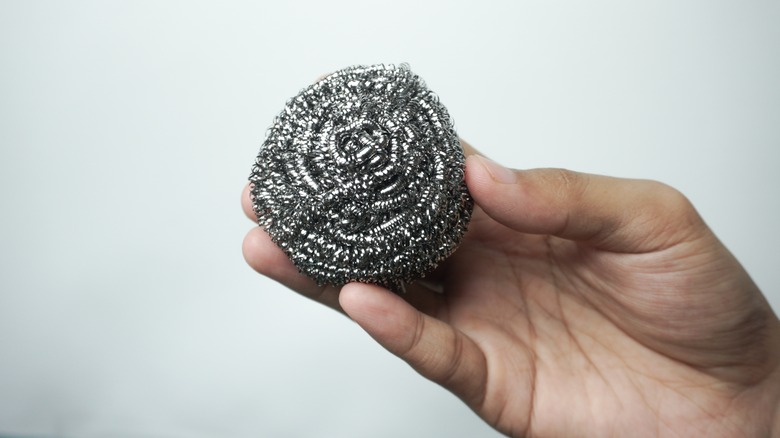
Sometimes called iron wool, wire sponge, and a handful of other names, steel wool is a general term for a collection of tiny, bundled metal shavings. Lightweight, semi-flexible, and abrasive, steel wool is useful for all sorts of jobs — it can even help with stripped screws.
In addition to steel, "steel wool" is sometimes made of aluminum, bronze, or other metals, each of which are suited for different jobs. For instance, when steel wool is used on certain types of wood, like oak, the iron reacts with the wood and leaves behind a black "iron stain." Other types of metal won't do that. They also come in varying degrees of coarseness, depending on whether you want to remove rust from machinery or scrape hardened food grime from your dirty dishes.
In our case, the flexibility and abrasiveness of steel wool comes in handy when grabbing onto the ragged edges inside a stripped screw. Separate a small piece of steel wool from the bundle and place it atop the screw head, then push the screwdriver through. You're trying to get some of the fibers between the screw head and the driver, so they catch as the driver turns and pull the screw out.
Screw extractor kit
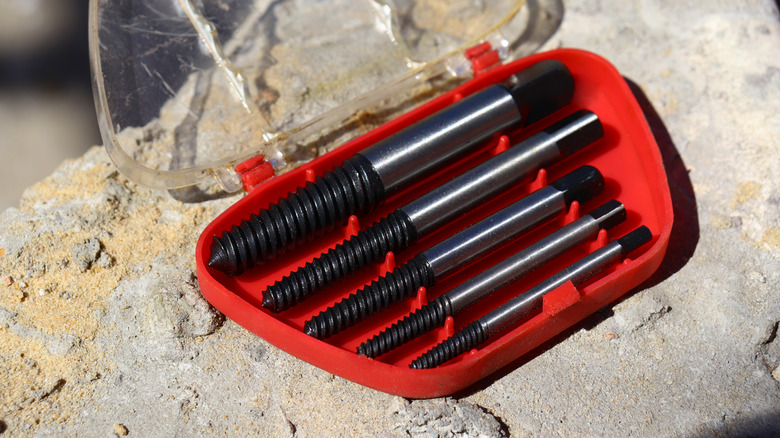
The best tool is the one that works and the one you have on hand, but if you've tried rubber bands and duct tape without any luck, it might be time something purpose-built. Screw extractor sets come in different forms, but they all do essentially the same thing. First, figure out how wide your screw is to identify the right size extractor. Most kits come with multiple sizes to accommodate most common screw widths.
The next step is drilling out the inside of the screw head, followed finally by extraction. Depending on the kit you choose, the drill bit and extractor bit may be separate, or may be attached as part of a two-headed bit. Regardless, the drill bit is designed to be operated with the drill in reverse, to carve out a clean, uniform surface. You'll want to keep the speed and torque of your drill low, to ensure a clean carve.
Keep the drill in reverse while using the extractor bit, it's designed for biting into the freshly carved interior and pulling it out. It's important to back it out slowly or you might break the extractor bit off in the screw. Then you have a new problem. You may also need to go back a step and drill out the screw again. It may also take some patience to get the screw out, even if you do everything right, especially if the screw is long or embedded in tough material.
Rotary tool and flathead screwdriver
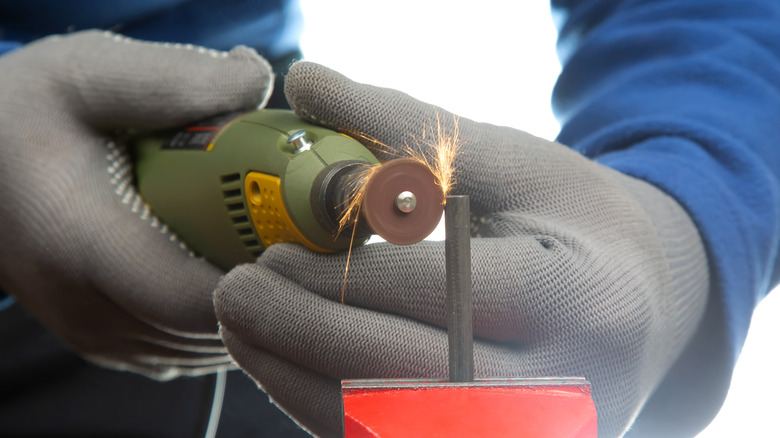
Unfortunately, sometimes the only way forward is to do a little more damage. If you can't grab hold of the screw with pliers, abrasives, or any other of the usual methods, you might have to make a new screw head of your own.
The tool of choice in this situation is a rotary tool, also commonly called a Dremel, though that's actually just a brand. Attach a thin cutting disk to the tool and start it spinning. It's important to keep the tool steady as you cut into the screw head to ensure a clean cut and a uniform surface for your driver to grab onto. The philosophy here is similar to using a screw extractor, with the ultimate goal of creating a better surface for extracting the screw. But this is more of a scorched earth approach because it isn't anywhere near as surgical.
Only use this method if you care more about removing the screw than the high potential of collateral damage you could, and likely will, cause to surrounding materials. Once you've carved a new channel into the screw head you can use an ordinary flathead to wind it out or, if you're feeling overzealous, you can cut a second perpendicular channel and use your favorite Phillips screwdriver. Remember, as always, to take all appropriate precautions and safety measures. Don't forget the goggles, and good luck.