Optimizing Your Gaming Monitor For The Best Frame Rate: A Step-By-Step Guide
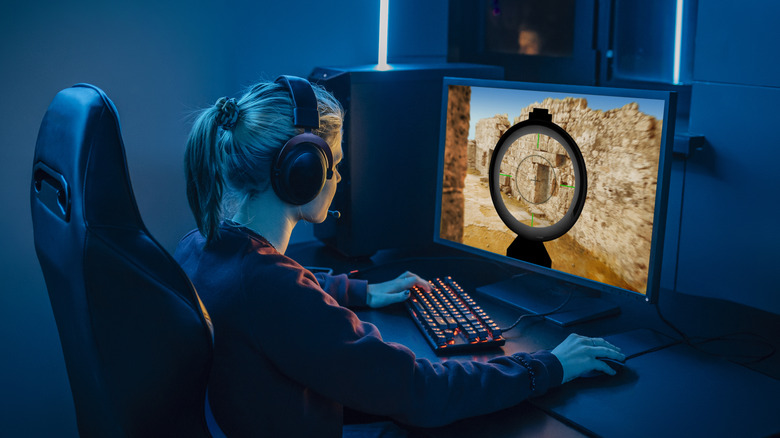
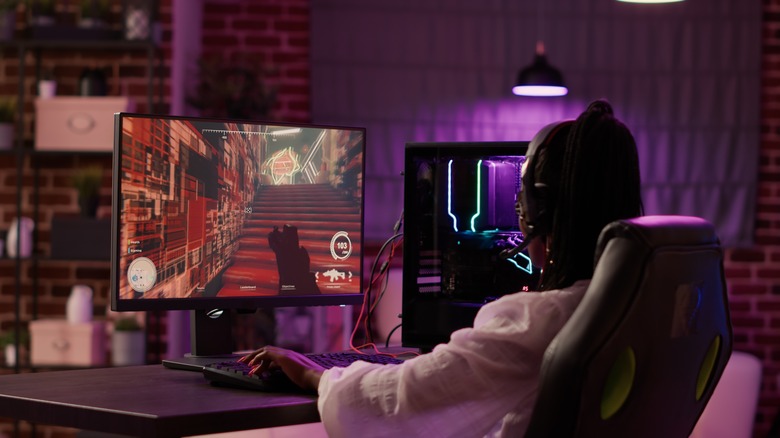
If you're the proud owner of a shiny, new gaming monitor, you probably chose it for its performance. The packaging declared its astonishing frame rate capabilities in big, bold letters, and as you loaded it into your cart, you imagined the extra speed and dexterity that high refresh rate a new machine would enable. But things quickly went sideways. You brought it home, peeled off the plastic, took in that new tech smell. Then, after hooking it up, you booted up your favorite game, ready to tear through enemies and bosses with newfound power. Except, that didn't happen. Frames started dropping, and as you suffered a game loss, you start to wonder if your fancy new monitor is defective.
The good news is your monitor is (probably) fine. The bad news is you're likely using it wrong. When integrating a high-refresh-rate gaming monitor with your PC, it's important to tune its performance in combination with your Windows and Nvidia settings in order to take advantage of those extra hertz. For the purposes of this guide, we'll be discussing how to configure a high-refresh-rate monitor with Windows 10 and 11 with an Nvidia GPU. We won't be discussing multi-monitor setups, as they can be a bit more complex. Also, before we get started, make sure you know the basic specs of your monitor, most importantly its native refresh rate and resolution. With those disclaimers out of the way, let's dive in to get your monitor pumping out frames at top speed.
Cables matter
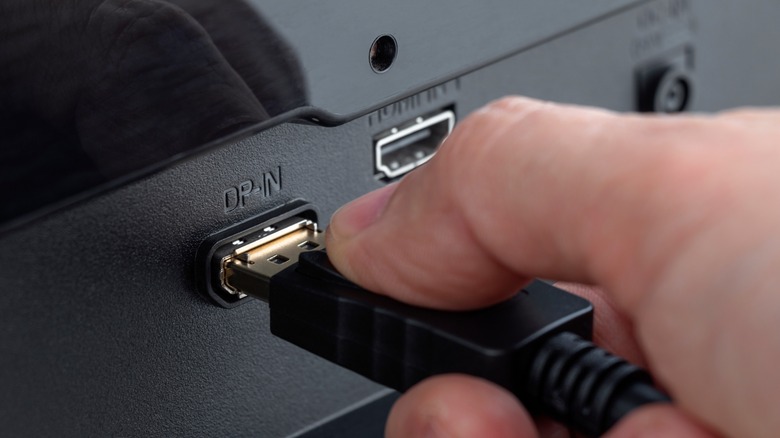
The first thing you'll need to do when you set up your monitor is choose whether to use HDMI or DisplayPort — the two mainstream display connector types. You can tell them apart by the shape of their ports and plugs. The HDMI connector has a distinctive flared base, while a DisplayPort connector looks like a rectangle with one of the corners chipped away.
The main difference between the two is that HDMI can carry both video and audio signals, while DisplayPort can only carry video. However, the latest DisplayPort standard has a much higher data throughput than the latest HDMI standard. Because of this, DisplayPort is generally preferred unless you need to output audio through your monitor. Additionally, if you want to play games with HDR (high dynamic range), you will need, at minimum, DisplayPort 1.4 or HDMI 2.0a, or HDMI 2.1 for frame-by-frame Dynamic HDR. The latest versions of both DisplayPort and HDMI support 120Hz refresh rates.
Whichever connection you choose, make sure you have a cable that's compatible with the highest standard supported by both your monitor and gaming PC. The cable included in the monitor box is usually matched with its specs, but double check just in case. It's always possible someone packed the wrong cable up at the factory, or that the manufacturer simply cut corners by shipping a cheap cable.
Windows settings
Before we head into your GPU settings, the first things to take care of will be in the native Windows Settings app. This is where we'll make sure that your resolution and refresh rate are set correctly. To do so:
- Open Settings.
- Navigate to System > Display.
- Next to Display Resolution, select the native resolution of your monitor from the dropdown menu.
- Further down the Display settings page, click on Advanced Display. Make sure the correct display is selected from the dropdown menu at the top right.
- Choose the maximum refresh rate your monitor is capable of from the "Choose a refresh rate" dropdown menu. Be aware that if your monitor has an overclocking feature, it may have been advertised to have a higher refresh rate than it actually does. For example, a 144Hz monitor with overclocking may be advertised as 170Hz, but you'll only see a 144Hz option in Windows settings.
With the Windows settings in place, your monitor should work at its top refresh rate. But you've still got a few more steps to go before everything is optimized. Next, we'll walk through how to optimize your graphics card settings.
Optimizing Nvidia Control Panel settings
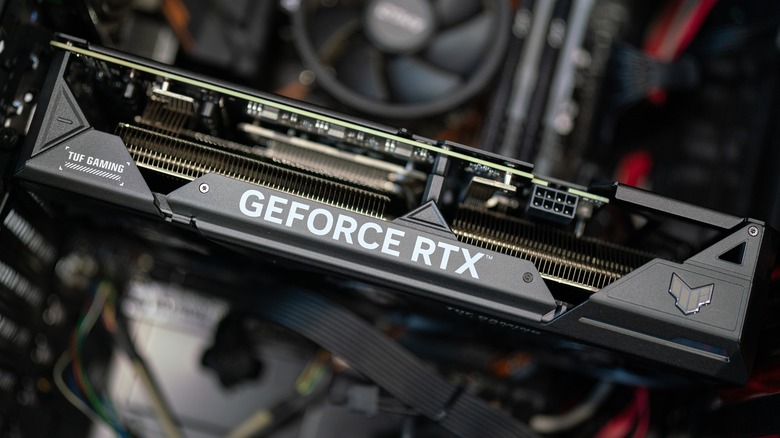
The next thing you should do is optimize your graphic card's settings. Depending on your PC hardware, getting the peak refresh rate your monitor is capable of may come at the cost of resolution and other graphics settings. If your computer has the latest and greatest processor and GPU, you may be able to crank both the graphics and the frame rate, but on midrange specs, you'll need to tinker a bit with the video and graphics settings in each individual game. However, when configuring your monitor, always choose the highest resolution. To do so, Nvidia GeForce graphics cards have a suite of settings to help you get the best in-game results.
- Open the Nvidia Control Panel and navigate to the Change Resolution panel under the Display heading on the left side navigation bar.
- Make sure the correct display is selected, then choose your monitor's native resolution from the menu. If you're unsure of your monitor's resolution, check its specifications from the manufacturer website.
- To the right of the Resolution settings are the refresh rate settings. Choose your monitor's highest refresh rate from the dropdown menu. Be aware that if your monitor has an overclocking feature, it may have been advertised to have a higher refresh rate than it actually does. For example, a 144Hz monitor with overclocking may be advertised as 170Hz, but you'll only see a 144Hz option in Nvidia settings.
- If you have a G-Sync or G-Sync Compatible monitor, click on Set up G-Sync from the lefthand panel.
- Click the checkbox next to Enable G-SYNC, G-SYNC COMPATIBLE. You can also choose whether G-sync should activate for only full screen mode, or for both full and windowed modes.
- Click Apply at the bottom right of the Nvidia Control Panel.
Setting up G-SYNC and FreeSync

The two top manufacturers of graphics cards, Nvidia and AMD, have their own display technologies to enable adaptive frame rates while reducing screen tear. Nvidia G-SYNC and AMD FreeSync are essentially the same thing with different labels, but the former is a proprietary technology that only works with Nvidia GeForce cards and the latter is based on open standards and works with both AMD and Nvidia cards. However, if you plan on using a FreeSync monitor with an Nvidia GPU, you should check Nvidia's list of officially G-Sync compatible monitors to make sure it will actually work.
G-Sync and FreeSync work by adjusting your monitor's refresh rate to match the frame rate from your GPU, creating a variable refresh rate (VRR). This setting will be called G-Sync on official G-Sync monitors, but on G-Sync Compatible, FreeSync, and Adaptive Sync monitors, it may go by other names. Consult your display's user manual if you're unsure. To set it up, follow these steps:
- Using your monitor's onboard controls, which are usually located underneath or behind the display, navigate to the setting for G-Sync, FreeSync, or Adaptive Sync, and make sure it's turned on.
- Open the Nvidia Control Panel and navigate to Set up G-SYNC under the Display tree in the navigation panel on the left side of the window.
- Check the box next to Enable G-SYNC, G-SYNC Compatible, and select, "Enable for full screen mode."
- Underneath those checkboxes, make sure the correct display is selected, and check the box for "Enable settings for the selected display model."
- Click Apply.
- Click on Manage 3D Settings from the navigation panel, and select the Global Settings tab.
- Scroll down and make sure Monitor Technology is set to G-SYNC.
- Continue down and make sure Preferred refresh rate is set to Highest Available.
- Click Apply.
What about V-Sync?

People tend to confuse V-Sync with G-Sync and FreeSync. Whereas the latter two enable better communication between your graphics card and monitor, the former is designed specifically to reduce screen tear. When your PC is outputting more frames than your monitor can handle, the monitor becomes overwhelmed (so to speak) and displays portions of two different frames. V-Sync solves this by syncing the two pieces of hardware, forcing your GPU to produce frames at a rate the monitor can handle. However, V-Sync can also artificially cap your GPU's performance, which has made it a somewhat controversial setting.
If you do not have a G-Sync- or FreeSync-enabled monitor, you should use V-Sync. If you do, what you can do is use G-Sync or FreeSync to operate within your display's parameters, while using V-Sync in combination with a game's frame rate cap to ensure a consistent frame rate without screen tearing or stutter. To do this:
- Enable G-Sync or FreeSync as described in the previous section.
- Navigate to Global Settings under the Manage 3D Settings section of the Nvidia Control Panel.
- Scroll down to find Low Latency Mode and set it to Ultra.
- Scroll down to find Vertical Sync and set it to On.
- Click Apply.
In-game settings
You won't know for sure whether all the previous steps taken have worked until you actually boot up a game and run some tests. To check your frame rates, you can use Windows Game Bar, Steam, or other tools that display frame rates in the corner of your screen as you game. Some games, especially competitive ones, also have built-in frame-rate counters you can enable in settings. To get the best frame rate in combination with the other settings, change the following in-game settings for each game you play.
- Once your game is open, make sure it's set to fullscreen mode with your display's native resolution in its settings panel.
- If you're using an AMD FreeSync or Adaptive Sync monitor and your game has a frame rate capper in its settings, turn it on and set it to between 3 and 7 Hz lower than your monitor's native refresh rate. This will help ensure frame rate stability. For G-Sync monitors, Nvidia's Ultra Low Latency Mode will cap your frames, so there's no need to double up.
- Although we recommend turning V-Sync on in Nvidia settings, do not turn it on in your game's settings.
- If there's an option for Nvidia Reflex, turn it on at the highest possible setting..
- Turn off any settings for extra buffering.
Fiddle around with your other graphics settings until you find the right balance of FPS and video quality for your liking. If you want to have the highest frame rates, especially if your computer doesn't have the best possible specs, you may have to give up things like ray tracing or realistic shadows.