How To Connect Your Samsung TV To The Internet
With the prevalence of smart TVs these days, streaming services have become everyone's go-to source of entertainment, and for good reasons. For one, they're very convenient to use. You don't have to wait for the scheduled broadcast just to watch a show or movie you really want — you simply hop on your streaming app of choice and play your favorite content. There's also a wide assortment of shows and movies available on these platforms, from popular options to original programming. Plus, some streaming services even offer personalized recommendations based on your watch history, so you won't have to spend hours on end scrolling the library for new films to watch.
However, before you can even use these streaming platforms, you'll likely first need to connect your smart TV to the internet. If you have a Samsung TV, there are a few steps involved in the process and some snags that can occur along the way.
Set up your Samsung TV's Wi-Fi connection
One of the two ways to get your Samsung smart TV online is by connecting it to your home Wi-Fi network. Here's what you need to do to configure the Wi-Fi connection on your TV:
- Press the Home button on your remote control to open the Smart Hub.
- Go to Setting on the left side panel (or bottom panel for older models).
- Click on All Settings (skip this for older models).
- Select Connection (or General) on the left.
- Navigate to Network > Open Network Settings.
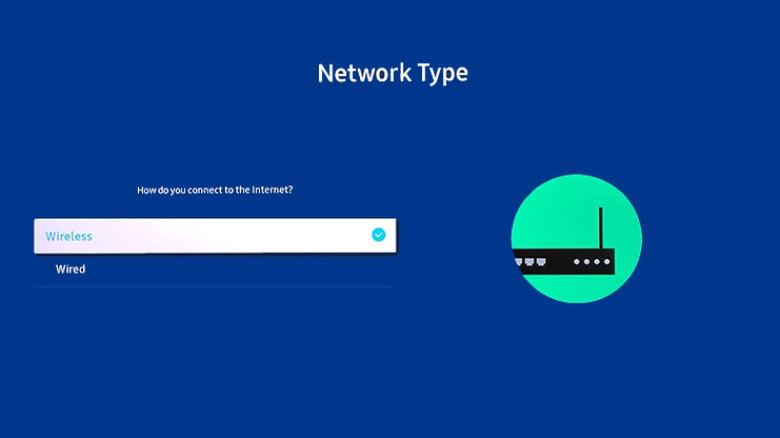
- Select Wireless as the network type. Your TV will then list all the available Wi-Fi networks in your home.
- Find and click on the Wi-Fi network you wish to connect to.
- Type in the Wi-Fi password. You can also opt to turn on Show Password to double-check the password you entered.
- Press Go (or Done).
- Wait for the connection evaluation to finish.
- After you successfully connect to the internet, hit OK to exit.
You can now start watching on any of your go-to streaming services. Try playing a TV show or movie to test the connection.
Hook up your Samsung TV via wired connection
If you want to make sure that you get a stable, low-latency internet connection on your Samsung TV, then using a LAN cable is the way to go. To set up the wired connection on your TV, follow these steps:
- Go to your Smart Hub by pressing Home on your remote control.
- Click the directional pad to jump to the Settings option on the left side panel (or bottom panel if you have an older model).
- Select All Settings (skip this for older models).
- Navigate to Connection (or General for older models) > Network > Open Network Settings.
- Choose Wired.
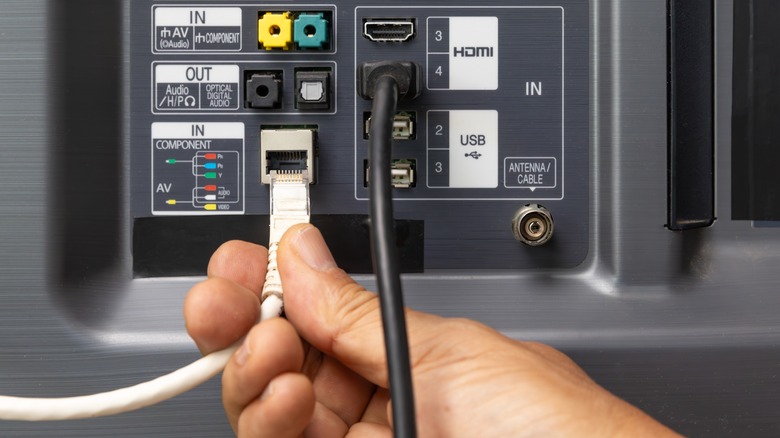
- Plug the LAN cable from your router into the Ethernet port at the back of your Samsung smart TV. Make sure it fits snugly.
- When prompted, press Yes on the Network Settings dialog box that appears on your TV screen.
- Wait for the "Checking wired connection" screen to disappear.
- Once you see the connection success message, click on OK.
While a LAN connection is wired, you should still test the connection to ensure everything is working correctly.
Diagnose internet issues on your Samsung TV
There is nothing more frustrating than your Samsung TV notifying you that you have a slow or lost internet connection just as your favorite movie is about to get exciting. When this happens, the first thing you need to do is check the Network Status on your Samsung TV. This will tell you whether the connection issue is between your TV and router or between the router and the internet.
To see your Network Status, press the Home button on the remote control and navigate to Settings > All Settings > Connection (or General) > Network > Network Status. Here, you'll see a diagram showing the TV – router – internet. If there's a red crossmark between the router and internet, the problem is either with your router or your internet service. If the red crossmark is between your TV and router, the issue stems from either the router or your Samsung smart TV.
Resolve network issues on your Samsung TV
Now that you know what might be causing your internet problems, you can try resolving them. Start with your router. Try restarting it, wait for a minute or so, and then turn it on again. Once it's on, use your phone to see whether you can browse the web. If there's still no internet connection, get in touch with your internet service provider as there might be an ongoing maintenance or unscheduled interruption in your area.
If the router is working as expected but your Ethernet-connected Samsung TV is still offline, it may be an issue with your LAN cable. Examine the cable for any physical damage, such as exposed wires, pinched or bent sections, or broken connectors. Then, plug it again to make sure it isn't loose. You can also try connecting the LAN cable to your laptop instead of your TV to test the internet connection.
If everything's functional on the router (and cable) side, the problem may be with the TV. Do a soft reset — this typically solves the issue of your Samsung TV disconnecting from Wi-Fi. Or change the DNS settings on the TV:
- Go to your Smart Hub, a.k.a. home screen.
- Select Settings > All Settings > Connection (or General) > Network > Network Status > IP Settings.
- Switch the DNS setting to Enter manually.
- In the DNS Server, enter 8.8.8.8.
If the problem persists, reset your network connection. On the Network page in your Settings, press Reset Network and select Reset to confirm. Then, simply reconnect to your home Wi-Fi network or try using your smartphone's hotspot.