How To Fix Kernel Security Check Failure In Windows
The Kernel Security Check Failure is a Blue Screen of Death (BSOD) error that commonly occurs on devices running on Windows 11 and Windows 10. It generally means that one or more of your system files is corrupted and failed the compatibility or integrity check. This error can happen anytime while you are using your computer, but most users have experienced it while playing games — such as "Counter-Strike" — on their device. Experiencing this error can lead to a disruption in work, data loss, and frustration.
There are several reasons this error could arise on your PC. Corrupted or deleted system files are generally the main culprits. Alternatively, not updating Windows or your system drivers for a long time may be another reason, with corrupted or outdated drivers causing an error. Conflicts with software, especially security solutions, can also cause BSOD.
Other than that, hardware issues like faulty RAM, hard disk errors, or loose connections can also lead to Kernel Security Check Failure. Thankfully, there are a series of solutions you can apply to fix this error and resume the normal functioning of your PC. Let's start with some basic checks.
Preliminary checks to fix Kernel Security Check Failure
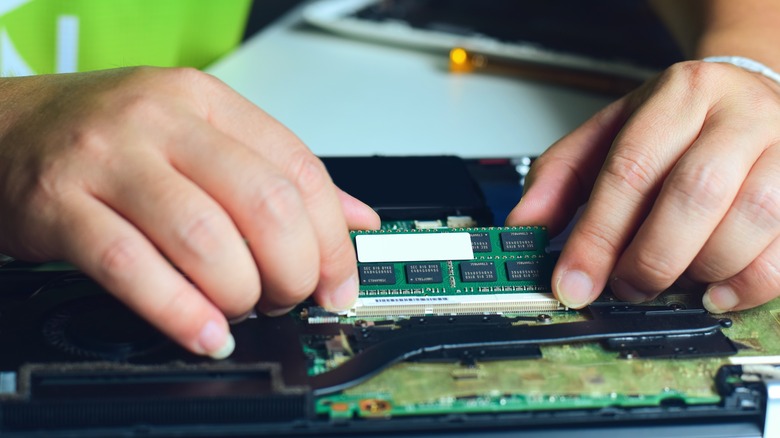
Before applying some advanced steps or making changes in the settings, it's wise to try some basic checks that might fix the issue. Begin with checking the RAM and hard disk placement and connections. A loosely connected RAM or hard disk can trigger such BSOD errors. Next, unplug all the external peripherals from your PC. Then restart your system and plug them in one by one. This will help you in cornering the culprit hardware, if there is any.
Next, check for any pending Windows updates. Outdated Windows, especially if you have opted for the Windows Insider Program, can lead to errors like Kernel Security Check Failure. Windows Updates also bring driver updates, which are essential for the PC's stable operation. To update Windows, launch Windows Settings, switch to the Windows Update section, and click the Check for Updates button.
If updating doesn't resolve the issue, boot your system in the Safe Mode. Under Windows Safe Mode, only the essential services and applications are allowed to run. So, if any third-party software or service is responsible for the blue screen error, you can isolate it with Safe Mode. If you don't get the blue screen under Safe Mode, a third-party app may be causing it. Uninstall any recently installed apps and restart your system in regular mode to check if the problem is solved.
If you recently visited an unsecured website or installed an application from an unknown source, your system could be infected with malware, which might be causing the BSOD. To solve this, run a full system malware scan with a robust antivirus solution.
Run CHKDSK Command and Windows Memory Diagnostic
Windows comes with some amazing built-in tools that can help you fix the Kernel Security Check Failure error. The Check Disk utility is one such tool for scanning and repairing hard disk errors.
Here are the steps to run it:
- Right-click the Start button and select Terminal (Admin) or Command Prompt (Admin) from the list.
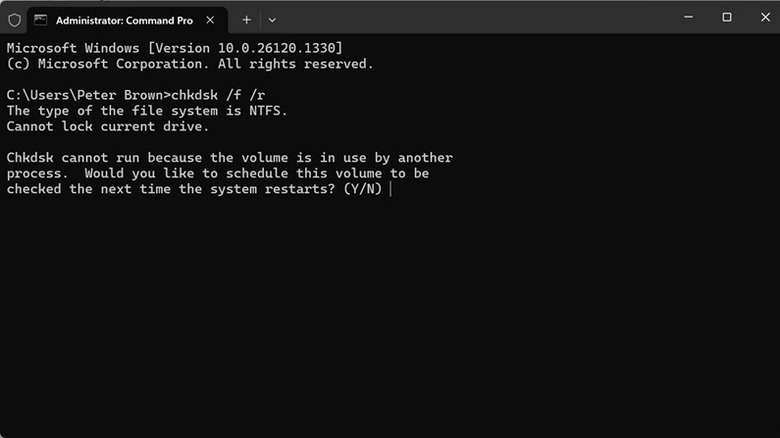
- Use this command to run the Check Disk: chkdsk /f /r.
- Since your disk is currently in use, the tool will ask you to schedule the scan on the next restart. Type Y and press enter.
- Restart your system to run the scan.
If the error persists, run Windows Memory Diagnostic, a tool for checking RAM errors. Save your work before using this tool, as you'll be asked to restart. Here's how to use it:
- Press Windows + S on your keyboard and type Windows Memory Diagnostic in the search box.
- Select its icon to launch it.
- Under the Windows Memory Diagnostic window, click the Restart Now and Check For Problems option.
Let your computer restart and check for RAM errors.
Run DISM and SFC commands
Sometimes, system files can be corrupted or deleted due to malware attacks or other reasons, such as registry changes. In such cases, you can run the DISM and SFC commands to fix the essential files and thereby solve the Kernel Security Check Failure error.
Follow these steps to run both tools:
- If you can boot your system normally, launch Command Prompt with Administrator rights and skip to step 5 to continue.
- If you can't boot your system normally, restart your system, and as soon as you see the Windows logo, restart it again. Repeat the same process three times to trigger the Windows Recovery Environment.
- Now navigate to the Troubleshoot > Advanced Options.
- Select Command Prompt under the Advanced Options.
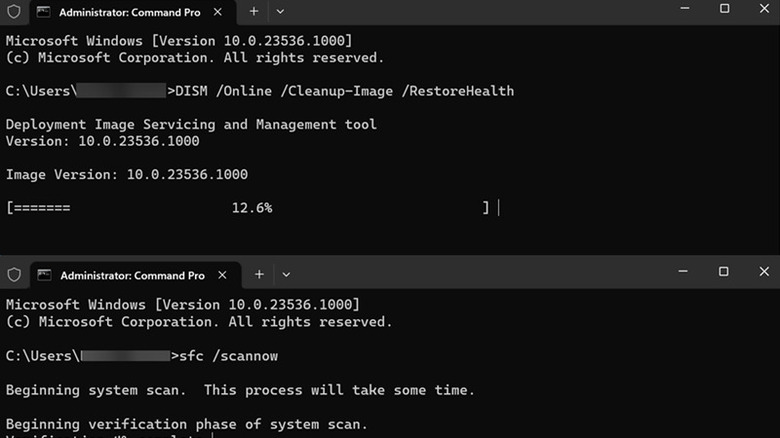
- Use the following command to run the DISM tool: DISM.exe /Online /Cleanup-image /Restorehealth.
- Wait for the process to complete. After that, use the following command to run the SFC tool: sfc /scannow.
- Let the command fully execute. It can take some time to finish.
After both the commands are successfully executed, restart your system and check if the error is solved.
Uninstall recent Windows updates
Although updating Windows is necessary for proper system functioning, sometimes it can be disastrous. If you recently updated Windows and the Kernel Security Check Failure error started just after that, it's possible that the latest update has some bugs causing the issue. In that case, you can uninstall the recent updates to fix the issue.
Here's how to do that:
- Launch the Windows search box, type Control Panel, and click its icon to open.
- Under the Programs category, click the Uninstall a Program option.
- On the left section, click the View Installed Updates option.
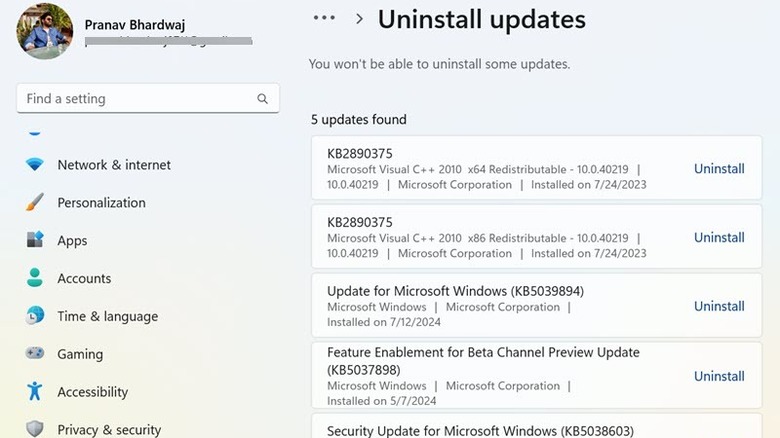
- You will be redirected to the list of recently installed Windows Updates. Uninstall the most recent ones from the list.
- Follow the onscreen instructions to uninstall the updates successfully.
After uninstalling the recent Windows updates, restart your system and check if the problem persists. If you still face the blue screen, try restoring your PC to undo recent Windows changes.
Restore your PC
If none of the above solutions solved the Kernel Security Check Failure issue, try restoring your PC. If the problem appeared only recently, then restoring your PC might fix it.
Follow these steps to restore your Windows OS:
- In the Windows search box, type Recovery and click its icon to launch recovery options under Control Panel.
- Next, select the Open System Restore option.
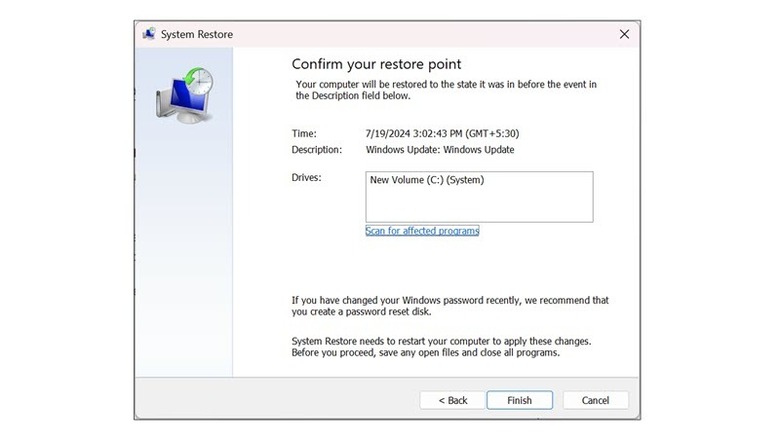
- The System Restore window will be launched. Click the Next button to begin the restore process.
- Choose one of the latest restore points and click Next.
- Finally, click the Finish button to begin restoring the system to the selected restore point.
Check if you are still getting the blue screen error. If the answer is yes, there might be some deep-rooted issues which can only be solved by resetting your PC. You can either reset your PC from Windows Settings or freshly install your operating system using a USB bootable device.

