Windows 11 Not Detecting A Second Monitor? Here's How To Fix It
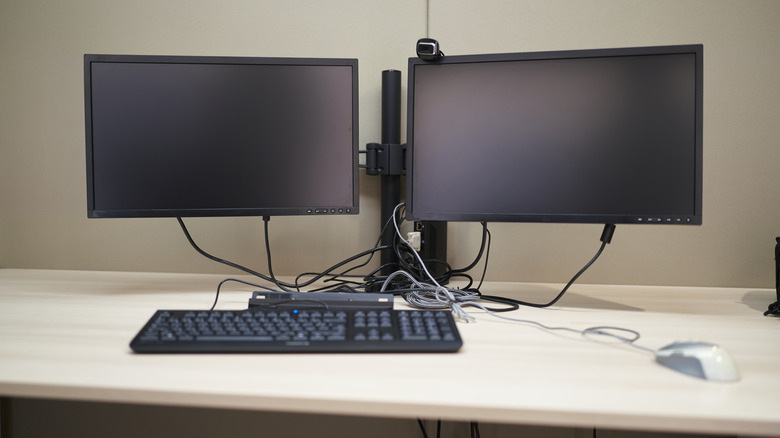
Whether you're a professional, creative, or gamer, a dual monitor setup can be a game-changer. It can significantly boost your productivity by providing additional screen space for multitasking. While setting up a second monitor is usually straightforward, there are times when Windows 11 may fail to detect it, leaving you frustrated.
The problem could stem from a variety of sources, ranging from minor hardware issues to more intricate software conflicts. Common causes include malfunctioning cables, outdated or corrupt display drivers, incorrect display settings, or compatibility issues between your computer and the monitor.
Fortunately, resolving this problem is not too difficult, as long as your monitor is in working condition. It may be as simple as checking and securing all cable connections or as involved as updating your display drivers and adjusting the display settings in Windows 11. Here are some tips that should get Windows 11 to detect your second display in no time.
Try basic fixes
Before trying more complex solutions, it's a good idea to first rule out some basic issues that may be preventing your second monitor from being detected. First, double-check that the cable connecting the second monitor to your PC is securely plugged in. A loose connection can lead to detection issues, so unplug and then plug the cable back in to ensure it's firmly connected.
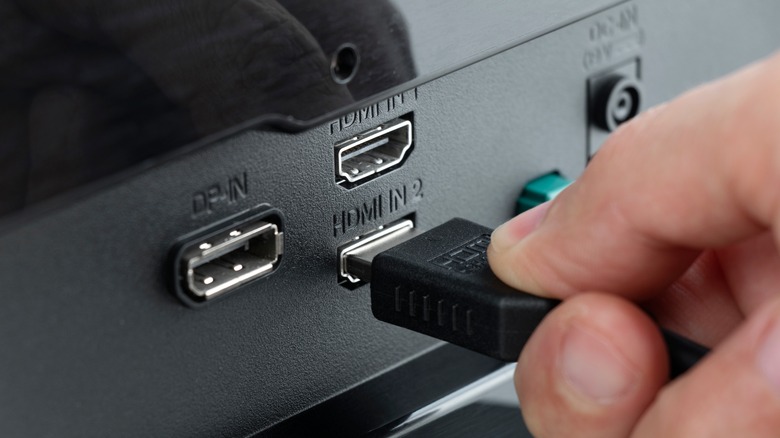
Another important step is to make sure that the cable and port you're using are not defective. To confirm this, try connecting your monitor with a different cable. Verify that you are using the correct cable type by referring to the manufacturer's requirements, as DisplayPort and HDMI come in different versions. You can also try using another available port on both your monitor and PC.
While most monitors can automatically switch to active input sources, not all of them do, which might make it seem like there's a problem. Check the monitor's settings and manually select the input source that matches the cable connected to your PC. Finally, consider restarting your computer. Doing so will fix any temporary issues that may be preventing Windows from detecting the monitor.
Force Windows to detect displays
Typically, Windows 11 automatically recognizes and configures a secondary display as soon as it's connected. However, there can be instances when this automatic detection might fail due to temporary glitches in the operating system or incompatibilities with older connection standards like VGA. In such cases, you can force Windows 11 to detect your secondary display manually via the Settings app.
Here's what you'll need to do:
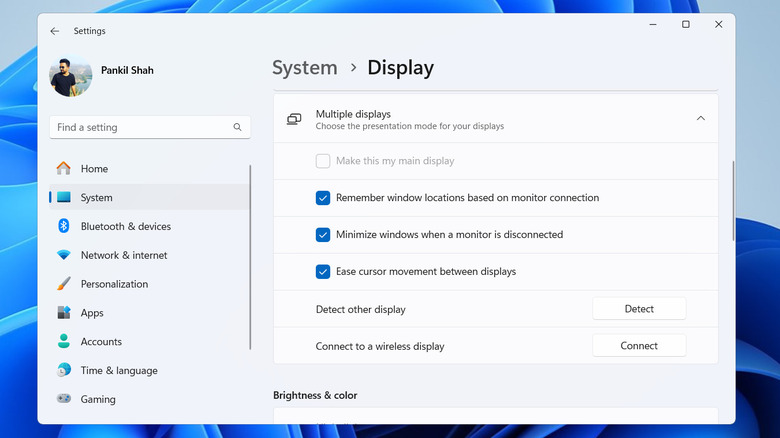
- Press Windows + I on your keyboard to quickly open the Settings app. Select the System tab in the left pane and then click on Display.
- Click the tiny arrow next to Multiple displays to expand it.
- Click the Detect button to force Windows to detect external displays.
This should help Windows identify monitors that are connected to the system. If you see the "We didn't find another display" message, ensure your monitor is turned on and then try again.
Change the display refresh rate and review projection settings

Sometimes, Windows 11 may not display anything on your second monitor even after detecting it. This can happen if Windows 11 is set to a refresh rate that is not compatible with your monitor. You can try changing the default refresh rate to see if that fixes the problem.
- Right-click anywhere on an empty spot on your desktop and select Display settings from the context menu.
- Scroll down to the "Related settings" section and click Advanced display.
- Choose the second monitor using the drop-down menu at the top.
- Use the dropdown menu next to "Choose a refresh rate" to set a different value and see if that fixes the issue.
Another thing you should do is review the display projection settings to ensure Windows 11 is configured to show content on your secondary display. Press Windows + P to access projection settings. Select the "Duplicate" or "Second screen only" option to allow Windows to display content on the second monitor.
Update or reinstall the graphics driver
Buggy or incompatible graphics drivers can cause various display-related issues in Windows 11. In most cases, you can fix such issues by simply updating the driver.
Here's how to update graphics drivers:
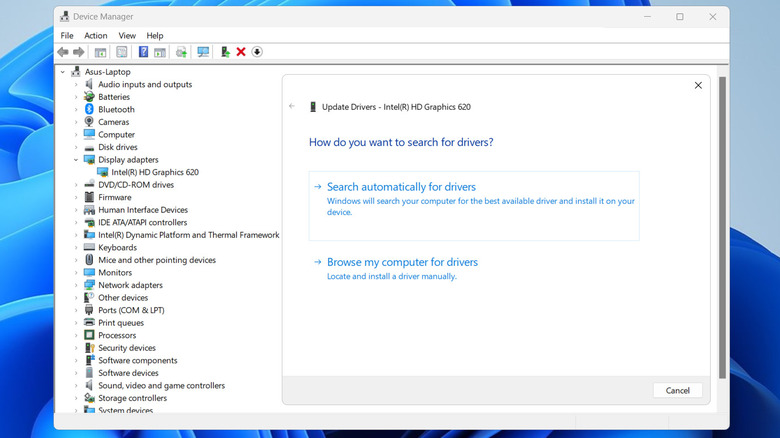
- Right-click on the Start icon and select Device Manager from the list.
- Expand the Display adapters section, right-click on your graphics driver, and select Update driver.
- Select "Search automatically for drivers" and then choose the "Search for updated drivers on Windows Update" option.
Note that if your computer has a dedicated graphics card from AMD or Nvidia, you'll need to use their proprietary software for driver updates. For AMD GPUs, you can update drivers through the AMD Radeon Software. If your computer has an Nvidia GPU, use the GeForce Experience app for driver updates.
Once the drivers are updated, check if your second monitor works. If it does not, your graphics driver may be corrupted. In that case, head to the Device Manager window again, right-click on your graphics driver, and choose "Uninstall device." Then, select Uninstall to confirm.
After removing the driver, restart your PC. Windows will automatically reinstall the missing driver during the boot process, which should resolve the issue.