You Can Finally Schedule Texts On iPhone And Mac: Here's How
Social media strategists have long harnessed the ability to schedule posts, using official as well as hack methods, but it's surprising that an analogous tool for doing the same for messages hasn't existed. Apple currently boasts an active base of two billion iPhones across the world, but it took the company eighteen major OS iterations and over a dozen yearly iPhone upgrades to finally build this facility in the Messages app.
So far, the only way to send scheduled messages from an iPhone has passed through the Shortcuts app. It's an immensely powerful app, but utter words like "personal automation," "time of day scheduling" control, and "ask before running" permissions, and they would probably give up on the idea. The whole process is a tedious chore.
Thankfully, iOS 18 introduces the convenience of sending scheduled messages. Thankfully, Apple mirrored the development over to its computing platform, as well. If you're running macOS Sequoia, you can take advantage of the scheduling feature in the Messages app on your Mac.
How to schedule messages on an iPhone?
In order to send a scheduled text from your iPhone, make sure you are running iOS 18. At the moment, Apple is in the public beta testing stage and it is widely available to folks who opted in, but a wider rollout will commence in the coming weeks. Of course, also make sure your phone is on the official support list for iOS 18 upgrade, which you can find here. With requirements out of the way, please find the details here:
1. Open the Messages app on your iPhone, pick a contact you want to send a message and enter the contents (text or media) in the chat field.
 Nadeem Sarwar/SlashGear
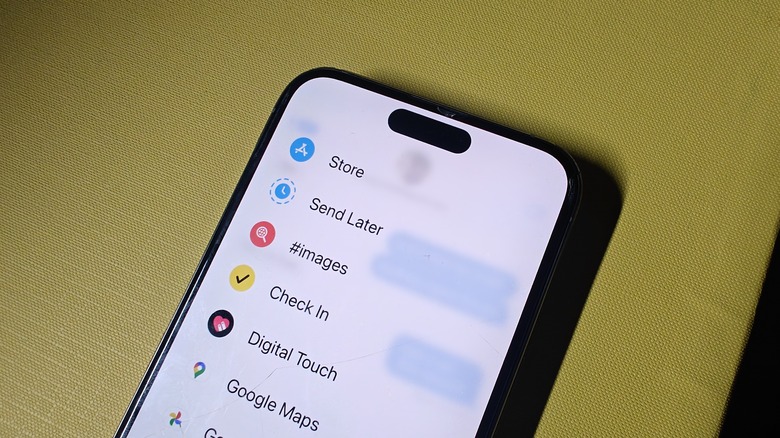
2. Press the "+" icon in the lower-left corner of the corner, followed by tapping on the "More option.
 Nadeem Sarwar/SlashGear
3. Tap on "More" in the pop-up window and tap "Send Later."
 Nadeem Sarwar/SlashGear
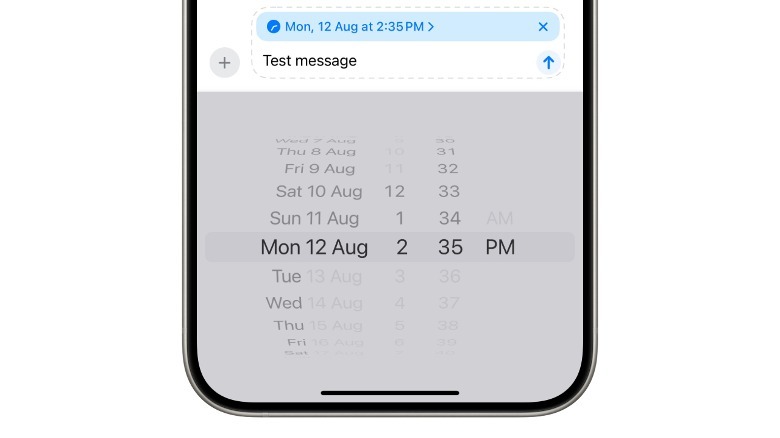
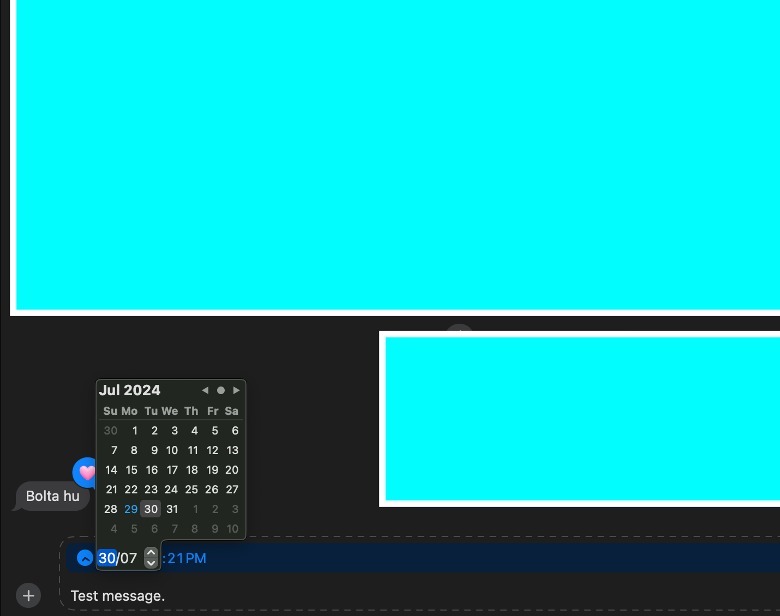
4. You will now see a vertically scrolling scale that will let you pick up the date and time for sending a scheduled message.
 Nadeem Sarwar/SlashGear
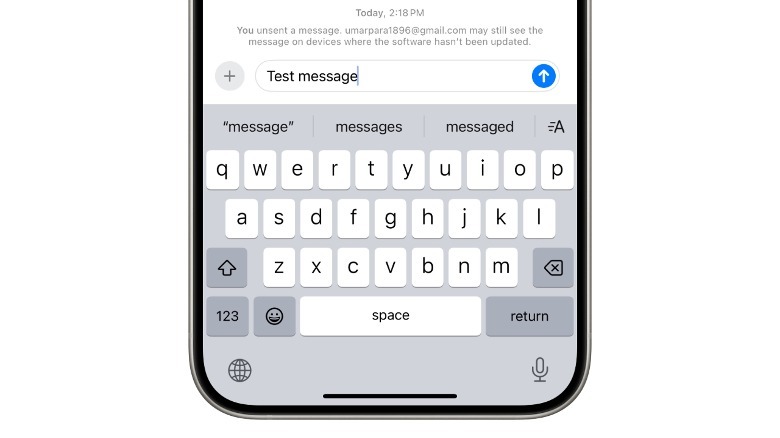
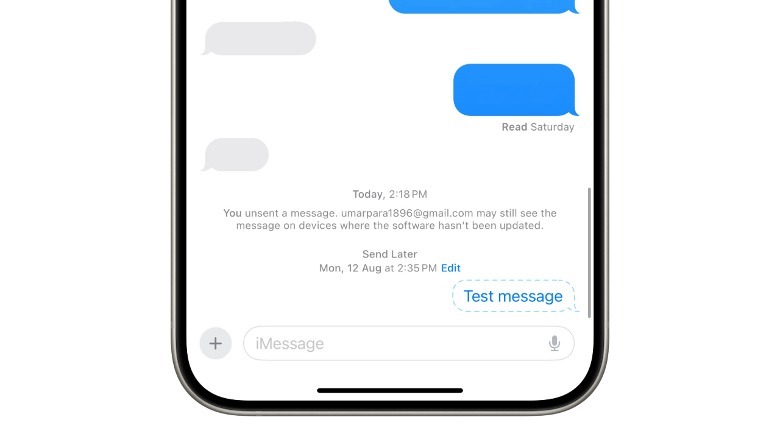
5. Once you've done that, hit the send icon (up arrow) and you will see the message in a white chat bubble with a dotted blue-line outline.
 Nadeem Sarwar/SlashGear
6. If you tap on this chat bubble, you get options that let you edit the message's contents, send the message instantly, or delete it.
Sending scheduled message on macOS
If you're invested in the Apple ecosystem, you must already be using the Messages and FaceTime call facilities on your Mac. Fortunately, Apple has extended the message scheduling facility to macOS Sequoia, as well. Here's how you can take advantage of this:
1. Open the Messages app on your Mac.
2. Pick a chat or contact who you want to send a message at a later date and time.
3. Write your message in the compose field at the bottom.
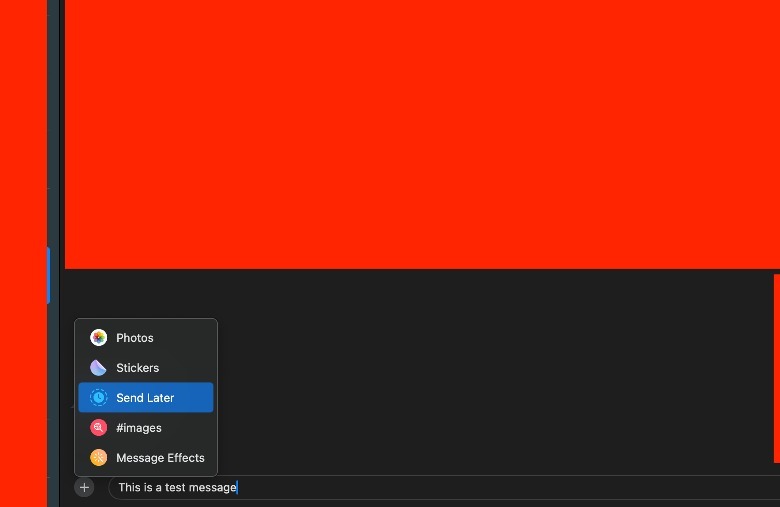
4. On the lower left corner of the chat window, tap on the "+" icon and select the "Send Later" option.
 Nadeem Sarwar/SlashGear
5. Next, click on the date and time fields and enter the schedule details.
 Nadeem Sarwar/SlashGear
6. Once you've specified the sending time frame, hit "Return" on the keyboard.
 Nadeem Sarwar/SlashGear
7. If you change your mind, simply click on the "X" in the compose field to cancel the scheduled message.
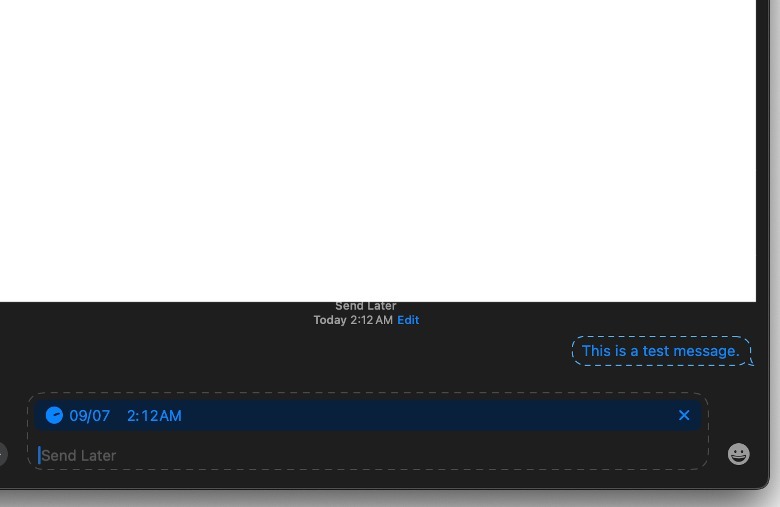
8. Above each bubble for a scheduled message, you will see a "Send Later" badge and an "Edit" option below it.
9. The latter lets you tweak the message content, adjust the sending schedule, or cancel the whole process. Do keep in mind that message scheduling only supports a window of up to 14 days, for now.