8 iPhone Security Settings And Features You Should Enable Or Change Right Now
Your iPhone isn't just a phone — it is a mini-computer filled with your personal life and financial info. Think about it — all your contacts, photos, emails, passwords, and maybe even bank details — everything is stored inside. That's why protecting it against hackers and snoops isn't just a good idea, it is absolutely essential.
While you might think your iPhone is secure out of the box, there is actually a deeper layer of settings you can tweak to make it a fortress. We are not talking about the obvious stuff like setting a strong passcode (although you should definitely do that too). These are lesser-known features that can help you avoid a disastrous hack that could expose your most sensitive information.
Cyber threats are constantly evolving, and the bad guys are getting more sophisticated every day. That is why it is important to stay one step ahead by taking advantage of all the security tools at your disposal. Here are eight iPhone security settings and features you should enable or change right now to keep your device safe and secure.
Turn on automatic updates
Let's kick things off with a simple but crucial step: turning on automatic updates. Apple regularly releases iOS updates, which often include patches that fix vulnerabilities hackers could exploit. Ignoring updates is just asking for trouble.
There are many reasons why you should keep your iPhone updated — it's not just about security. For example, updates bring performance enhancements that make your iPhone faster and more responsive. You will be able to scroll through Instagram and play your favorite games without any annoying lag. Updates also often come with cool new tools and tricks that can make your iPhone even more useful.
To turn on automatic updates, go to Settings, tap on General, and then Software Update. From there, you will see the option for automatic updates. Make sure it is toggled on. You can also customize your settings to allow your iPhone to automatically install updates overnight. This makes sure you always have the latest protection without interrupting your day.
Enable strong passcode and biometrics
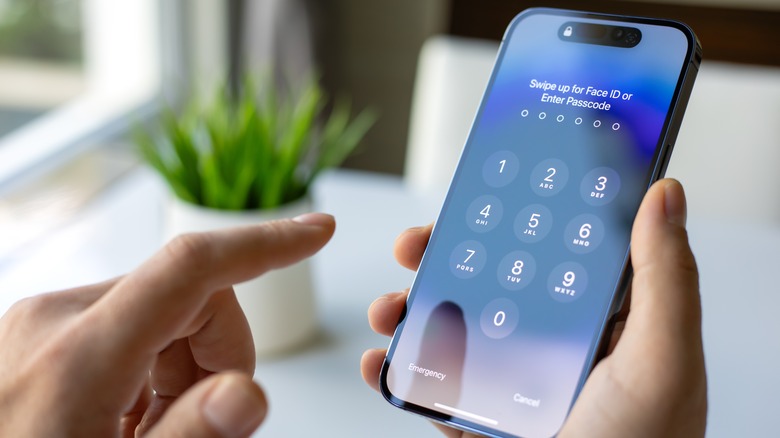
The second important privacy setting you need on your iPhone to improve security is enabling a strong passcode and biometrics. Many people still use simple and easily guessable passcodes like 1234 or 0000 or even names of their spouses, children, or pets. And if you happen to be one of them, you are practically inviting trouble.
A strong passcode should be like a complex password — a mix of letters, numbers, and symbols that is very hard to guess. And don't worry — you won't have to type it in every time you unlock your phone. That is where biometrics like Face ID or Touch ID come in. These features are the VIPs of the security world, and they use unique physical traits like your face or fingerprint to unlock your iPhone. It is super convenient and adds an extra layer of protection.
To set a strong passcode, go to Settings, scroll down to Face ID & Passcode (or Touch ID & Passcode), and then tap Change Passcode. Here, you can select Passcode Options to choose a custom alphanumeric code. This step might seem cumbersome at first, but it is a powerful way to keep your data safe. For biometrics, the setup process is simple. Follow the on-screen instructions in the Face ID or Touch ID section of your settings. Make sure to scan your face or fingerprint in various angles to ensure accurate recognition.
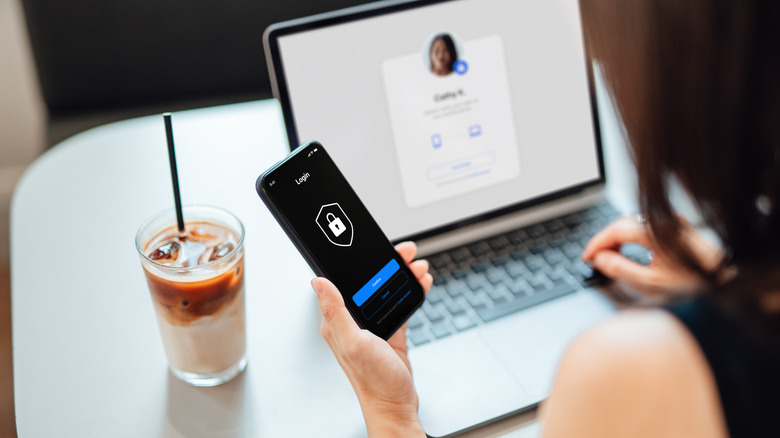
Enable two-factor authentication (2FA)
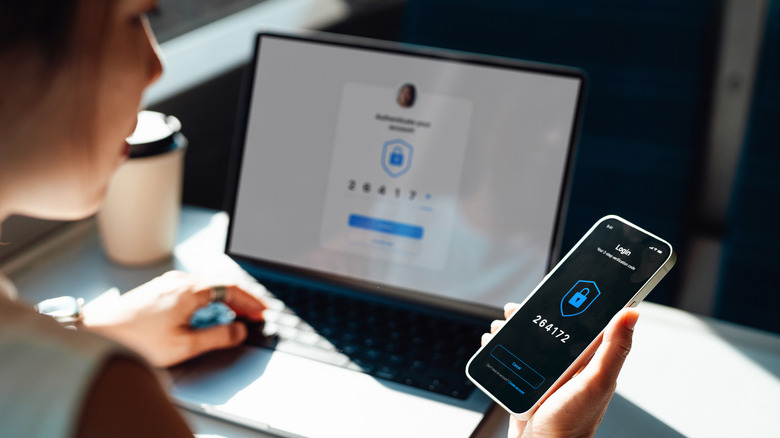
The third crucial setting to boost your iPhone's security is enabling two-factor authentication (2FA). This feature adds an extra layer of protection to your Apple ID and other accounts by requiring a second form of verification in addition to your password. Using 2FA might feel like an extra step, but it's one that can prevent a lot of headaches.
The way this works is when you sign in to your Apple ID on a new device, you will need to provide your password as usual, but you will also get a verification code sent to one of your trusted devices or phone numbers. This means that even if someone manages to steal your password, they still can't access your account without the second factor. Check out our article on why you should always enable two-factor authentication for a more detailed explanation of how it works and why it is essential.
To enable 2FA on your iPhone, go to Settings and tap your name. Go to Sign-In & Security and then select Two-Factor Authentication. Follow the prompts to set it up, and make sure you have a trusted phone number where you can receive verification codes. It is also wise to add an extra trusted number — like a family member's — just in case you lose access to your phone.
Enable Find My iPhone
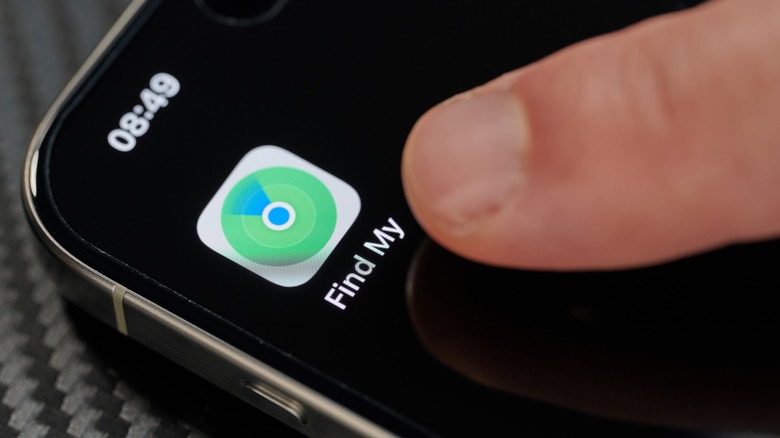
The next essential setting to enhance your iPhone's security is Find My iPhone. This feature could be a lifesaver if your iPhone ever goes missing — it lets you track your device's location using another Apple device or iCloud.com. So, if your iPhone accidentally slips out of your pocket on the bus or mysteriously vanishes from your bag, you will have a fighting chance of getting it back.
Find My iPhone can also play a sound (even if your phone is on silent), lock your device remotely, and even erase all your data to protect your privacy. It is like having a remote control for your iPhone, giving you some peace of mind even in the worst-case scenario.
To enable Find My iPhone, go to Settings and tap your name. Go to Find My and then tap Find My iPhone. Here, turn on Find My iPhone and Find My network. Make sure Send Last Location is also enabled. This sends your iPhone's last known location to Apple when the battery is critically low, which makes it easier to locate.
Review app permissions
Let's talk about something that often flies under the radar but is super important for your iPhone's security — app permissions. Apps often ask for access to various parts of your phone, such as the camera, microphone, contacts, or location. While some of these permissions are necessary for the app to function, others might not be.
Giving apps unnecessary access can put your privacy at risk. For example, a weather app doesn't need access to your contacts, and a photo editing app should not need to track your location. It is important to regularly review and manage these permissions to protect your privacy.
Start by going to Settings and then scroll down to Privacy & Security. Here, you will see a list of different types of data and features that apps might request access to — such as Location Services, Contacts, Photos, Camera, and Microphone. Tap on each category to see which apps have access and adjust as needed. For example, you might find that a simple note-taking app has access to your location, which it probably does not need.
Disable lock screen features
The sixth setting to adjust for better iPhone security is disabling certain lock screen features. It might sound counterintuitive, but your lock screen can actually be a bit of a double-edged sword. On one hand, it is convenient to have quick access to notifications, Control Center, and even your wallet. But on the other hand, it can be a privacy risk.
If someone gets their hands on your phone, they might be able to see sensitive information or even access certain features without even unlocking the device. For instance, with notifications enabled for your messages or emails, someone could potentially read snippets of your conversations without even knowing your passcode. Similarly, if you have Control Center enabled on your lock screen, someone could easily turn on Airplane Mode, disable Wi-Fi, or even mess with your Bluetooth settings.
To customize your lock screen features, go to Settings, then scroll down to Face ID & Passcode (or Touch ID & Passcode). Under Allow Access When Locked, you can toggle on or off various features like Notification Center, Control Center, Return Missed Calls, Wallet, and more. While it might feel less convenient, the added security is worth it.
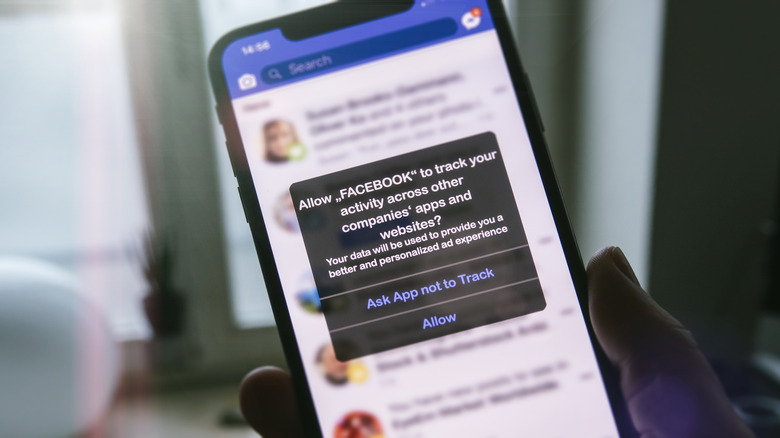
Disable location tracking in ads
The next security threat might seem a little creepy but it's unfortunately common in the digital world — location tracking in ads. If you have ever felt like ads were following you around online, that's because they probably have been. Many apps and websites track your location to show you personalized ads. Although this may seem harmless, it can be a major invasion of your privacy.
Thankfully, you can put a stop to this on your iPhone. Apple provides a way to limit ad tracking and preventing apps from using your location to target you with ads. It is a simple setting adjustment that can significantly protect your privacy. You regain some control over your privacy and reduce the amount of personal information being shared.
To reclaim your privacy, head to Settings, tap on Privacy & Security, then select Location Services. Scroll down and tap on System Services. From there, toggle off Location-Based Apple Ads. While you are in there, you might also want to check the Significant Locations setting. This feature keeps track of places you visit often, supposedly to enhance Maps and other services. However, if you are uncomfortable with your iPhone monitoring your whereabouts, you can disable it as well.
Turn on Stolen Device Protection
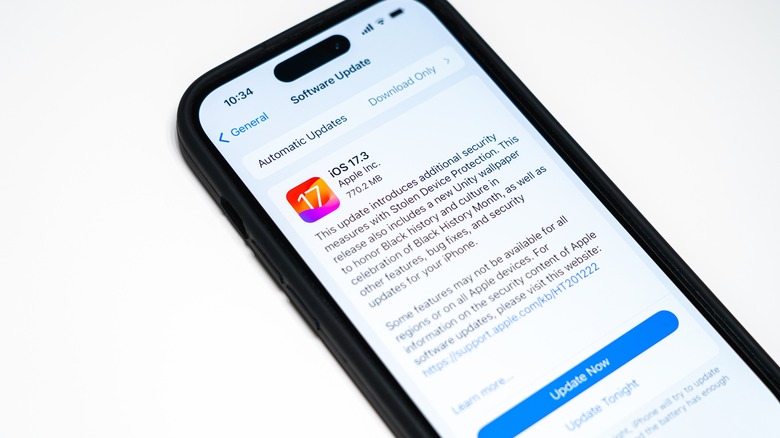
Let's wrap things up with one of the new features that arrived with iOS 17.4: Stolen Device Protection. With this feature enabled, even if someone manages to get past your passcode and biometrics, they will still face major roadblocks. This feature puts extra security measures in place, making it much harder for a thief to disable Find My iPhone, erase your data, or even activate your device with a new SIM card. In other words, you can use Stolen Device Protection to make your iPhone much less valuable on the black market.
Even the most sophisticated security measures can be bypassed, but in the unfortunate event that your iPhone does get stolen, Stolen Device Protection can be the difference between losing your data and privacy forever and potentially getting your phone back.
Here's the cool part — Stolen Device Protection is automatically enabled if you meet a few requirements. You need to have a passcode, Face ID or Touch ID enabled, two-factor authentication turned on for your Apple ID, and Find My iPhone activated. If you have followed the tips in this guide, you have probably already checked all those boxes.
Just to be sure, you can double check by going to Settings, tapping on Face ID & Passcode (or Touch ID & Passcode), and scrolling down to Stolen Device Protection. If it is not already enabled, just tap on it to turn it on.