What To Do If Your Windows 11 PC Keeps Restarting Randomly

Experiencing random restarts on your Windows 11 PC can be incredibly frustrating, especially when you're in the middle of an important task, enjoying your favorite game, or participating in a virtual meeting. These unexpected restarts not only derail your productivity but can also lead to potential data loss.
Such random restarts can be caused by a variety of factors, including overheating, faulty hardware components, or conflicts with recently installed software. Additionally, corrupt system files or malware infections can also contribute to this problem. Depending on your situation, fixing the underlying issue may be as simple as installing pending updates or as demanding as completely resetting your PC and starting afresh.
In any case, there's no need to settle for an unstable experience, as it is possible to fix the issue yourself with some troubleshooting. Here are steps you can take to stop your Windows 11 computer from restarting randomly and restore system stability.
Perform basic checks to fix random restarts
A faulty power supply unit (PSU) can cause random computer reboots. Start by checking the PSU to ensure it's properly connected and delivering adequate power. If you suspect it's malfunctioning, consider testing with a different PSU or consulting a professional to avoid further damage.
Windows may also initiate a reboot if it detects that the system is overheating to prevent hardware damage. It's crucial to ensure your PC has proper ventilation and is free of dust accumulation, particularly around the fans and heat sinks. If the CPU is overheating, close unwanted programs, clean the interior, and consider using additional cooling solutions like external fans.
Installing pending Windows updates is another essential step. These updates often contain critical fixes and enhancements that can resolve stability issues. If the random reboots are occurring due to a bug within Windows, installing the updates should help. Finally, malware infections can also cause such erratic behavior. Use the built-in Windows Security app or a reputable antivirus program to run a full system scan and remove any threats.
Turn off automatic restart
By default, Windows 11 is configured to automatically restart in the event of a system failure. This helps facilitate a quick recovery from crashes and reduces downtime. However, this feature can also cause Windows to reboot randomly at times. You can try disabling the automatic reboot feature via the Startup and Recovery settings and see if that helps. Here are the steps you'll need to follow:
- Right-click on the Start icon and select Run from the list.
- Type "sysdm.cpl" in the text box and hit Enter.
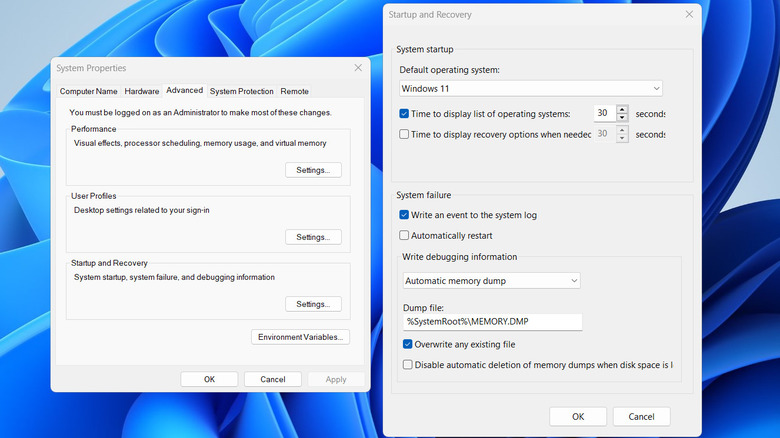
- In the System Properties window, head to the Advanced tab, and click the Settings button under Startup and Recovery.
- Uncheck the "Automatic restart" option under System failure and click OK at the bottom. Close the System Properties window.
Restart your PC for the changes to take effect. After that, use your computer as usual for some time and check if the issue is resolved.
Run the SFC and DISM scans
Windows 11 relies on numerous system files to perform essential tasks and keep the computer running smoothly. If some of these files become corrupted, Windows 11 may crash and restart abruptly. Fortunately, Windows includes a couple of handy tools — System File Checker (SFC) and Deployment Image Service and Management Tool (DISM) — that can scan your computer for any problematic system files and repair them. Note that DISM may need to download clean copies of corrupted files from the web, so ensure your PC is connected to the internet for this to work.
To run the SFC and DISM scans on your PC:
- Press Windows + X to open the Power User menu and select Terminal (Admin) from the list.
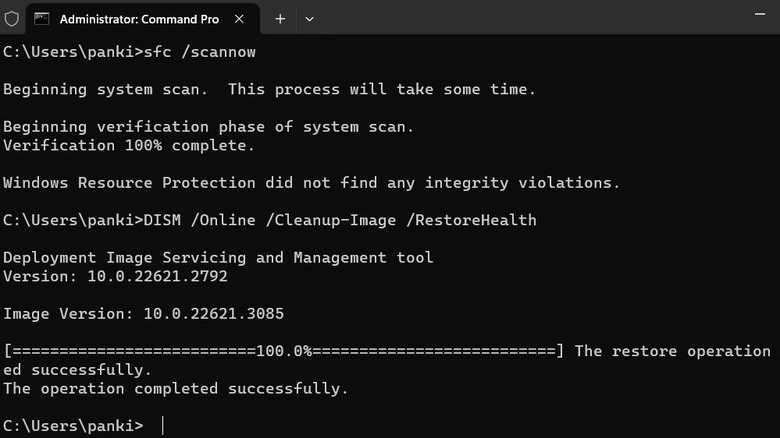
- In the console, type sfc /scannow and press Enter to run the SFC scan and repair any corrupted system files.
- Once done, type DISM.exe /Online /Cleanup-image /Restorehealth and hit Enter.
The DISM scan might take some time, so be patient. Once the scan is complete, restart your PC and check if the issue is resolved.
Run the Windows Memory Diagnostic tool
Random Access Memory (RAM) is crucial for the stable operation of your computer, and issues with it can lead to system instability and crashes. To identify and resolve memory problems, you can use the Windows Memory Diagnostic tool, which is a built-in utility designed to test your computer's RAM for errors. Since running this tool requires a reboot, be sure to save all your work before proceeding.
To run the Windows Memory Diagnostic tool on Windows:
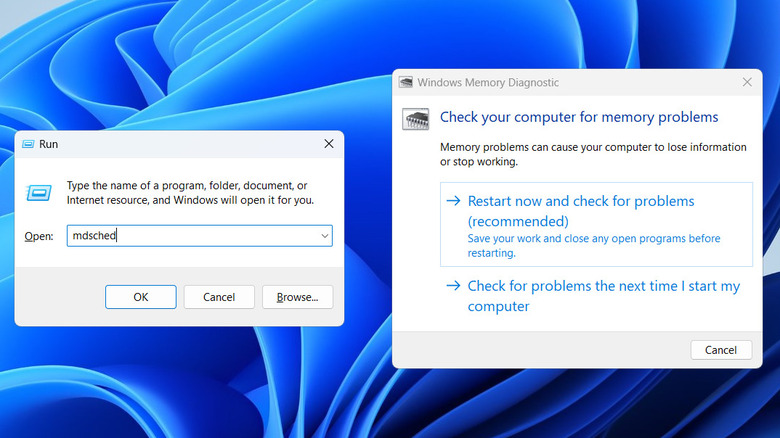
- Press Windows + R to open the Run dialog box. Type "mdsched" in the text field and hit Enter.
- Select the "Restart now and check for problems" option.
- Wait for your computer to reboot, and allow the Windows Memory Diagnostic tool to run tests.
Once the test is complete, your PC will restart, and the results will be displayed upon login. If any errors are found, the diagnostic tool will notify you. If necessary, you may have to replace or install more RAM on your computer.
Perform a clean boot
One of the third-party programs or services on your PC may be interfering with Windows processes, leading to random system reboots. Booting your Windows PC into a clean boot state can help you verify if this is the cause. To initiate a clean boot:
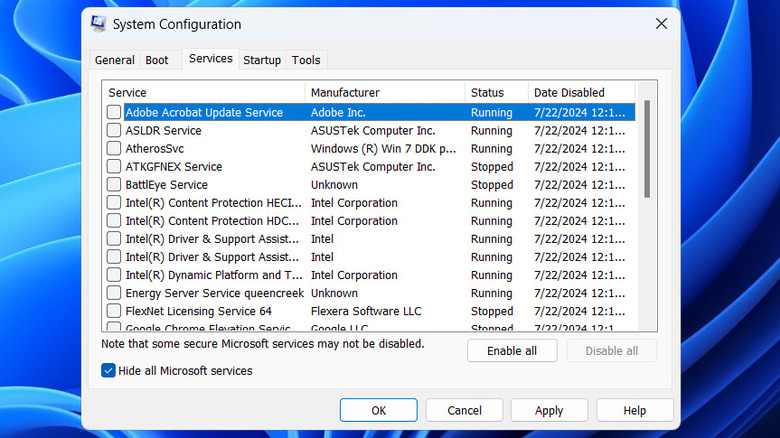
- Open the Windows Search menu, type "system configuration" in the box, and select the first result that appears.
- In the System Configuration window, navigate to the Services tab and tick the "Hide all Microsoft services" checkbox. Then, click the Disable all button.
- Switch to the Startup tab and click Open Task Manager.
- In the Task Manager window, select a third-party app or program and click the Disable button at the top. Repeat this to disable all the third-party apps and programs.
- Close the Task Manager window, click OK in the System Configuration window, and hit Restart.
Once your Windows PC starts in a clean boot state, use it for some time to check if the issue reappears. If it doesn't, re-enable your third-party apps and services one at a time until the problem resurfaces. Once you identify the service or app causing the issue, consider removing it.
Reset your PC
If all else fails, resetting your Windows 11 PC might be the only solution. This will restore Windows to its original state and fix problems caused by incorrect settings. You can choose to reset Windows 11 while keeping your personal files. However, if you prefer a fresh start with a clean slate, be sure to back up your essential data first. To reset your Windows 11 PC:
- Press Windows + I to open the Settings app, switch to the System tab, and click on Recovery.
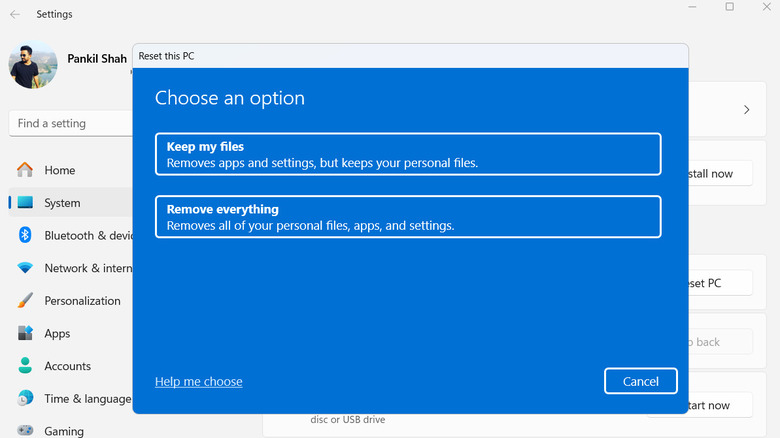
- Under Recovery options, click the Reset PC button.
- Select "Keep my files" to reset Windows without losing any personal files or data. Choose "Remove everything" if you want to erase apps and files as well.
Now, follow the on-screen instructions to reset your PC successfully. You will then need to reconfigure your Windows 11 settings and install the necessary apps. Following that, your computer should operate smoothly without any issues.