Here's An Easier Way To Transfer Google Photos To iCloud Photos
So you've finally decided to stick to one photo and video storage service, and picked iCloud over Google Photos. Now, the only problem is, how can you transfer the media you already have on Google Photos over to iCloud Photos? If it was the other way around, you'd have no trouble doing so, as Apple has an iCloud to Google Photos tool that can help you with that.
However, for Google to iCloud transfers, you'd normally have to go through the tedious and time-consuming process of manually downloading all your images and videos to your computer, and then uploading them to iCloud. If you're lucky and are only dealing with a couple hundred megabytes of data, you can accomplish this in less than a day. But if you have gigabytes' worth of media, it might take you a few days (or even weeks) to do so, depending on your connection and computer. By the time you get to the last photos and videos, you're probably sick and tired of repeatedly downloading and uploading files.
Fortunately, you no longer have to go through such a cumbersome process. Google recently introduced a tool to move your Google Photos to iCloud in a painless way. We'll walk you through a step-by-step guide on how to use this tool.
What you need to know before transferring your Google Photos to iCloud Photos
There are a few things you need to keep in mind before you start moving your Google Photos over to iCloud Photos. First off, restrictions apply to both your Apple and Google accounts. Your Apple account shouldn't be a child account or a Managed Apple ID account. If your Google account is a child, work, school, or org account, you also can't use it to transfer data to your Apple device.
Another important thing: iCloud Photos doesn't support every media file type out there. You can only use JPEG, PNG, HEIC, GIF, BMP, and TIFF files for photos — as well as MP4 and MOV files for videos. If, however, the service detects any unsupported files in your Google Photos, they will still be transferred over, but to your iCloud Drive — not your iCloud Photos.
So now, what happens when you transfer your Google Photos to iCloud Photos? The process actually only copies your data from Google to iCloud. This means you get to keep your photos and videos on Google Photos. Once your media is successfully transferred, they'll still appear in their original resolution with their original metadata, such as file name, date and time taken, and location.
Step 1: Prepare iCloud for the transfer
Here's what you need to do to get your iCloud ready for the Google Photos transfer:
- Make sure you have iCloud Photos and iCloud Drive turned on. You can check both on your iPhone by going to Settings > [your name] > iCloud.
- Disable Advanced Data Protection on your iCloud if it's on:
- On your iOS device, open Settings and navigate to [your name] > iCloud > Advanced Data Protection. Then, tap Turn Off Advanced Data Protection.
- On your macOS computer, open the Apple menu at the upper left corner. Go to System Settings > [your name] > iCloud > Advanced Data Protection and select Turn Off.
- Turn off Advanced Data Protection on your Google account if you have it enabled:
- Sign in to myaccount.google.com.
- Go to Security.
- In the Advanced Protection Program section, click Manage Advanced Protection.
- Press Unenroll from Advanced Protection at the bottom.
- In the popup that appears, select Unenroll anyway to proceed.
- Check how big your Google Photos are:
- Login to photos.google.com.
- Scroll to the bottom of the left side panel.
- Select Storage.
- Note how much space Google Photos occupies.
- Check whether you have enough storage left on iCloud:
- On your iOS device, go to Settings. Tap on [your name] > iCloud. At the top, you should see how much of your storage is already used up.
- On your macOS computer, select the Apple logo. Jump to System Settings > [your name] > iCloud. At the top is a bar graph with your remaining space.
If you don't have enough iCloud storage for your Google Photos, log in to iCloud on your browser to see all your files and delete those you no longer need. Alternatively, you can upgrade to iCloud Plus to get a bigger storage.
Step 2: Proceed with the transfer
After getting your iCloud setup for the Google Photos transfer, you're ready to get the process started. Follow these next steps:
- Log in to Google Takeout using the Google account where your photos are stored.
- (Optional) Select the albums you want to transfer. Under "Choose the data you want to copy," click on "All photo albums included," and mark only the ones you need.
- Press Continue.
- Grant Google Takeout access to your Google Photos library.
- In the "Select the third party service" section, set it to Apple – iCloud Photos. If you don't have this option, then your Google account doesn't support iCloud Photos yet. The feature is still being rolled out as of this writing, so just keep an eye out for when it reaches you.
- Hit Continue.
- Log in to iCloud with your Apple ID.
- Allow Google Takeout to access your iCloud Photos.
- Back on the Google Takeout page, click on Agree and continue to proceed with copying your data.
- When prompted, enter your Google account password.
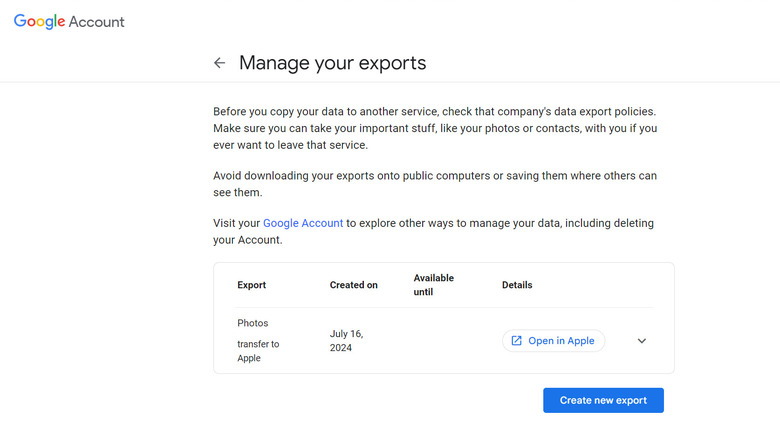
Once the operation starts, you should receive an email on both your Apple and Google accounts about the transfer. This process can extend over several days depending on how large your data is. If you want to check the progress, sign in to privacy.apple.com. There should be a message on the right about the photo library import from Google Photos. Click on "View details" to see more details regarding the transfer. After everything is transferred over to iCloud Photos, you'll get another email on your Apple and Google accounts saying so. You can then see your Google Photos files in an album labeled "Imported from Google YYYY-MM-DD."


