How To Install Ubuntu On Raspberry Pi
When working with Raspberry Pi, many hobbyists' and makers' go-to operating system for their board is the Raspberry Pi OS, and for good reason. It's easy to install and all but guaranteed to work on your Pi with no issues. If you do run into some problems, you can always rely on the comprehensive official documentation or the huge Raspberry Pi community for help.
But while the Raspberry Pi OS is a great general-purpose OS for both simple and advanced projects, you might want to switch to a different system that fits your needs better. One of the top OS options for Raspberry Pis, especially for beginners, is Ubuntu. It's among the major Linux flavors out there, so it's well-supported, and its community is just as massive. If you plan on using Ubuntu for your Pi, we'll walk you through the step-by-step process of how to install this OS to your board of choice.
Step 1. Flash Ubuntu to your microSD card
Using the Raspberry Pi Imager, Raspberry Pi's official OS installer, is the easiest way to flash Ubuntu to your microSD card. The OS images are directly available in the Imager, so you won't have to download it yourself. Follow these steps to get Ubuntu on your microSD card:
- Download and install the Raspberry Pi Imager for your computer. It's available for Windows, macOS, and Ubuntu users.
- Insert your microSD card to your computer.
- Launch the Imager.
- Under Raspberry Pi Device, click Choose Device.
- Pick your specific board from the list (goes as far back as the Pi 1).
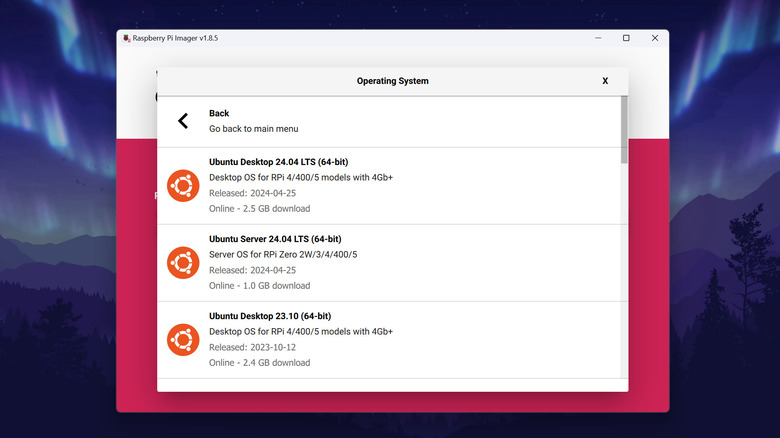
- Under Operating System, press Choose OS.
- Navigate to Other general-purpose OS.
- Select Ubuntu.
- Choose your preferred Ubuntu Desktop OS. Make sure to read the description as some versions only support specific boards with specific RAMs. Aside from the Desktop version, you can also find Ubuntu Server and Core OSes in the Imager. However, if you're only interested in turning your Pi into a desktop computer, then Ubuntu Desktop is what you need.
- Under Storage, select Choose Storage.
- Click on your microSD card. If you only have one card inserted to your computer, it will be the only one that shows up on the list.
- Hit Next.
- In the prompt that appears, select Yes to proceed with erasing the existing data on your card and installing Ubuntu.
- Wait for the writing and verification process to finish.
- Once that's done, press Continue in the Write Successful popup.
- Safely remove the microSD card from your computer.
You now have Ubuntu ready for setup on your microSD card.
Step 2: Configure Ubuntu on your Raspberry Pi
Before you can use the OS, you first need to configure it to your preferences. Here's how to do so:
- Unplug your Raspberry Pi from the power supply if you already have it connected.
- Connect a keyboard, mouse, and monitor to your board. Alternatively, you can use a touchscreen display, such as the official 7" touch display or any other Raspberry Pi-compatible accessory you can find on Amazon or your favorite maker shop.
- Insert the microSD card to your Pi.
- Power the board.
- Wait for the boot process to complete.
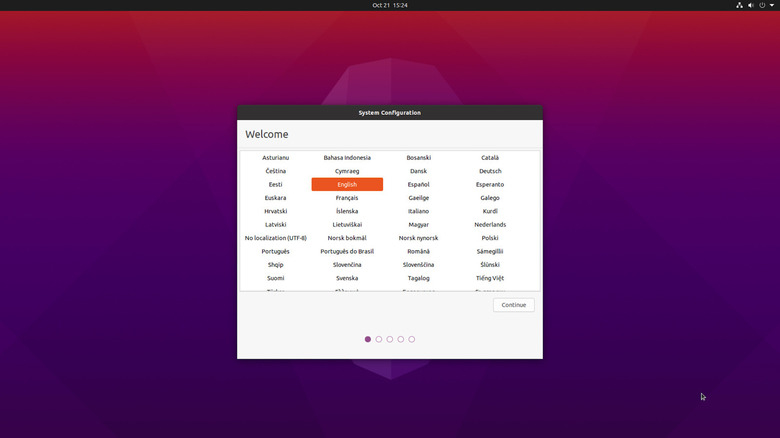
- Configure Ubuntu:
- Set your language by selecting your language of choice and hitting Continue.
- Set the keyboard layout by picking manually from the options. Press Continue to save it.
- Connect to your Wi-Fi network by selecting your SSID from the list and entering your password. Select Continue.
- Choose your location from the map to set your timezone. Hit Continue.
- Set up your profile by entering your name, preferred computer name, username, and password. Then, select "Require my password to log in" to keep unauthorized people from accessing your computer. Select Continue to finish.
- Let Ubuntu reboot to apply your changes.
- On the login screen, sign in with your username and password.
- Update your software by opening the Terminal app and running sudo apt update && sudo apt upgrade. Then, reboot to integrate the changes.
Once on the desktop, you can start using Ubuntu as you wish. If you plan on installing more software, click the App Center (orange basket icon) from the left side panel, type the app you need in the search bar, and select it from the results. Then, press Install to proceed. Enter your password when prompted.