Windows 11 Start Menu Not Working? Here's How To Fix It
Start Menu is an essential Windows 11 feature that allows users to launch apps, access Windows Settings, apply power options, and more. Basically, Windows users control their system through the Start Menu. Considering this, it might be quite unproductive when the Start Menu stops working suddenly. It is one of the most common Windows issues that leaves users scratching their heads trying to solve it.
There could be many reasons for this problem, and thankfully, most of them are easily solvable. If you have enrolled for the Windows Insider Program, you are highly likely to face such issues because of instability. If the system file responsible for launching the Start Menu is corrupted, it'll lead to unresponsiveness. Many Windows users install third-party launchers to customize their taskbar and Start Menu, so problems with such programs can lead to the Start Menu not working.
Sometimes, a corrupt Windows User Profile can cause the Start Menu or other services to not function as expected. If the problem started recently after you visited an unsecured site, or downloaded and installed programs from an unrecognized platform, it's possible that malware is causing this issue.
Whatever the cause may be, solving this problem isn't as challenging as it seems. We'll discuss all the working ways to fix it with step-by-step instructions. You need to have administrator rights to perform the actions listed in this guide. If you run into this problem on your Windows 10 device, the listed methods will work fine on that as well.
Basic checks to fix Windows 11's Start Menu
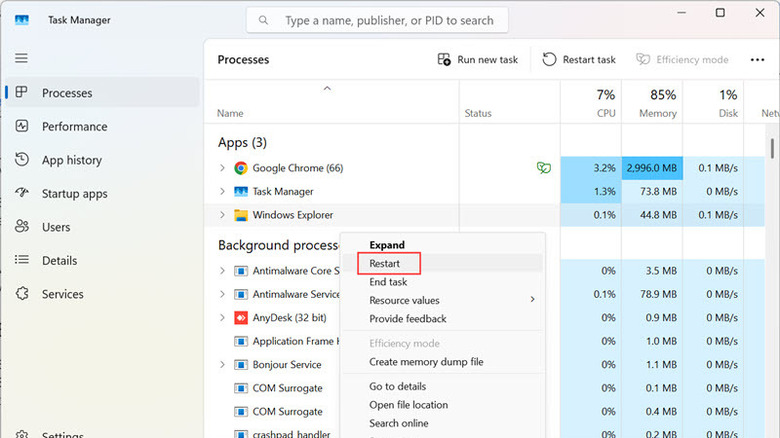
Sometimes, the problem can be fixed by applying some basic steps: Start by restarting the Windows File Explorer app. It is responsible for managing the graphical user interface of Windows, and restarting it might fix the minor glitch. Launch Windows Task Manager and look for the Windows Explorer service. Right-click on it, and select "Restart."
Next, if you haven't already done so, restart your computer. Surprisingly, this is the most common solution for many Windows problems: Restarting the system will restart all the Windows services and processes, including Windows Explorer. If you are using any third-party applications for customizing your Start Menu, try uninstalling them and see if that solves the issue.
Another thing you can try is booting your Windows in Safe Mode. This will restart your Windows with a minimal set of drivers and services and help isolate any background process or application that is interrupting the Start Menu from opening. Finally, you should also check for any pending Windows Updates. An outdated Windows OS, especially if you are running it under the Insider Program, can have technical issues. Microsoft generally pushes fixes to such glitches via updates, so go to Settings on your system, switch to the Windows Update section on the left, and then click the "Check for Updates" button on the right.
Restart the Start Menu process and other background services
The Windows Start menu functions through a process called "StartMenuExperienceHost.exe." Restarting this process might clear the temporary glitch and restore the normal functioning of the Start Menu.
To do that, follow these steps:
- Press the Ctrl + Alt + Delete buttons on your keyboard, and select Task Manager from the menu that appears.
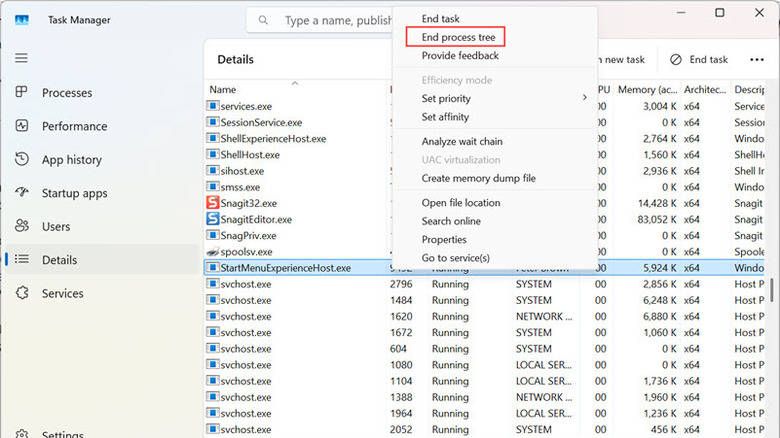
- Under the Task Manager, switch to the Details section on the left, and look for the "StartMenuExperienceHost.exe" process.
- Right-click on the process, and select the "End Process Tree" option.
- Exit the Task Manager, and reach the Desktop.
- Press Alt + F4, expand the drop-down menu below "What do you want the computer to do?," and select the Restart option. Click OK to restart your PC.
After the restart, check if the Start Menu is launching properly. If not, repeat the same steps to restart SearchIndexer.exe, SearchHost.exe, and RuntimeBroker.exe processes as well.
Hard reset the Start Menu
If the Start Menu is corrupted or misconfigured due to some actions on Windows, resetting it will fix the problem. It will also reset any personalization you have made to the Start Menu, such as app pinning and the recommended section. The most straightforward way to reset a Windows component is through PowerShell.
Here are the steps to reset the Start Menu using a PowerShell Command:
- Press Windows + X on your keyboard to launch the Windows Power Menu. Select Terminal (Admin) from the menu.
- Windows PowerShell should be launched by selecting the Terminal (Admin) option. If not, press Ctrl + Shift + 1 to open a new tab with PowerShell.
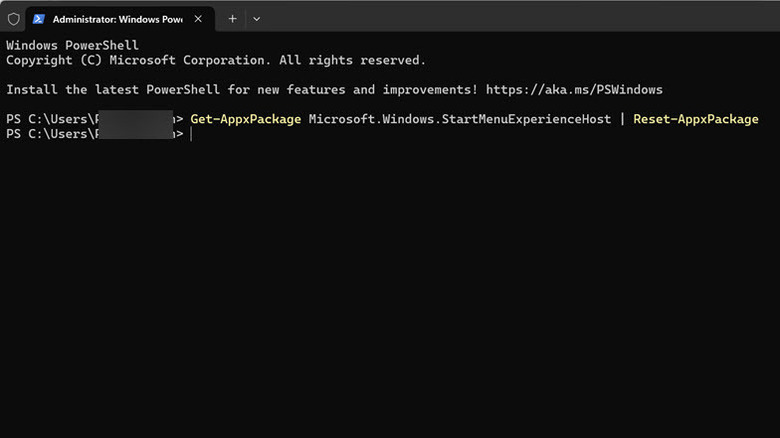
- Now type or copy & paste the following command and hit the Enter key: Get-AppxPackage Microsoft.Windows.StartMenuExperienceHost | Reset-AppxPackage
- You will see a blue screen, and within seconds, the Start Menu will be reset.
Exit the Terminal window and restart your system using the Alt + F4 keys. This reset should fix the problems with the Start Menu, which should now function as usual.
Run DISM and SFC commands
If the system files on your Windows 11 are corrupted, it can lead to issues like the Start Menu not working. To repair the corrupted files, Windows offers two tools — Deployment Imaging Service and Management Tool (DISM) and System File Checker (SFC). You can run these tools with single-line commands on Command Prompt, or via Windows PowerShell. We'll start with the DISM command first to ensure that the SFC tool has a healthy Windows image to work with.
Here's how to do that:
- Press Windows + X and select Terminal (Admin) from the Windows Power Menu.
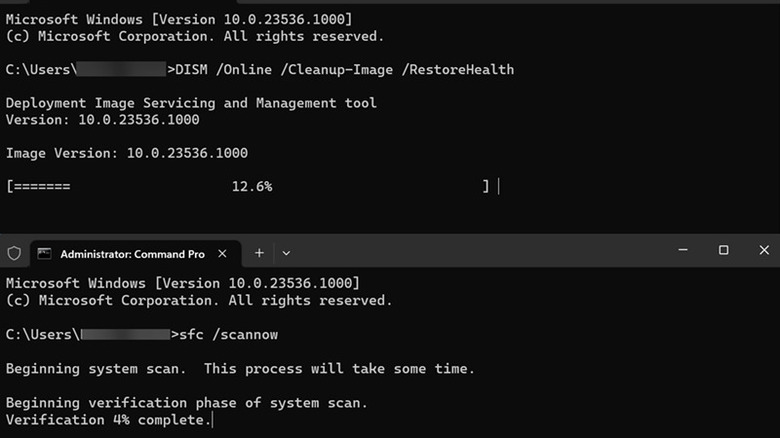
- Now, on the command line, enter the following command, and hit enter: DISM /Online /Cleanup-Image /RestoreHealth.
- Windows will likely take some time to complete this process, depending on the level of corruption and speed of your system.
- After the DISM command is successfully executed, now use the following command to run the SFC tool: sfc /scannow.
Let the SFC command complete, and then restart your device.
Rebuild the Windows search index
The Windows search function and the Start Menu are closely connected and work together when using your PC normally. If there's any issue with the search functionality, it's possible that it might make the Start Menu unresponsive as well. To rule out this possibility, you can rebuild the Windows search index.
Here's that process:
- On your system, press Windows + R to launch the Run Command box.
- Type in or copy & paste the following command and hit enter: control /name Microsoft.IndexingOptions
- Click the Modify button at the bottom to continue.
- Now, click the Show All Locations button at the bottom and uncheck all the selected locations. Click OK.
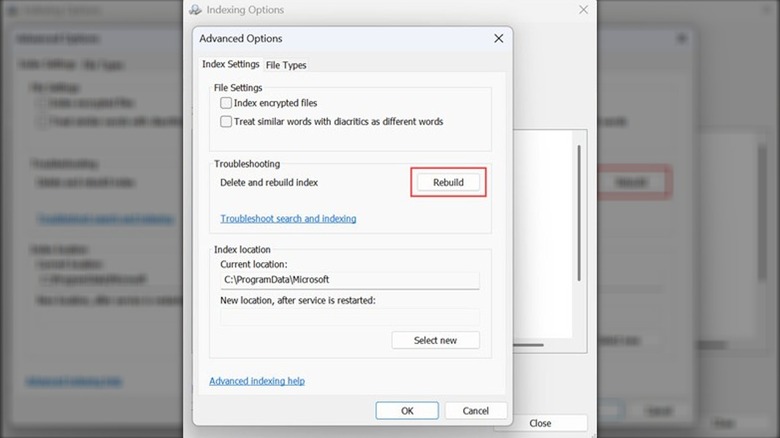
- Under the Indexing Options window, select the Advanced button at the bottom.
- Click the Rebuild button under the Troubleshooting section.
- Finally, click the OK button.
After rebuilding the Windows search index, restart your device and check if the Start Menu is working again.
Create a new local account
Sometimes, the error might be specific to your current user profile. If you have another user profile registered to your Windows 11, sign in to that and check if the error persists. If you don't have another profile, create a new local account with admin rights for testing.
Here's how to do that:
- Press Windows + I to launch Windows Settings.
- Switch to the Accounts section on the left and click the Other Users option on the right below Account Settings.
- Next, click the Add Account button next to the "Add Other User" option.
- In the next window, you'll be asked to enter the phone number or email of this new account user. Click the "I don't have this person's sign-in information" option.
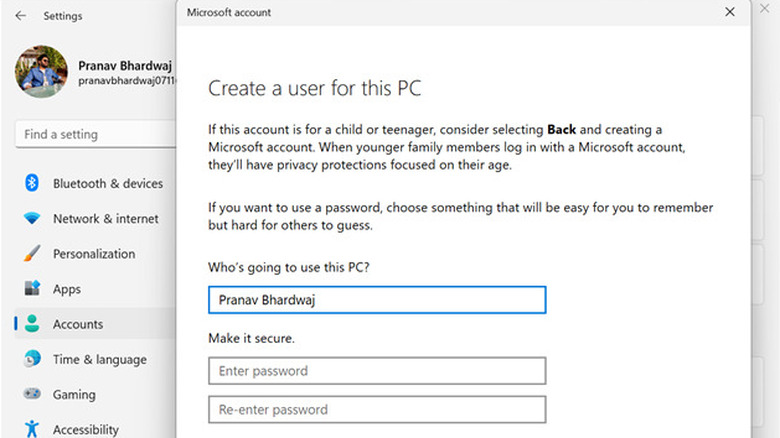
- Next, click the "Add a user without Microsoft account" option.
- Enter the username and password for this account. Entering the password is optional; you can leave it blank. Click Next when you are done.
The new account will be created, but without administrative privileges. Now, you need to make it an administrator.
- Under the Other Users settings, you'll see your new account labeled as Local Account.
- Click on it to expand the menu, and then click the Change Account Type button next to Account Options.
- Expand the drop-down menu on the next window and change the user type from Standard User to Administrator.
- Finally, click OK.
Now, sign out of your current profile and sign in to this newly created one. Check if the Windows 11 Start Menu is working. If it is, it means the issue is profile-specific, and your previous user profile is potentially corrupted.
Reset your PC

If you have applied all the methods listed in the guide and even creating a new user profile didn't solve the issue, then as a last resort, you need to reset your PC. It will give your PC a fresh start and possibly fix the underlying problems preventing the Start Menu from launching.
Here is the process:
- Press Windows + I to open Settings and switch to the System section on the left.
- On the right side, select the Recovery option.
- Next, under the Recovery Options, click the Reset PC button.
- You'll get the option to keep your files or remove everything. Choose the appropriate one.
- After a moment, you'll be asked how you would like to reinstall Windows — Cloud Download, or Local Reinstall. Select your preferred option to continue.
- Now, follow the onscreen instructions to reset your PC successfully.
After the reset is completed, all the settings will be reset to default. The Start Menu not working issue should now be fixed.