10 iPhone 15 Features You Should Be Using But Never Knew Existed
The iOS 18 beta is out (and you can try it now, if you dare), but the official public release is slated for September at the earliest. Ask any beta tester and they'll tell you bugs are aplenty and battery life is poor; best if you wait until the iPhone 16 hits store shelves. Worse, many of these features — particularly Apple Intelligence — won't be available to anybody with an iPhone 15 and below, and if you do have a 15 Pro, it's only available in beta for that September release date. That means you've got a long time to wait to try out those new iOS 18 features, particularly the fancy new Siri and Image Playground. The beauty of Apple, though, is that many of its best features aren't advertised on the front page of their Newsroom releases. Some that you might stumble upon have been there for years — and will change how you use your device.
Take the ability to turn the on screen keyboard into a trackpad by holding down the spacebar. It's a small thing that levels up the way you edit text on your phone. Most people have heard about it by now, but what they didn't know is that tapping the screen with a second finger allows you to select text with it, too — the point is, the rabbit hole goes deep once you look for those hidden features. To get you started with those lesser-known tricks and productivity boosters, here are some fab features you can try on your iPhone 15 right now.
Securely share a password or passkey over AirDrop
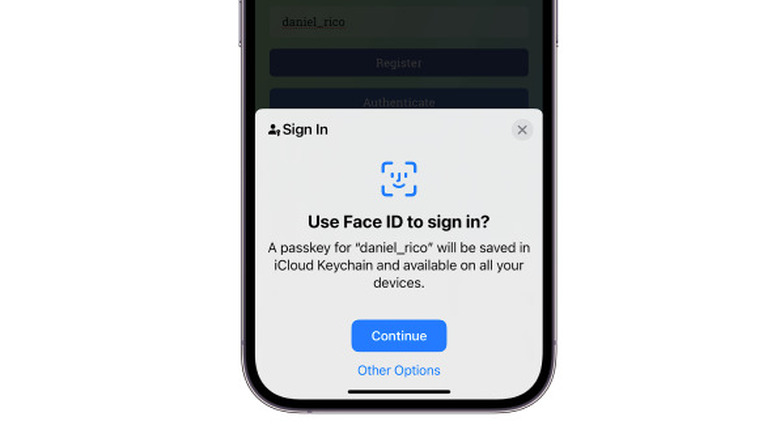
One of the most popular ways to share your account password with a friend is also the least secure: sending it via message. And heaven forbid it's SMS with an Android user (RCS is another feature not arriving until iOS 18), because that's a perfect way for hackers to intercept it. Even if you were to send it with end-to-end encryption, it's just bad security practice. All phones running iOS 17 have the ability to conveniently and securely share both passwords and passkeys over AirDrop — nifty, because passkeys can't otherwise be shared with other people.
Of course, there are some requirements before you go around handing out your credentials like candy. Aside from setting up iCloud Keychain, the recipient must be in your contacts with their iCloud email address — and you must be on their contact list with the same. That done, all you have to do is go to Settings > Passwords and tap the share button next to the login info you want to pass on. It's that simple.
A fair word of warning: you obviously shouldn't share a password with someone you don't trust, but keep in mind you are giving the person you're sharing with future access, too. The credentials get stored in their iCloud Keychain, just like it's stored in yours. Consider instead adding them to a shared password group where you can revoke access at will. Going this route also makes it easy to share passwords with them in the future, even if they are beyond AirDrop range.
Scan documents directly into Notes
It wasn't too long ago that the only way to scan documents onto your smartphone required downloading a sketchy third-party app, often with poorly-framed, illegible results. These days, every app and its dog will do it for you; even Google Drive will scan them straight into your cloud storage folder. If you're like most, you'd prefer to do it through a built-in, proprietary app that you're already using. If Notes is an app you use regularly, then you're in luck.
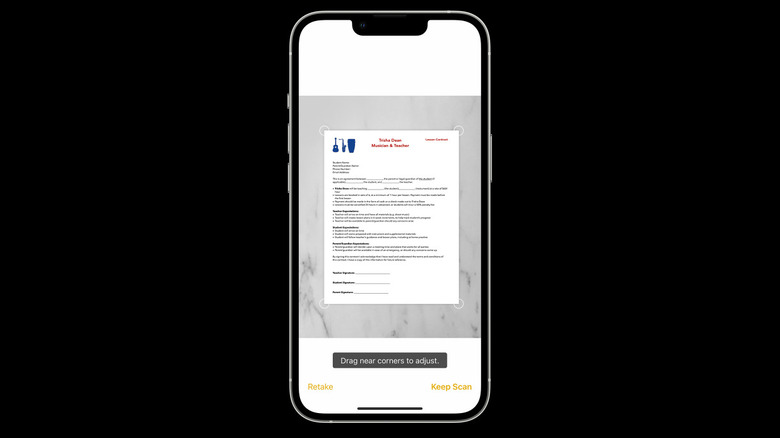
Notes makes it about as easy as it could possibly be: hit the Camera icon at the bottom of any note, then Scan Documents. It's set to Auto mode by default, so all you have to do is make sure you've got good lighting and point the lens. Notes takes care of the rest. You can also snap a picture manually if you're unhappy with the result, and change to grayscale if you want black and white documents only. Subsequent pages or documents get added automatically; just remove the freshly-captured document from frame and replace it with another, wait for your iPhone to capture it, and repeat. Press Save once you're finished and you'll have a ready-made PDF for sharing.
Once you finish capturing a document, you can sign it as well using the markup tools, or a saved signature. Unfortunately, it appears Apple doesn't yet support a way to convert the image into text with the document's same formatting, aside from copying and pasting recognized text by hand. Instead, you might scan text directly into Notes, section by section, using Apple's excellent live OCR.
Drag and drop your files
Split View on an iPad is one of those features we've been begging Apple to bring over to the iPhone, but our cries have fallen on deaf ears — as they usually do. Split view would make it much easier to have that Mac-like drag-and-drop functionality for easily transferring files between apps. While it's impossible to know when split view will appear on the iPhone roadmap, there is some good news: drag and drop is possible on the iPhone, it just takes two hands.
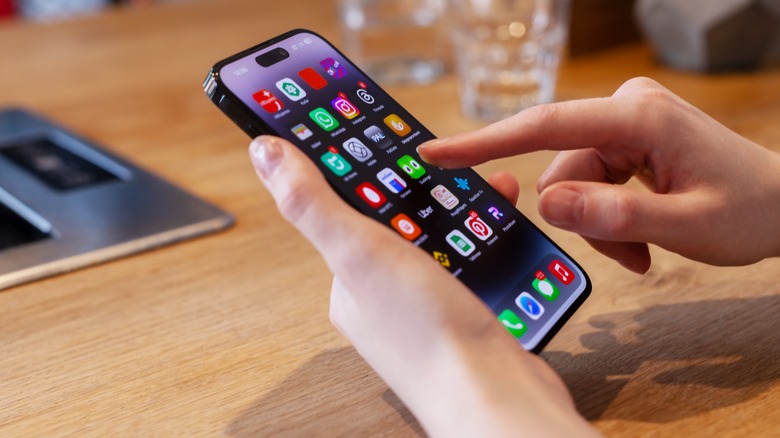
Suppose, for example, you found an image in Safari that you want to send over iMessage. Simply press and hold the image, wait for it to lift away from the page as a thumbnail, then swipe up on the navigation bar with your other finger to get to the home screen. Keep holding that image while you use the other hand to select iMessage and your desired chat conversation. Let go of the file, and it should go straight into the send box. It doesn't get any easier than that.
A few downsides here: not all files and apps are supported. Aside from Apple's native apps like Notes and Files, it appears only a few major ones like Gmail and WhatsApp support this functionality. Most major file types should work, like PDFs and text documents, but don't hold your breath for any less-common types. It was a tad bit slow during our testing — perhaps a larger image and an older iPhone will cause some delay — so be patient if it feels like nothing's happening at first.
Do a one-finger zoom in Maps
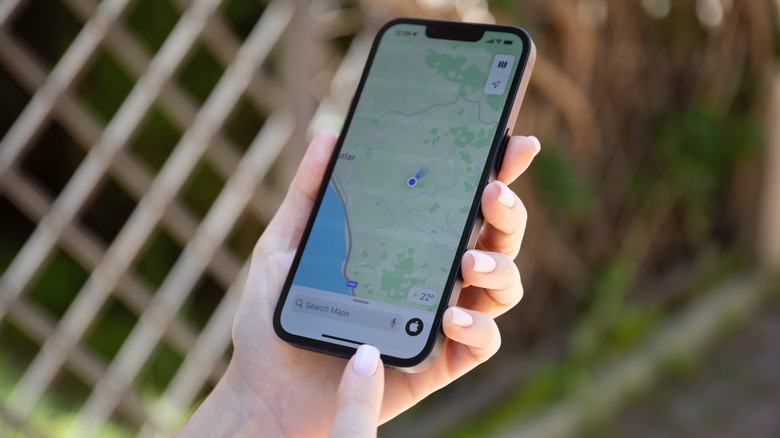
Pinch to zoom was super cool in 2007 when Steve Jobs demonstrated it on stage with the first iPhone. Back then, touchscreen-enabled smartphones were all the rage, and multi-touch gestures made waves the same as ChatGPT regularly shakes up our world today. Multi-touch is old hat in the 2020s, and frankly it gets annoying to readjust your grip so you can zoom in on pictures and maps — especially if you've only got one hand to do so at the moment. One of the best kept secrets of Apple Maps is that you can actually zoom with one finger.
With Maps open, double tap on the map and, without lifting your finger from the screen, drag in or out. Dragging out will zoom in; dragging inward will zoom out. Release to stop zooming. That's all there is to it. It will definitely take a bit of practice, but once you master it, we'd argue it's the superior method compared to pinch to zoom. It even works in other map apps, too, like Google Maps and CityMapper — but we'd recommend giving Apple Maps a try, since recent updates and a ton more useful features have put it back in the running with Google.
Protect your hearing with AirPods
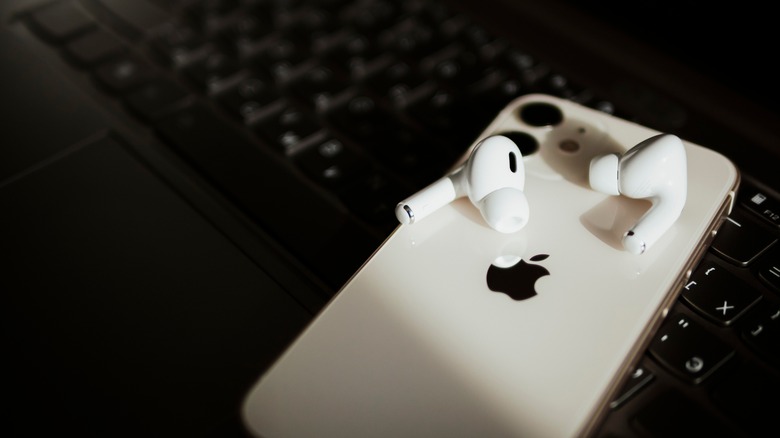
Noise pollution, like sleep deprivation and poor air quality, is something we all fail to take seriously. City sounds in the modern age sit regularly above 85 dB, which damages your hearing after only 8 hours andmakes us all slowly go deaf — and that's to say nothing of the other negative health effects. AirPods noise cancellation is an excellent way to combat this, except when you turn on transparency mode (where the microphones pass outside noise through) to be aware of your surroundings. Transparency mode is essential to avoid, say, getting hit by a car while crossing the street, but letting the sound back in arguably negates the benefit of ANC since you'd hear all those loud noises again and have to turn up your music volume to compensate. Cue AirPods hearing protection features.
First, enable Ambient Noise Reduction. Go to Settings > Accessibility > Audio/Visual > Headphone Accommodations, then enable Custom Transparency Mode and drag the slider as high as you'd like for Ambient Noise Reduction. You'll have to connect your AirPods before these settings appear. When transparency mode is enabled, your AirPods will cancel out annoying background sounds without cutting out the important ones like voices.
Your AirPods can also automatically make sure your music never exceeds 85 dB so your volume never exceeds safe levels. Go to Settings > Sounds & Haptics > Headphone Safety, then toggle Reduce Loud Sounds and drag the slider to 85 dB or below. If you forget to turn volume down, your iPhone will notify you when you've been listening for too long at a high setting. We also recommend enabling Sound Check in Settings > Music, which prevents volume spikes in your media that would be jarringly loud.
Make long screenshots into marked-up PDFs

If you haven't used the iPhone's excellent screenshot utility, you've been missing out. Aside from quickly cropping and sharing an image, you can use a mini suite of Markup tools to add stickers, text, signatures, and shapes. Custom brushes, stroke thickness, and colors let you easily point things out in your screenshots. This is great, but what if you want to screenshot an entire webpage and send it as a PDF, without having to use extra software? The screenshot utility can do that, too.
To screenshot an entire webpage, take a screenshot, tap the preview thumbnail that appears, and tap Full Page at the top of the screen. That's it. You can adjust how much of the screen you capture by dragging the box that appears on the right. Then, rather than saving it as one big, unwieldy image, you can tap Save PDF to Files. Two items of note here: the PDF that it creates won't be neatly divided up into pages, so it'll be one long scroll; second, this feature only works in Apple apps like Safari.
Identify things in your Photos with Visual Look Up

The iPhone Photos search is fairly powerful, enabling you to search for AI-identified items and even text that appears on documents and signs. But what if you want to look up a specific item that appears in your shots, similar to Google Lens or Circle to Search? Visual Look Up is a native means of doing so without another app, and all with a single tap.
In a photo with an item you're curious about — say, a type of plant or a dish — tap the Visual Look Up icon. The option is only available if the information icon has changed and has stars overlaying it. Results from the internet will then appear in a pop-up window similar to the Define or Look Up feature.
It's helpful for finding all sorts of things on your next vacation; restaurants, food recipes, plants, animals, and more. Admittedly, the feature is nowhere near as powerful as Google's image recognition, likely because Apple does all of the processing on-device instead of in the cloud. It's often liable to call your lab a rottweiler and your roses germaniums, but it can come in handy for simple, obvious queries — like identifying a famous landmark.
Use your iPhone as a remote mic

Suppose you want to set your baby down to nap in a different room, but don't want to set up the baby monitor there. Live Listen on iPhone could transform your device into an on-demand baby monitor, provided you have a pair of AirPods. With your AirPods connected, swipe down the Control Center, tap the hearing icon, select your listening device (the AirPods), then Live Listen. You can also do this via a triple-click accessibility shortcut and/or your supported hearing aids. That done, all you have to do is set your iPhone down next to the thing you want to listen to — preferably with the microphone at the bottom aimed at the source — and walk away.
This might not be something you use every day, but there's guaranteed to be at least a handful of instances in your life where you'll be glad you had it. For example, say you want to keep listening in on a meeting when you have to leave to do something else; you could set your iPhone down on the table and walk out without missing a word. Of course, the most obvious use case that comes to mind is eavesdropping a conversation. Who knows, your friends might say some very interesting things about you when you're in the bathroom.
Quickly share contact info with NameDrop
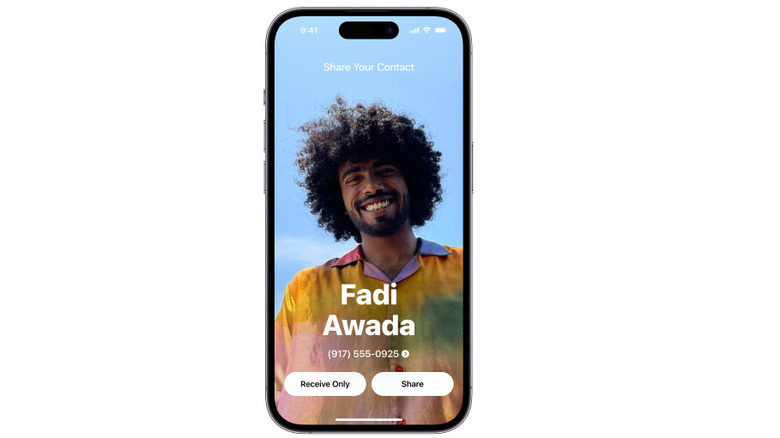
As the saying goes, it's not what you know, it's who you know. Networking is incredibly important for improving your job prospects and opening doors you wouldn't have otherwise. Sadly, the rise of social media and the recent pandemic made people more introverted than ever. A shame, since in last year's iOS 17 we got NameDrop, probably one of the coolest and easiest ways ever imagined to swap contact deets.
So, suppose you meet a fun person at a party. Provided you both have an iPhone running iOS 17.1, all you have to do is hold the tops of your devices in close proximity and wait for NameDrop to appear. Then, you can tap Receive Only or the Share button on the prompt that appears on your screen. Done and done. And if you're iffy about sharing more than your phone number, you can customize which info NameDrop includes. It's a convenient, easy, gamified way of getting someone's number at a bar or after class, one that gives you more reason to step outside your comfort zone and make new friends. Just keep one thing in mind: you can't use it to update the contact information of someone you already know, as it only works for new contacts.
Check-in with friends
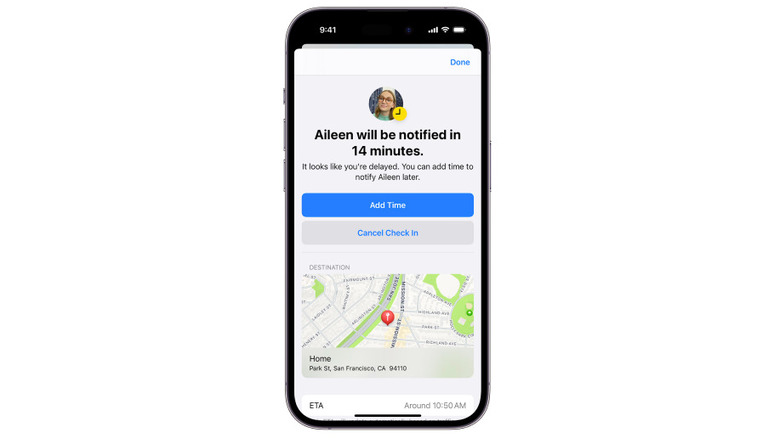
Back when Blink-182 was cool and everyone had flip phones, we'd have to text our moms when we were on the way home after going out with friends — and if we were late, why. These days, concerned mothers have an easier option that works whether or not their child cooperates: Check In. To use it, open a conversation with someone in iMessage, tap the plus button, select More, then Check In. You can set it based on when you arrive — using your destination and current travel details to let your iPhone figure out if you'll make it on time — or just set a timer. When you reach your destination — say, home — the check-in completes automatically, so whoever is worried about you can breathe a sigh of relief.
If you don't arrive, then your friend can see your current location — or not, since you have full control of what information gets shared. There are so many situations where this could be useful for safety and peace of mind. For example, a girl goes out alone on a date and wants to keep her roommates in the loop on where she is. If you need to keep track of someone's location at all times, then it's probably better to have them share it in Find My so you can check it on demand without having to set up Check In.