Laptop Camera Not Working? Here Are 5 Fixes You Can Try
Many of us depend on our laptops for professional work and leisure activities, so any issues with them can be highly frustrating. One such common problem is the laptop camera not working, and is a common Windows issue that can disrupt important meetings, virtual classes, or catching up with loved ones.
Various factors, both software-based and hardware-based, could lead to this issue. If there are no hardware malfunctions, an outdated, missing, or corrupted camera driver is usually the culprit. If your OS has been outdated for a long time, it can also result in the webcam not working. Other than that, the privacy settings within the system or the app you are using can also prevent the camera from turning on. The security programs installed on your system, such as antivirus or firewall, can also disrupt the normal working of the camera. An insecure website or insecure Wi-Fi could possibly cause malware entering your laptop and perhaps preventing the webcam from turning on.
Solving the webcam issue on a laptop is generally easier than it seems, especially if it's software-related. We'll provide you with some working ways to do so with step-by-step instructions. The methods listed in this guide are performed on Windows 11, but all will work on Windows 10 — albeit with slightly different steps.
Preliminary checks
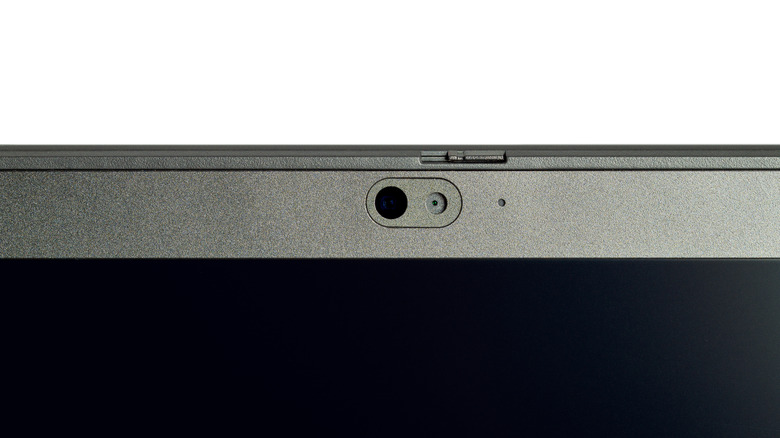
Before implementing some complex fixes, first go through some preliminary checks. Start with checking the physical switch that covers the webcam, if there is one. Some laptops (especially Lenovo's) have a privacy switch that turns the webcam on or off on the hardware level. Ensure that it's turned on — it's generally located just above the camera lens.
Next, thoroughly inspect the camera lens for any visible damage or obstruction. Over time, dust can accumulate on the lens, or it can get scratched by contact. Try gently cleaning the lens with a soft cloth. Sometimes, the security apps on your laptop can block camera access due to unknown apps asking for access. If you trust the application, go to your security program's settings and lift the webcam block.
In case you are using an external webcam on your laptop, check its compatibility with the laptop and the operating system you are using. Also, ensure that it's properly connected and that there's no damage to the cable or the USB port.
Allow camera access from the settings
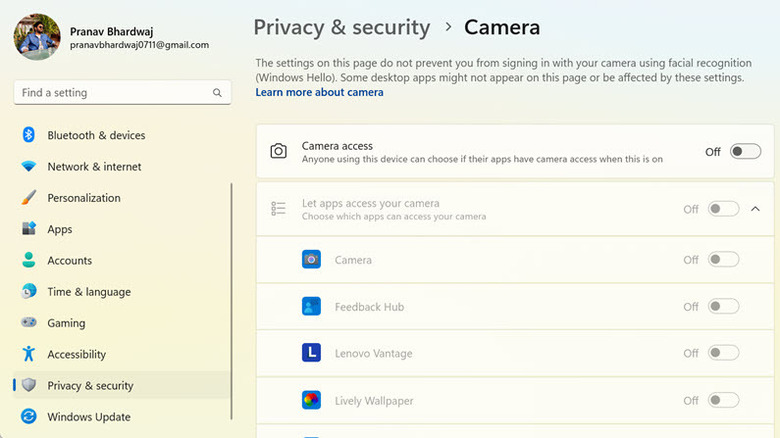
It might be possible that the camera access is accidentally turned off from the Windows settings. To check it and turn it on, follow these steps:
- Launch the Settings app on your Windows laptop and switch to the Privacy & Security section on the left.
- Scroll down and click the Camera option under the App Permissions section.
- Check the Camera access status. If it's off, toggle the button next to it to turn it on.
If Camera access is on and the laptop camera is still not working, it might be that the app on which you are trying to access the camera is restricted. To allow access:
- Follow the above-mentioned steps and expand the "Let Apps Access Your Camera" section below the Camera access.
- Look for the app for which you want to enable the camera, for example, Zoom or Skype.
- Toggle the button next to it to turn it on.
This would enable the camera access for that app, and hopefully, the problem will be solved.
Run camera and hardware troubleshooters
Windows 10 and 11 have built-in troubleshooters that can help solve various Windows issues, including the camera not working.
Here are the steps to run the camera troubleshooter on Windows 11:
- Open Windows Settings and switch to the System tab on the left.
- On the right, click the Troubleshoot option and then select Other Troubleshooters.
- Scroll down and look for the Camera option. Click the Run button next to it to run the camera troubleshooter.
- Follow the on-screen instructions to solve the issue. You can also click the Contact Support button to get support from Microsoft.
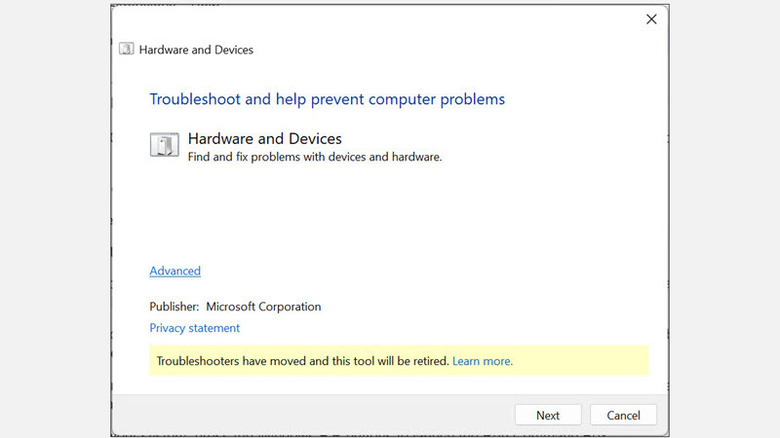
If the camera troubleshooter couldn't solve the issue, try running the hardware troubleshooter to check for any hardware faults. Follow these steps:
- On your system, press the Windows + R buttons to launch the Run Command Box.
- Type the following command and hit enter: msdt.exe -id DeviceDiagnostic.
- Click the Next button under the Hardware and Devices window.
- Windows will start scanning for the problem.
- Follow the instructions on the screen to complete the scan and apply the recommended steps.
After running these two troubleshooters, the problem should be fixed; if not, follow the next methods.
Roll back, update, or re-install the camera driver
A corrupted or outdated camera driver can fail to connect the webcam to the operating system. To fix it, you can first try to roll back your driver if the error starts occurring after a recent Windows update.
- Press Windows + X and select Device Manager from the list of options.
- Under Device Manager, expand the Camera section.
- Right-click on the Integrated Camera and select Properties.
- Under the Integrated Camera Properties, switch to the Driver tab.
- Look for the Roll Back Driver button and click it.
- Follow the on-screen instructions to roll back the driver to a previous version.
If the roll back didn't work or the Roll Back Driver button is greyed out, try updating the driver instead. Here are the steps for that:
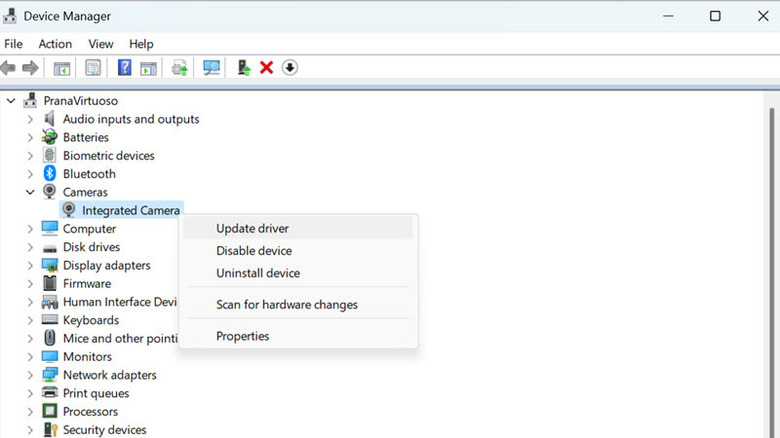
- Reach the Camera section under the Device Manager.
- Right-click on Integrated Camera and select Update Driver.
- You can manually download the latest drivers from the camera manufacturer's website, and select the Browse My Computer For Drivers option. If you want this process to be automatic, choose the Search Automatically For Drivers option.
- Now, follow the on-screen instructions to update the camera driver.
If the problem persists, maybe freshly installing the driver will help. Here is how to re-install the camera driver:
- Expand the Camera section under Device Manager.
- Right-click on the Integrated Camera and select Uninstall Device.
- Restart your computer, and Windows will automatically install the fresh driver for the camera.
If Windows didn't install the driver automatically, check for a Windows update or manually install the driver after downloading it from the manufacturer's website.
Update Windows and applications
Windows Updates not only brings new features and enhancements to the OS, but it also contains driver updates. If you haven't updated Windows for a long time, your laptop camera might become incompatible and stop working.
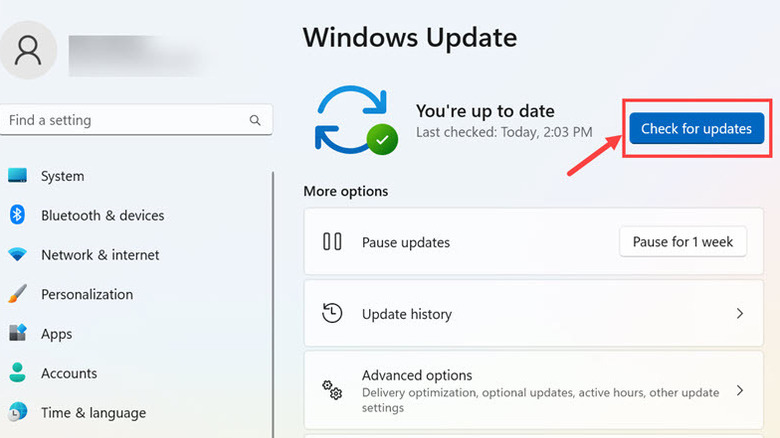
Here is how to update Windows 11:
- Launch the Windows Settings and switch to the Windows Update section on the left.
- On the right, click the Check For Updates button to let Windows search for the latest updates, if any. Ensure that you have an active internet connection.
- If any updates are available, Windows will start downloading it.
- After the updates are downloaded, Windows will ask you to install it. Click the Install Now button.
- Restart your system after the installation is completed.
Other than updating the Windows OS, it is also essential to keep your applications updated. If you try to access the camera with an outdated application, it might create a compatibility issue. So, ensure that your applications are updated. Either check for updates from the internal app settings or download the latest version from the Microsoft Store or the official website.

