6 Raspberry Pi 5 Projects For Your Home Office

There are a lot of advantages to working from home. The coffee is good, commute is short, and professional work attire often involves stretchy waistbands. That said, working from home also means that you're probably going to be spending a lot of time in your own house. You must have a comfortable and work-conducive space that allows you to focus. It's even better if you can throw together some smart automations that help to make the space work for you.
Those who work from home and also happen to be interested in DIY might want to learn about a few different projects that they can do with Raspberry Pi computers to make their workspaces a little more functional. Some of these projects might be for items that you interact with every day, while others might work quietly in the background, performing automated functions so that you don't have to think about them. I've set up quite a few automations in my own home office and learned that one of the best ways to find a good project is to start by looking at maker and DIY forums for the most popular options and then search for the source sites to make sure they're still active and receiving support. With that methodology in mind, here are six of the best Raspberry Pi 5 projects for your home office.
Productivity PC
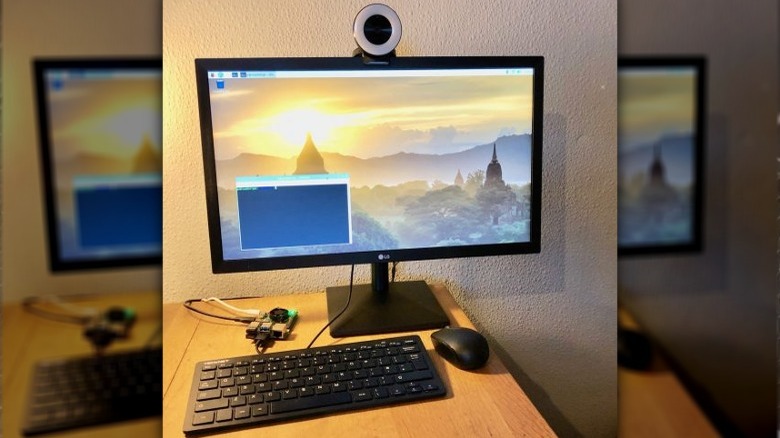
One thing just about everyone who works from home needs is a computer. Most people already have some kind of internet-capable device, but smaller tablets and laptops aren't always ideal for an 8-hour day. When it comes to that, it's hard to beat a decent desktop workstation with a big monitor. These are better for your eyes and will help you to maintain good posture throughout the day.
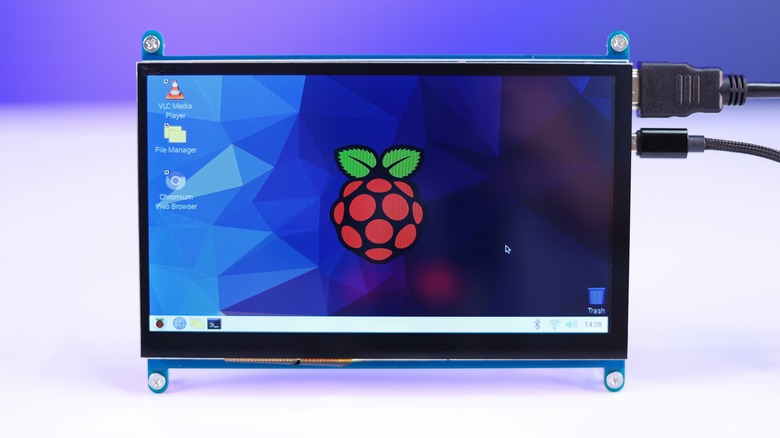
Raspberry Pis aren't exactly processing powerhouses, but they're perfectly sufficient for running a basic productivity station and they might even be an upgrade from a slow PC. You won't be playing the latest games or performing graphic-intensive tasks like video editing on one, but you should be able to browse the internet and work with basic word processors and spreadsheet software.
There are a few different operating systems that you can use to achieve this. One of the more popular options is to use the Raspberry Pi OS. This is the only officially supported operating system that is designed specifically to turn your Raspberry Pi into a personal computer. The instructions listed on the website are simple, just, "Download and install Raspberry Pi Imager to a computer with an SD card reader. Put the SD card you'll use with your Raspberry Pi into the reader and run Raspberry Pi Imager." Then connect a monitor, mouse, and keyboard and hook it up to ethernet or WiFi. Boom. Fast, simple, and cheap workstation. Though you may wish to invest in a case with a fan as well.
Home storage server
There's nothing worse than working on a big project and having something go wrong with your computer. Maybe your files mysteriously disappear. Maybe you can't boot past the blue Windows screen. Maybe you press the power button and it simply refuses to turn on. You'll be more comfortable in any of those situations if you have your files backed up on an external drive. You can always buy one or use a cloud storage service like Dropbox, but one of the safest, most convenient methods is to use a NAS (network-attached server). This will give every device in your home a secure backup disk that you will be able to conveniently access inside or outside your home network.
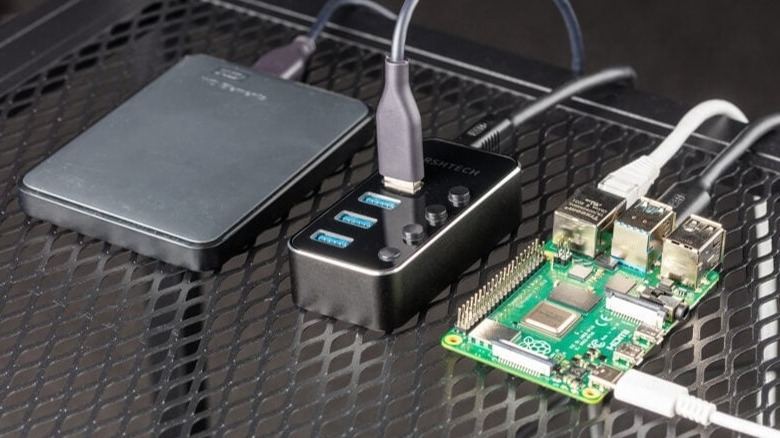
You can build one of these pretty easily. There are instructions for how to assemble one on the official Raspberry Pi tutorials site. You need a Raspberry Pi 4 (or newer) with a suitable power supply, a microSD card, an ethernet cable, a powered USB hub, and one or two external storage drives.
The setup takes a bit longer. You can then download Raspberry Pi OS Lite as your operating system and configure it into an NAS by following the steps listed on the page. You will then need to connect it to your network via SSH, configure it into a storage network, and then format, mount, and share your drive to each of the computers. This can be time-consuming, but it's worth it.
WiFi extender
The room that is most convenient for you to use as a home office isn't necessarily the one with the best access to your WiFi network. We don't always have a lot of options when it comes to choosing a location to set up our modem and router, and sometimes thick walls, electronics, plumbing, or just sheer space can interfere with the signal. You need a reliable internet connection if you want to work from home though, and a good Wifi extender can make all the difference.
PiMyLifeUp has instructions for how you can make one of these using a Raspberry Pi, a microSD card, a power supply, and two Wi-Fi adapter dongles. You will need to use the Dnsmasq package which, "provides network infrastructure for small networks: DNS, DHCP, router advertisement and network boot." This will act as the server for connection to the WiFi source point and to your other devices.
The instructions on the PiMyLifeUp page list a 25-step setup process. That might sound intimidating, but each step is thoroughly documented and most of them simply involve copying and pasting lines of pre-written code. Just follow the steps meticulously and you should be able to broaden the range of your WiFi.
Wireless network printer
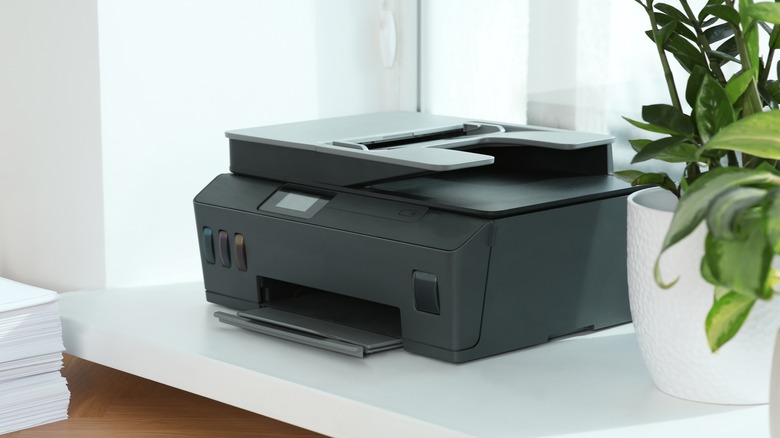
There are few appliances as frustrating as a printer, especially if you go wireless. It feels like the WiFi cards most of use must have been pulled from the faulty discard pile. You might just be in luck if you have a printer that connects via USB and an old Raspberry Pi though.
Make Use Of has a simple tutorial for how to WiFi enable a non-networked printer. You simply need a wireless-enabled Raspberry Pi with a power source and a printer that can connect to it with a USB cable. Once you have that all setup, you should be able to access your Raspberry Pi remotely using SSH, VNC, or RDP.
Once that's done, Make Use Of outlines a few simple lines of code that you'll need to enter in the command terminal to find the Pi, update its software, and install Samba and CUPS (Common Unix Printing System). This will allow your Raspberry Pi to appear on your networked devices as a printer. Then all you have to do is add it as your default printer and you'll be printing wirelessly in no time.
Video conferencing station
Working from home often means engaging in video conference meetings. These can be an effective method of team-based communication, but they can also be long-winded, boring, and uncomfortable as you are confined to your computer chair. An alternative solution is to create a dedicated video conferencing station. It has everything you need to communicate with your clients and co-workers and you can set it up anywhere.
Make Tech Easier has a guide for making a Raspberry Pi-powered video conferencing station. It recommends that you use a Pi 4 or newer, as this generation was a huge upgrade from previous models and you will need the more powerful SoC and graphics for video conferencing. You will also need a monitor, a keyboard and mouse, a USB Webcam, a USB microphone, and headphones if you don't want to rely on the speakers built into your monitor.
Once everything is set up, the first step is to download and set up Raspberry Pi OS, just like you would to make a personal computer. The Chromium browser on this OS takes advantage of the Pi's hardware acceleration capabilities and should improve performance. Make sure your hardware drivers are installed and you should be able to log into your conferencing network of choice and start chatting just like you would on a regular computer.
LED Windows
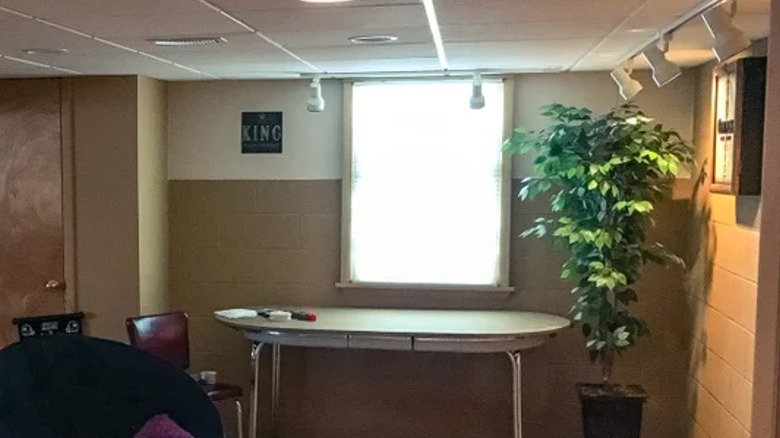
You might not realize how important something as simple as a window can be until you don't have one. If your home office is in a basement or a room in the center of a house, you might not have access to much natural light. This might not seem like a big deal at first, but it can quickly start to feel oppressive and bad for mental health. There are a few tricks you can do to fake it though. There are special "daylight bulbs" that can help simulate natural light in your office, but there's still nothing quite like the feeling of having light peeking through a window.
One Raspberry Pi-powered project shared on Instructables shows you how to build a fake window that can create a realistic daylight-like glow using LED lights. This is a bit of a construction project as those who wish to build it will need to make a frame out of trim boards backed by canvas and foil. This will serve as the base for the lights, which will be strung across the foil backing to create a glowing effect. These will then be connected to a MOSFET switch which is in turn connected to your Raspberry Pi. The page then states that you should install Lighttpd for the web server and then download the necessary code from Github.
Once you have the lights working, all that's left to do is cover them in an opaque window shade and enjoy the illusion.
Our methodology
I've personally worked from home for years and I've set up several smart home automations to make my home office into a more comfortable and efficient space. With this experience in mind, I looked at several maker and DIY forums to find the most popular Raspberry Pi projects that people used in their home office setups.
I picked six options that I believed people would benefit from the most and checked their host websites to make sure that the software for these projects was available and receiving active support. I then broke down the materials and steps necessary to complete these projects, providing links to more in-depth guides where necessary.