How To Scan For Malware & Viruses In Microsoft Defender For Mac
Apple's Mac lineup is praised globally for its quality and performance. The laptops are increasingly efficient with Apple's own silicon. You can even improve your MacBook's battery life by changing a few settings. However, despite the advantages that macOS brings over Windows, it isn't perfect. For starters, a current-generation MacBook with reasonable RAM and storage options costs an arm and a leg.
Another big myth about Mac computers you need to stop believing is that they can't get infected with viruses like Windows laptops and PCs. In fact, any operating system is prone to malware as long as there's a vulnerability left open for bad actors to exploit. Sure, the much larger user base of Windows makes it a more lucrative target for trojans and viruses, but your shiny new Apple laptop or desktop computer isn't immune to the dangers of the internet.
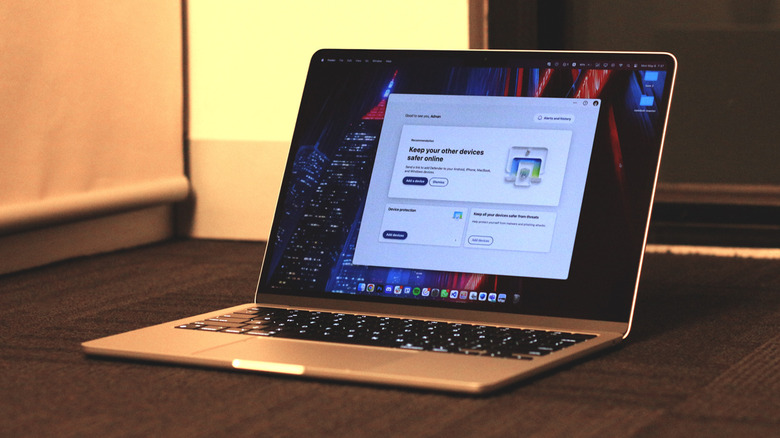
There is an abundance of highly rated antivirus programs you can use, with some options that support macOS as well. Microsoft Defender is one such software package, coming as a bit of a surprise given how it has been tailor-made for Windows for years. Here's how you can utilize Microsoft's antivirus solution on your MacBook, iMac, or other macOS devices.
Setting up Microsoft Defender on Mac
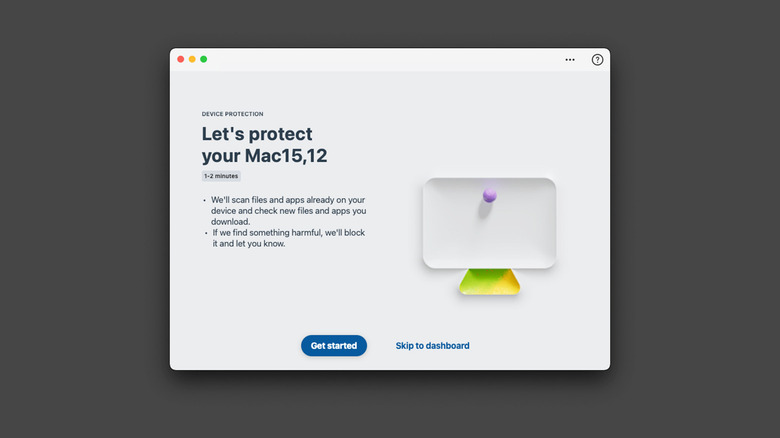
Unlike on Windows, Microsoft Defender isn't free to use on Mac. However, as long as you have a Microsoft 365 Individual or Family subscription, you will be able to download and use the antivirus software. Once you've installed the Microsoft Defender app on your macOS device, you will be prompted to log in to your account. After license verification, the dashboard will guide you through the setup process.
- Click on the "Set up anti-malware" button and select "Get started".
- The setup wizard will now install a system extension that is blocked by default courtesy of macOS. The steps will highlight how you can grant the Microsoft Defender extension security access.
- To do it manually, open the System Preferences app, select the "Privacy & Security" tab, scroll down to the "Security" section, and click on "Allow" next to the Microsoft Defender Extension alert.
- Next, to grant the extension access to all files, in the same "Privacy & Security" menu, click on "Full Disk Access" and check the toggle for Microsoft Defender.
We recommend you enable notifications for Microsoft Defender to receive time-sensitive alerts about potential malware on your Mac.
Scanning for malware on macOS
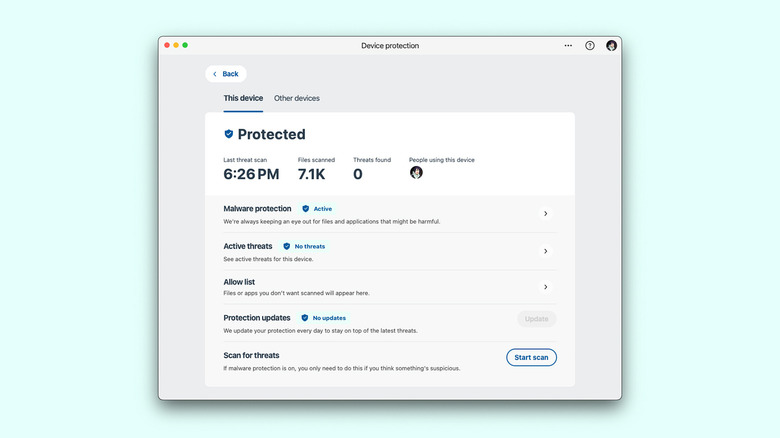
Now that everything is set up, head to the dashboard and click on "Device protection." Here, Microsoft Defender will list information about any malicious apps or files. Click on "Start scan" to begin hunting for suspicious and harmful content on your Mac. Depending on the mode selected and the number of files on your device, the scan may take anywhere from a few seconds to an hour. Microsoft Defender will then display a list of active threats if it finds any.
In the case of false positives, you can add files or folders to a whitelist that will be ignored by the antivirus software in future scans. To counter any new vulnerabilities, it is a good habit to regularly check for protection updates in the Microsoft Defender app. You can secure other devices you own using this antivirus, too. The software is available as an app for Android and iOS, and comes preinstalled on Windows. If you're subscribed to a Microsoft 365 Family plan, you will be able to monitor all devices in your household that are added to Microsoft Defender.