Arduino Mega PWM Pins Explained: What Are They?
Among all the Arduino boards, the Uno is most folks' go-to choice, and for good reason. It's the perfect platform to get started with Arduino, it's capable enough to handle a wide range of tasks, and it's quite portable being only 25 grams, 68.6 mm long, and 53.4 mm wide. But while it's a great platform, the Uno still has some limitations you need to keep in mind. There's the issue of small flash memory (only 32 KB), so you can't use it for projects with huge and long codes. The Uno also has a limited number of pins, making it difficult to work with when the project requires plenty of input and output components.
However, these two areas are where the Arduino Mega shines. It's built with 256 KB of flash memory and over 50 pins, perfect for managing larger and more demanding projects with multiple components. Compared to the Uno, the Mega also comes complete with 15 PWM pins, which is handy for controlling electronic components in different applications. But what exactly are these PWM pins, and how do you use them?
What are PWM pins?
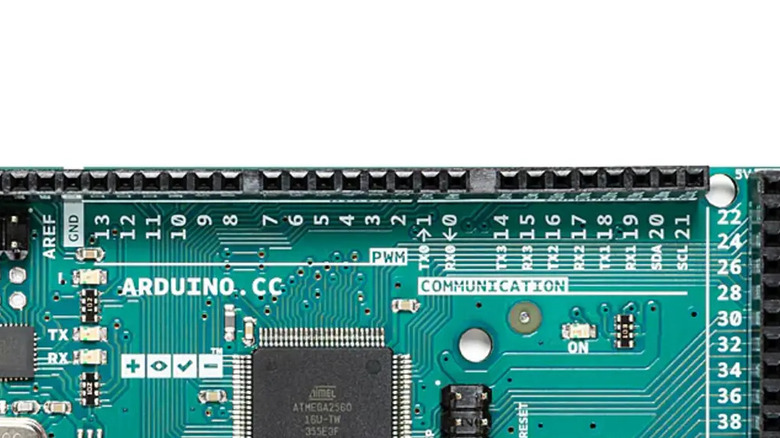
The Arduino Mega's PWM pins are digital output pins located on D2 to D13 and D44 to D46, coming to a total of 15. While they function as normal digital pins that can switch a component either fully on or fully off, they can also be used to generate simulated analog values through a technique called Pulse Width Modulation (PWM). That means these pins can send varying output voltages to a component (e.g., 25%, 75%, 33%) instead of the usual 100% or 0. This variable output is achieved with the use of a square wave, which dictates how long the digital signal stays in the on and off states. The on period, known as pulse width, is modulated (a.k.a. changed) via the code, allowing you to control the value sent to your components.
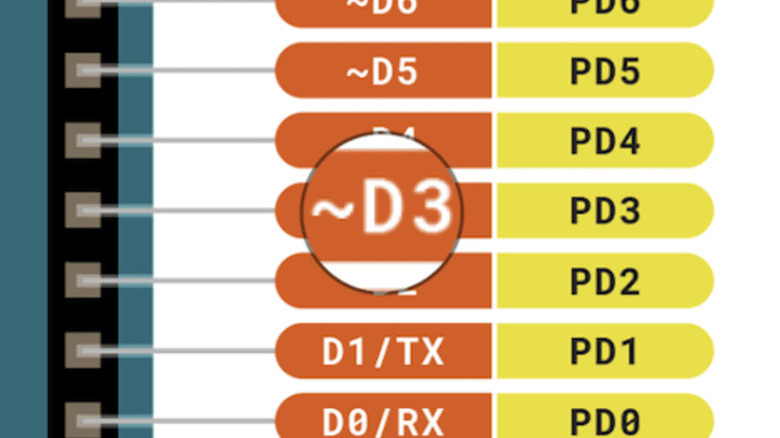
PWM pins work the same way across all Arduino boards, so you don't need to go out of your way to buy a Mega if you already have a board supporting PWM. On the Uno, Nano, and Mini, the PWM pins are on D3, D5, D6, D9, D10, and D11. On the Giga and Due, they're on D2 to D13. Some boards like MKR1000 WiFi, Zero, and Nano 33 BLE Sense also have PWM support on some of their analog pins, on top of the typical digital pins. To know which pins have a PWM functionality, look at the labels printed on your board. PWM pins are typically marked with a tilde (~) symbol or simply a "PWM" label next to the pin number. If your board has no printed labels, check out its pinout diagram documentation (found on the board's Arduino Store page). PWM pins in the diagram have the same tilde sign in front of the pin numbers.
How to use PWM pins
PWM pins are generally used in controlling output devices in Arduino projects. To send a PWM value to a PWM-capable pin like the Mega's D9, the easiest and most common way is by using the analogWrite() function. This function takes in the pin number and any value from 0 to 255. For instance, to set a motor connected to D11 to only 25% speed, the function should be written as analogWrite(11, 64), where 11 is the pin number and 64, the value, is a fourth of 255. With this, the motor will maintain a 25% speed until you send another analogWrite() function with a different value or call a digitalWrite() or digitalRead() on pin D11.
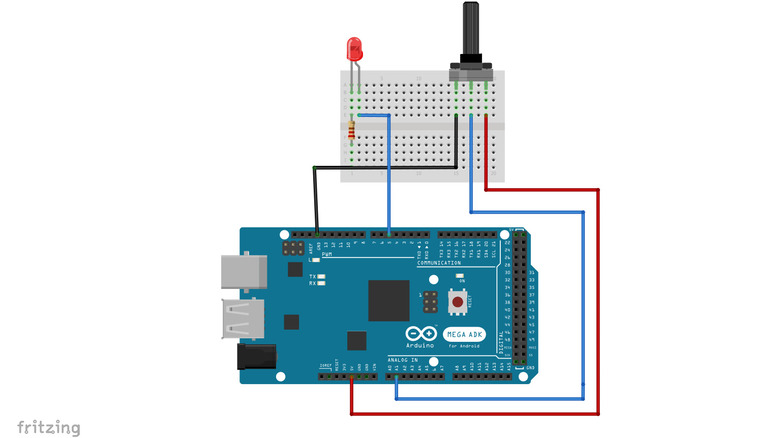
However, in most codes with the analogWrite() function, you won't typically see the value written as a fixed number. Instead, it's periodically changed using two ways. One is using an analog input like a potentiometer. In this case, the analogWrite() value is dependent on the value read from the input. This analog input reading, however, ranges from 0 to 1023 and has to be converted to an acceptable value for analogWrite(). That's done by simply dividing the input value into four as seen in this basic example code or by using the map() function, as you can see in this Analog In, Out Serial sample sketch.
The second way to periodically change your analogWrite() value is with the for loop. This doesn't require any analog input, and the PWM change is done via code. With the for loop, you start with an initial value and then increase/decrease it by a certain number, say three or ten. The for loop then goes through all the numbers from that initial number to the maximum value you set.


