10 Tips & Tricks Every iPhone User Should Know In 2024

If there's one self-help craze that's stuck around longer than any other, it's that of so-called "productivity hacks." Google's Ngram shows the phrase gaining initial traction sometime circa 2006, then rocketing into the stratosphere right up to the current day. Most productivity hacks, however, verge on clickbait, mass-produced pap, or else smack of our overworked American hustle culture.
The general premise is sound: doing things more efficiently saves you a few seconds here or there, which over time lets you reclaim many otherwise-wasted hours. In a nutshell, get more done with the same amount of work. Productivity hacks are almost always applied in a work context, but why not your smartphone, the place where the average American spends (or wastes) about 4.5 hours of their day?
The iPhone gets panned for lacking the customization and depth of Android (which leaves us begging for the iPhone to catch up with iOS 18) but one area where it shines is in its often game-changing hidden features. Over the years, Apple users have accidentally stumbled upon hundreds of tiny productivity boosters, some of which never get a mention in the documentation. Oftentimes it's goofy stuff like saying "Lumos" (a Harry Potter spell) to get Siri to turn on the flashlight, but occasionally, you find an honest-to-God innovation that makes using your phone easier, faster, and more efficient — a "productivity hack," if you will. Let's look at 10 tips and tricks in particular that (we argue) are indispensable in 2024.
Enable Reachability
How often do you find yourself using your iPhone one-handed when you need to tap one thing on the upper half of the screen? Probably often enough for it to be annoying. You have to either go two-handed, or else do some hand acrobatics to reach that faraway land near the notch. Reachability is the iPhone's solution to this problem.
Enable it in Settings > Accessibility > Touch > Reachability. On iPhone X and after (those without a home button) you swipe down over the gesture bar; for older devices, you lightly tap the home button twice. Once activated, your screen will slide down until the top is at the level of the bottom volume button, with only empty space above. That's literally all Reachability does: bring the top of the screen within tapping range of your thumb. Now you can hit that unreachable back button, access the control center, or whatever else.
Non-action will cause it to reset after a few seconds, but you can also reset manually in one of three ways: swiping up just over the gesture bar (the opposite of activating Reachability), tapping the empty space, or touching the arrow at the top. You're bound to get a few misfires where you accidentally end up on the home screen, but with a bit of practice, you'll never have to leave the comfort of one-handed mode just because there's something you need beyond your thumb's diminutive tapping range.
Share a password (or passkey) more securely
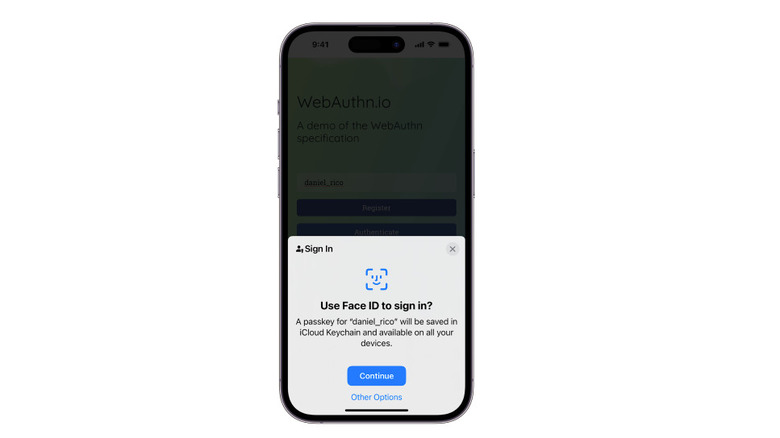
Netflix may have axed the ability to share your Netflix password with anyone beyond your home router, but there are still times when you'll want to grant someone access to your Amazon Prime or VPN. Problem is, you probably share your login details in the most risky way possible: a text message. Granted, iMessage is now secured against quantum computer brute decryption — so not even a quantum computer could steal it — but there are better ways to share.
Apple lets you swap credentials securely without revealing your password to them, provided your friend also has an iPhone updated to at least iOS 17. To do this, head to Settings > Passwords and use the Plus button to create a New Shared Group, then add people via their Contact name, email, or phone number. Choose which password (or passwords) you want to share, or hit Not Now to do so later. Invite those people (or they can find their group invitation in Settings > Passwords > Group Invitations) and then they can use your shared passwords straight from their own iCloud Keychain.
If, for whatever reason, you want to stop sharing, either go back to the password group and unshare that password, or remove a person from the group. Other group members can share their own passwords if they like. Note: this also works for passkeys, a better alternative to passwords you should try with any supported accounts.
Transform your keyboard into a trackpad
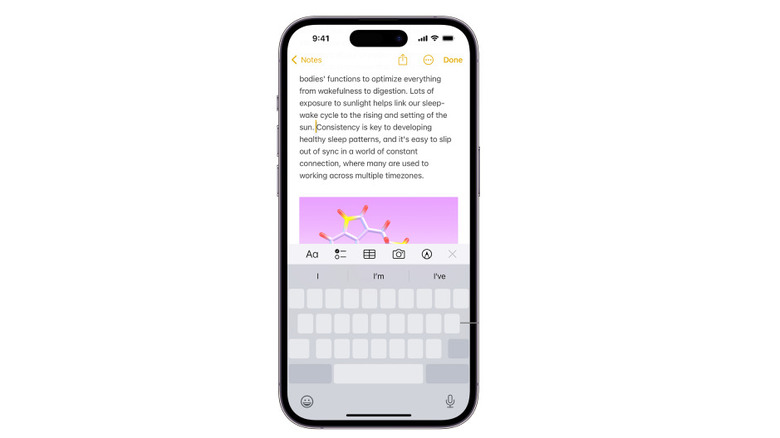
Apple's text selection magnifying glass provides an easy, intuitive way to navigate around a text field and place the cursor exactly where you want it. The only (mild) inconvenience is that it requires you to take your fingers off the keyboard. There's a slightly faster alternative that's accessible directly from the keyboard, though it will take some getting used to. Simply hold down the spacebar, wait for a little haptic kick, and the keys on your keyboard will go blank. You've now activated the iPhone's built-in "trackpad." Moving your finger up and down, or left and right, gives you precision control of the cursor. The cursor moves character-by-character, making it easy to relocate it to exactly where you want. Let go, and the keyboard resets to normal.
You'll need some practice to master it, but once you do, it's arguably faster and easier than the magnifying glass — albeit not as precise. If you like the trackpad, here's a second hidden feature: text selection. Move the cursor to the beginning of a section of text you'd like to select, then with the other hand, tap the trackpad area. Now drag the cursor and tap again at the end of that section. Voilà, you've selected the text in half the time it would have taken with another method. Again, it'll take some getting used to, but once you become trackpad-proficient, you may never go back to the magnifying glass.
Screenshot full webpages
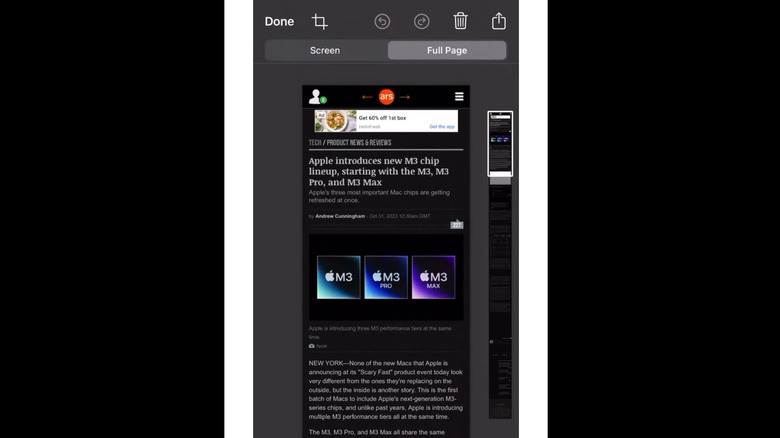
The iPhone's built-in screenshot utility is one of the easiest (and most powerful) in the industry. To take a screenshot, press the power button and volume up. This brings up a preview box on the bottom left that you can swipe away, or select for greater customization. Pressing and holding the preview reveals the share sheet. Opening it gives you access to crop, annotation, and markup tools, as well as the ability to magnify a section of the screen or add your signature. The list goes on, but there's one highly useful feature that most aren't aware of: screenshotting entire webpages. Spoiler alert: this only works on Safari.
Once your webpage loads, screenshot it as you normally would. Tap the preview. In the editing screen, tap "Full Page" at the top right. Hit "Done" and you'll be given four options: "Save to Photos," "Save PDF to Files," "Copy and Delete," or "Delete Screenshot" — or hit the Share button to send it directly. The PDF function is super helpful for making a document off-the-cuff for greater viewing ease, albeit one not broken up into separate pages.
Bonus tip: if you need to outline something with the drawing tools, there's a way to do so without a sloppy, hand-drawn box. Draw a common shape — a box, square, star, thought bubble — and hold your finger down at the end. The shape will then snap into a perfect version of itself so it looks more professional.
Tweak photo metadata before sharing

AirDrop is the uncontested king of sharing files wirelessly. Android's Nearby Share works great too, but it lacks cross-platform integration; you need to download extra software just to use it with a Windows PC. AirDrop does that out of the box with Mac, and then does you one better: it avoids compromising your privacy when you share photos with someone you don't know well. The photos you take include baked-in metadata — most notably GPS location info – that someone could use to see where you took a picture, among other things.
iPhone's AirDrop does not send metadata by default, but if you want to, tap "Options" when in the Share menu for a photo you're about to send. You'll be presented with two toggles: "Location," and "All Photos Data." Enabling Location gives your recipient that embedded GPS data so they don't have to manually add generalized data later — perfect for swapping pics with buddies at the end of a vacation. All Photos Data gives you the option to "send photos and videos in original quality along with edit history and metadata, including location and captions." Put simply, the recipient will receive the photo exactly as it is on your device. They can save it to their own iCloud in, say, RAW format, or revert to the edits you made, to give a few examples.
Enable Back Tap
We mentioned Reachability as a way to use your phone one-handed, but Back Tap gives you even more control. Drop into Settings > Accessibility > Touch and go to Back Tap. You'll see the options Double Tap and Triple Tap. This sets up your iPhone so that it performs a specified action after you quickly tap the glass backing two or three times with your index finger. There's a long list of actions you can program Back Tap to do: open the camera, mute your device, open the notification center, take a screenshot, etc. This closely resembles a feature on the Google Pixel known as "Quick Tap."
It's a simple thing that goes a long way, depending on what you set it up to do. For example, you could use it to open the Notification Center or Control Center — two items that would otherwise require you to use Reachability to access one-handed. You can set it to "Shake" (so you can undo a typing mistake), or use it to lock your phone (to reduce wear on your power button). Based on personal experience, it's quite responsive, though a bit on the slow side. You'll rarely get any misfires, so there's not a huge risk of accidentally switching on your flashlight if you bump your phone. The only downside is that Apple, rather than advertise such a nifty feature like Google does, chooses to bury it deep in Accessibility.
Search for virtually any photo
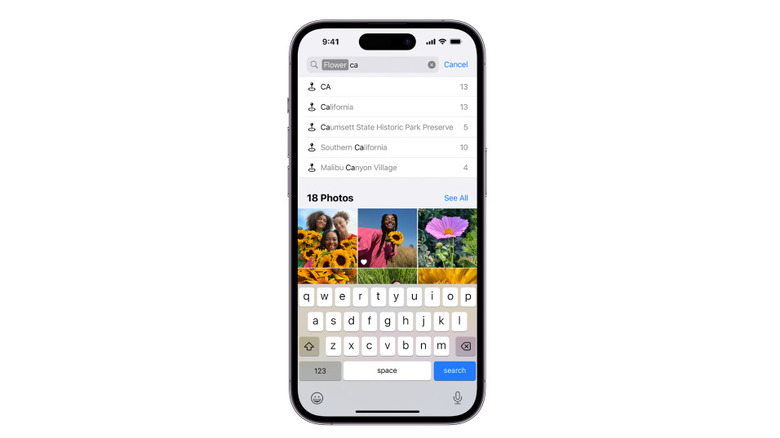
Apple has been taking its sweet time jumping on the AI bandwagon — though rest assured, it's soon to make a huge AI push. The strides it's made so far, however, do come in handy. The Photos app got some serious upgrades in recent iOS iterations, such as the ability to recognize people and pets. But there's another feature that we feel didn't get enough praise: the beefed-up search function. Tap the Search icon at the bottom of the Photos app and prepare to be amazed.
Want to find all the pictures you took on your last vacation? Type the name of the place. Need selfies with your bestie? Type their name — provided you've assigned them one in People and Pets. Can't find your birth certificate or some other document? Type "birth" or any other text printed on the paper. Need shots of flowers, beaches, or malls? AI image recognition will find anything it thinks matches your search query. You can even type multiple keywords to further refine what you're looking for.
Android does this too, but it sends your data to Google servers for processing. The beauty of the iPhone is that it's all on-device, ideal for having the utmost privacy. The only downside is that this on-device processing can take time, and your iPhone typically waits until it's connected to Wi-Fi, locked, and on power to scan your library.
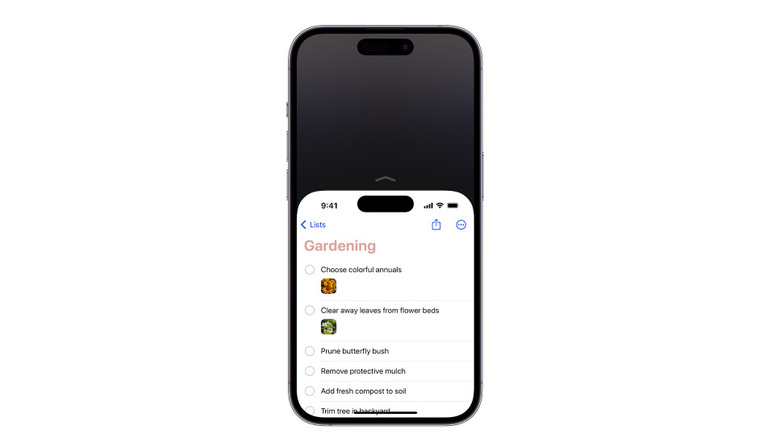
Save time with Text Replacement
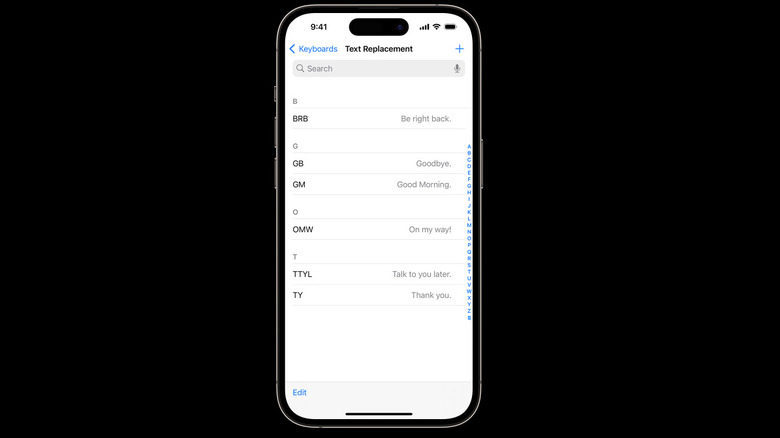
The iPhone keyboard gets a lot of flak for its poor text corrections and seeming inability to memorize any of your personal spellings, but it does have a few shortcuts to increase your typing speed. One that's helpful for typing out long, complicated words is Text Replacement. Head to Settings > General > Keyboard > Text Replacement. Hit the plus button and write out a phrase (the word you ultimately want the keyboard to output) followed by a text shortcut (a short string of characters to trigger the replacement). For example, the text shortcut for the phrase "on my way" could be "omw."
Simple, in theory, but Text Replacement can save you a ton of time if you find clever ways to use it. You could have shortcuts for sending your email or phone number; for writing out long or uncommon names; or, if the iPhone keyboard is driving you crazy, for making sure a particular word it keeps correcting stays as-is. To give a more niche example of where it could be useful, fiction writers might set up a long list of Text Replacements to quickly and accurately type out their in-world lingo without autocorrect getting in the way. The only limit is your imagination. Apple users with a Mac and iPad will love it, too, since those replacements automatically sync across your iCloud account devices.
Use press-and-hold apps to jump to specific in-app sections

iPhone's press-and-hold function is effectively a right-click of sorts that brings up helpful contextual menus in iOS. Pressing and holding a link in Safari, for example, can bring up a webpage preview, open it in a new tab, add it to the reading list, copy it to the clipboard, and so on. In Music, the same action gives the option to share a song, add it to a playlist, and more. Most iPhone users are probably aware of press-and-hold, but there's a way to make it even more useful from the home screen. Pressing and holding an app usually brings up the option to remove it from the home screen or delete it, but most apps add extra functionality.
For example, press and hold on an app that's downloading or updating, then tap "Prioritize Download" to put it at the beginning of the queue so it downloads faster. Do the same on Apple Maps to quickly mark your location; that's helpful if, say, your car's in a huge mall parking lot. Use it to jump to a specific area of the Settings app, such as WiFi. Apple's native apps aren't the only ones with long-press functionality, either. Uber, as one example, lets you quickly hail a cab to one of your favorite locations to save yourself a few taps. We recommend trying out the press-and-hold on every app you regularly use to see what it can do for you.
Get better control of QR codes
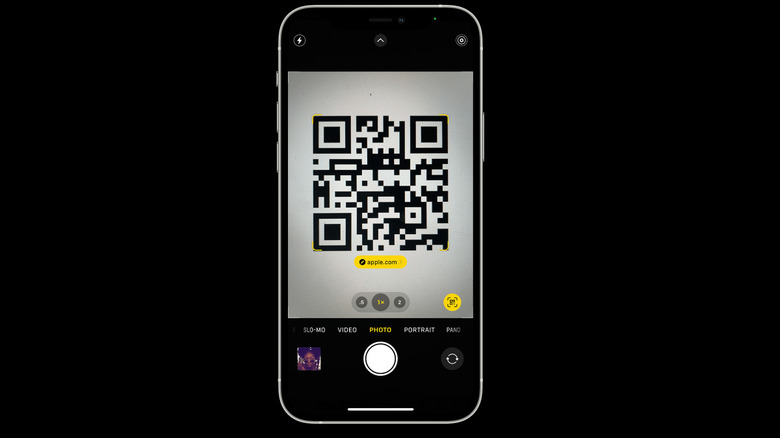
It wasn't long ago that scanning a QR code required downloading a sketchy third-party app. Eventually, Apple bundled a scanner into their camera app with iOS 11 in 2017. Most don't think twice now when opening their camera to scan a restaurant menu. They just tap the yellow QR link that pops up without a second thought. That's usually all you need, but the iPhone has a couple more options that may come in handy.
Pointing and shooting with the camera app also brings up a little QR code icon on the right. Tap this to open the QR code in a specific app — say, a payment app like PayPal. Otherwise, you can share the embedded link, copy it, or add it to your reading list. This is useful if you'd rather not have the QR code take you straight to Safari.
Want to scan a code and jump to the link instantly? Add the QR code scanner to your Control Center. Pressing it opens to the camera app and automatically takes you to the first link it finds. If you want to open the QR code in another browser (like Chrome), use that long-press we mentioned before on the app icon to see a "Scan QR Code" option. Lastly, you can snap a pic of a QR code and open it later in Photos. Press and hold the code to get the same contextual menu as before.