Everything You'll Need To Build Your Own Electric Guitar
We may receive a commission on purchases made from links.
As one of the world's most popular instruments, the electric guitar is the primary instrument of many musicians and songwriters nowadays. These magical six-string axes have redefined the music industry for about a century. While major guitar manufacturers like PRS and Gibson use advanced tools and machinery to build guitars, the roots of luthiery expand way beyond the industrial age.
Although such measures allow for the mass production of electric guitars, the process omits the uniqueness of a skilled luthier's craftsmanship. Because of this, many enthusiasts and artists prefer entirely handcrafted instruments over factory-made ones, even if they come with hefty price tags.
In today's market, you can find various DIY guitar kits that allow you to assemble pre-made parts and make modifications if necessary. However, if you want to dive deep into the art of making a guitar, you'll have to start from scratch.
Before you begin, you must know that making an electric guitar is a time-consuming and delicate process. Adequate carpentry skills should be your foundation. If you've made a dozen chairs and tables before, cutting out the body of a guitar wouldn't be much of a challenge, but crafting the fingerboard and installing frets requires surgical precision and has no room for errors.
Having access to the right tools and materials is just as important as the process itself. You'll need more than just a saw and some wood blanks to craft an electric guitar. Then, you should plan your DIY guitar's specifications.
Tools you need to put everything together

The primary tool you need to work on wood for your guitar would be a jigsaw with a fine-toothed blade. If you have access to a table saw, cutting wood blanks will be easier. Besides that, you'll need to sand a lot of surfaces to make sure everything is nice and smooth. Sandpaper would do, but if you can get your hands on a belt sander, the process will be much easier.
Many metal parts and electronics require plunge routers and drills to install correctly. Wood adhesives are also necessary for different purposes like fretting, binding, inlaying, and nut slot rebuilding. StewMac's Super Glue Starter Package is a safe bet for that matter. You'd also need wood clamps to make sure everything stays in place until the glue is dry. A soldering iron kit and wires are also required to connect the electronics together.
Besides all of those, ensure you have adequate measuring tools around you to install everything correctly. Fret length, fingerboard radius, nut width, and bridge position are only some of the measurements in your DIY guitar that require surgical precision.
With all of that set in place, you can kickstart your new guitar-making project. Generally, building an electric guitar takes three to six weeks. If you're planning to layer multiple coats of paint for a unique look, that can add another week or two to the process.
Determine what kind of guitar you want to make
Before you stop by a hardware store to get supplies, you should figure out what type of electric guitar you want for this DIY project. Start with more fundamental features, such as the body type, neck profile, and fretboard length.
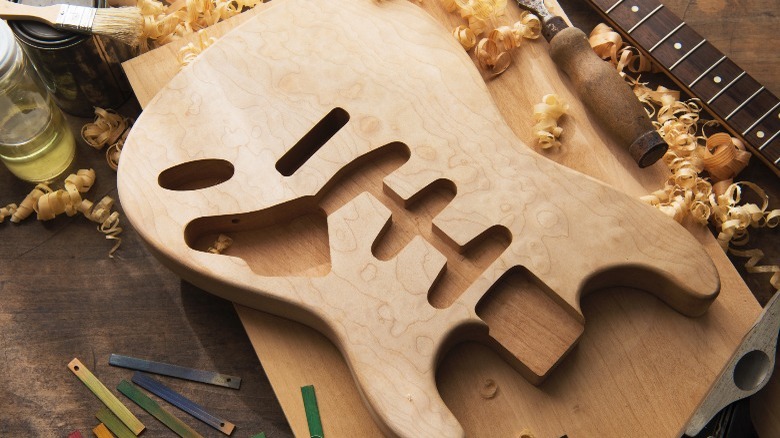
Cutting out a solid-body guitar (like a Fender Stratocaster) is easier than making a hollow-body guitar (such as a Gibson ES-390). Moreover, since hollow bodies create more resonance, they give you much different sound characteristics than solid bodies with no cuts in them.
Besides the body's shape, you'd want to choose a type of wood that fits your goals. Other than cosmetic purposes, each type of wood has unique acoustic properties that play a significant role in sustaining played notes. Some of the common materials for a guitar's body are mahogany, maple, rosewood, and alder.
A guitar's neck width and profile directly affect the instrument's playability. Thicker and wider necks are more favorable for rhythm players, whereas the C-shape neck allows for more dexterity across the fretboard.
The length of your fretboard also plays a major role in how your guitar plays. Classic Fender models, such as the Telecaster and the Jazzmaster, use full-length 25.5" scales. If you prefer Les Pauls, a 24.75" scale would be more suitable for your custom guitar.
Another thing you'd want to consider is the materials for your fingerboard. Fender guitars usually come with a maple finish for the fingerboard. While ebony and rosewood require more maintenance, many guitar players prefer them over maple fingerboards. Building fretboards and fingerboards can be very tricky. You might want to get pre-made models if you're not confident in your carpentry skills. You can find slotted fingerboards from StewMac, a popular shop for luthier tools and supplies.
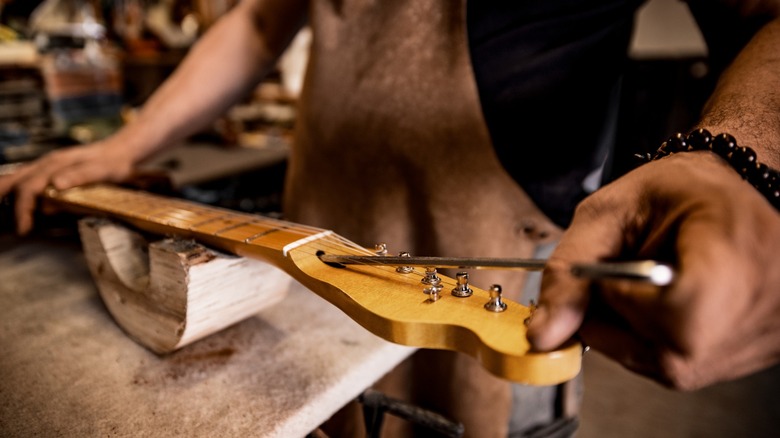
Getting tuners, nuts, bridges, and other metal parts

Once you've decided on wood materials, it's time to get into more details. The first thing you'd want to look for is tuners. Standard guitar tuners can give you more of a classic look, but Fender's locking tuners ensure your guitar strings stay in tune. You can get locking tuners from SweetWater.
Bridges are the part that keeps your strings in place on the guitar's body. A classic Tune-o-mac bridge is what you'll find in most Gibson models. However, if you want to use a whammy bar, you can opt for Bigsby models. A Floyd Rose bridge is more difficult to install, but if you're planning on building a guitar suitable for modern metal music, it might be the right fit for you.
Guitar frets play a significant part in the playability of your instrument, and they come in different sizes. Generally, Jumbo frets have a higher crown and make bending and shredding easier on the fretboard. On the other hand, if you have a heavy touch, higher frets might mess up the intonation of your guitar. Deciding on the right frets boils down to your personal preference and playing style. The most important factor to consider is checking to see if the crowns are appropriately sanded and perfectly round.
Also, this is a good time to decide if you want to glue or screw the neck to the body. If you're going to screw the neck, you should get a neck mounting plate.
Pickups and other electronics
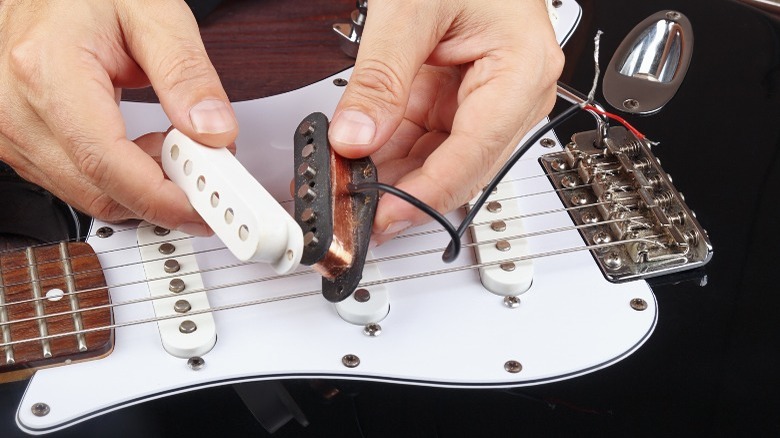
Pickups are your meat and potatoes. They directly affect how your guitar sounds when you plug it into an amplifier. First, you'll want to decide how many pickups you want to use on your guitar. Typically, different models come with one to three pickups.
You can get Humbucker pickups for a warmer and rounder tone with less noise. To get that classic surf-rock Fender sound, you can opt for single-coil pickups. Moreover, you can get P90 pickups that deliver a sweet and fat sound, good for playing chords. If you're into genres like nu metal, you can use active pickups that allow for more distortion with less background interference.
If you're installing two pickups on your guitar, you'll need a three-way switch. A three-pickup setup will require a five-way switch. Depending on how you want to wire the electronics together, you'll want two or more pots (potentiometers) for controlling volume and tone. Get 500k ohm pots to get a cleaner sound. If you want to get more high-ends on naturally warm pickups (like Humbuckers, for instance), 250k potentiometers can be a more suitable option.
Bear in mind that for each potentiometer that you use, you want to install a control knob as well. You'll also want to get capacitors to install on the tone pots. These caps control what range of frequencies pass through and what frequencies get blocked.
Lastly, you'll need an input jack for inserting a cable and connecting your guitar to an amplifier. Don't forget to ground your input jack to avoid noises and unwanted frequencies.