How To Tint Your Car's Windows At Home
We may receive a commission on purchases made from links.
Summer is coming to a close, but depending on where you live, you may be headed for the sunniest months of the year. If that is the case, this might be the time to consider tinting the windows of your car. Window tint not only can make driving more comfortable, but it will also protect the interior of your car from the sun's damaging ultraviolet rays. Professional window tinting can be an expensive project, however, costing close to $1,000 for some vehicles, depending on the type of tint you choose.
Opting to do this task yourself can save you hundreds of dollars, but it requires patience and a dust-free place to work and is easier to do if you have a second set of hands to help you at certain stages. Let's go through the process of tinting your windows at home, starting with a list of supplies necessary for the job.
Pre-cut kits make tinting your car's windows much easier
State laws vary as to the level of tint that is allowed, so be sure to purchase a tint that is legal where you live. You can purchase uncut rolls of window tint or pre-cut kits customized for your vehicle in various levels of tint from Amazon or Northern Tint. Once your kit arrives, gather your supplies and find a clean, dry, shaded place to work. A garage is obviously best, but if you don't have one, cover each window with a tarp and move it around as you work. What you'll need:
- window tint kit
- spray bottle
- microfiber cloths
- soapy water (mix two tablespoons of dish detergent with a gallon of warm water)
- spray bottle
- razor blade scraper and blades
- squeegee or tint applicator (may come with your tint film kit)
- scissors
- X-acto type knife with replacement blades
- vacuum cleaner
- heat gun
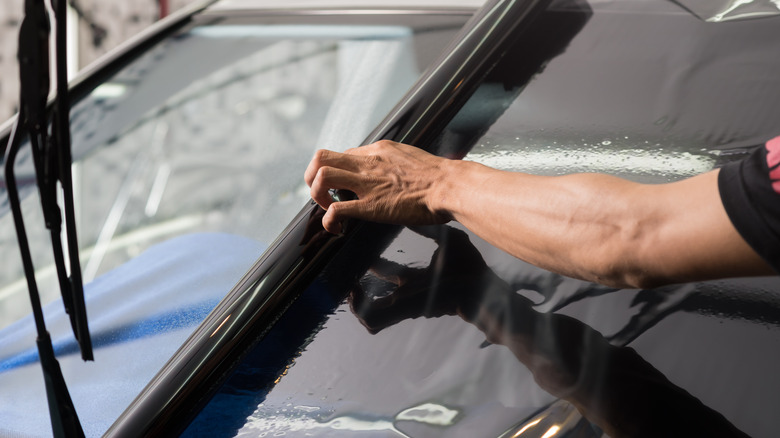
First, remove any stickers or decals and clean both sides of your car's windows with soapy water. Do not use a glass cleaner that contains ammonia, such as Windex. This may alter the color of the window tint once it is applied.
Make sure you roll your windows down a few inches and clean carefully where the window meets the weatherstripping around the edges. Dry the glass thoroughly with the microfiber cloths. If you have purchased an unsized roll of tinted material, the next step will be to size and cut it to fit your vehicle.
Sizing and cutting
You will use each window as a template to size and cut a piece from the roll, moving around the outside of the vehicle. Determine which side of the tint has the adhesive backing, and work with that side facing you. Do not remove the backing at this stage.
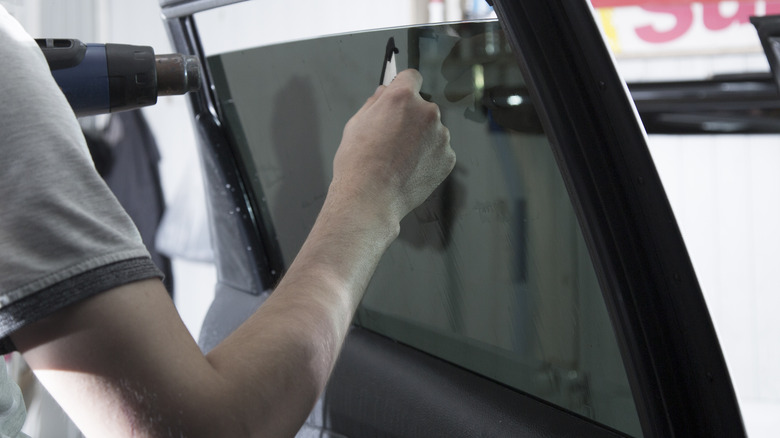
Spray the outside of the window generously with soapy water so the tinted film will cling to it. Using the scissors, cut a square piece from the roll big enough to overlap 2–3 inches all the way around the window. Use the X-acto knife to trim along the lower and back edges of the glass, using the window seals as a guide. Slide the film back so the back edge overlaps the window by about 1/2 inch. With the knife, trim the front edge of the film as close as you can to the edge of the window.
Center the film on the window (there should be about 1/4 inch of a border at the front and back edges). Slide the film down until it is about one inch lower than the bottom of the glass – when you're done, this extra material will go into the door when the window is rolled down. Lower the window about a half inch. Wet the exposed glass and smooth the film out with the squeegee.
Trim the top of the film using the top edge of the window as a guide. Work your way around the vehicle until you have done this for all of the windows, then dry off the outside of the windows. You're now ready to move to the inside of the vehicle and apply the tint.
Aplying the tint film
Take your newly cut or pre-cut pieces of tint to the inside of your vehicle. Select a window to start with, and wash and dry it thoroughly, including the window seals; any dirt or dust left behind will cause bubbling or creases. Spray the inside of the glass with lots of soapy water and roll the window down slightly. Peel the top half of the adhesive backing from the window tint. Spray the exposed adhesive with soapy water — this allows you to slide it around the window while installing it.
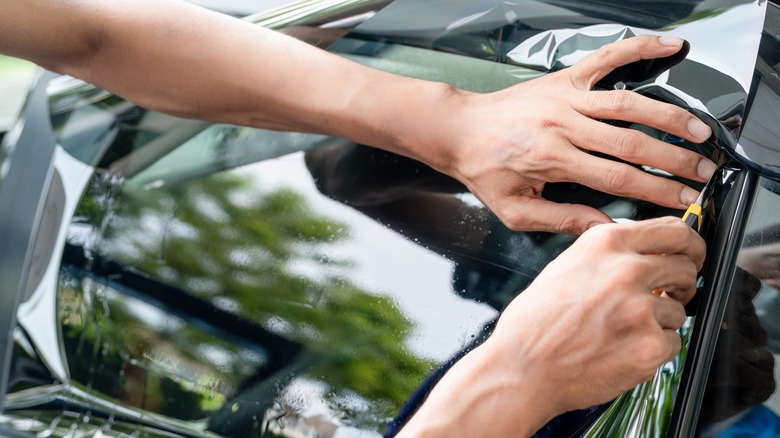
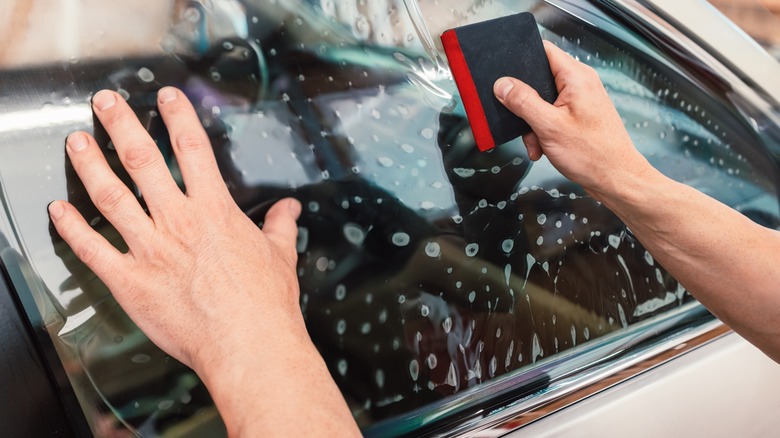
Line up the top edge of the tint with the top edge of the window and apply the film. Peel the rest of the backing from the tint and spray it generously with soapy water. Use the squeegee and applicator to smooth out bubbles and squeeze out excess water as you work, moving slowly downward and outward. Use the applicator or a hard-edged tool to tuck the tint under the window seals at the edges and corners.
Using the heat gun can help you avoid bubble and wrinkle formation, but be careful not to melt the film or stretch it too much in any one spot. Spraying more soapy water as you work can help keep things going smoothly. When you're done, squeeze out any bubbles or excess water and dry everything thoroughly with the microfiber cloths. Wait 7–10 days at least for the adhesive to fully cure before lowering your windows.