Split Screen On Mac: How To Use Two Apps Side By Side
While macOS Ventura (13.2) made using two apps side-by-side a somewhat smoother process, it's not the first version of the operating system to utilize split screen functionality. It's been available since 2015's El Capitan.
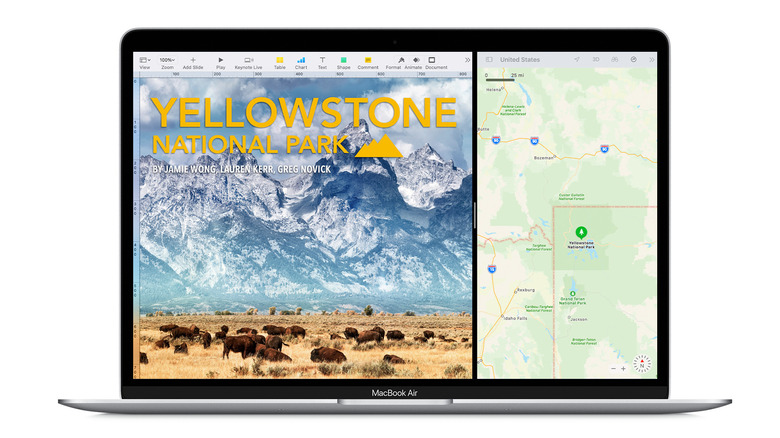
Split screen has become a fairly common way to use apps as it provides a clear view of two (sometimes more) apps simultaneously, making jumping between software faster and easier. Whether you're keeping separate notes open while working on a project, editing photos to immediately use in a video, or just looking up a map for reference while reading a travel guide, it's a feature that has a multitude of uses.
It's also a simpler (and cheaper) solution to using a dual monitor setup. It won't provide a full-screen view of both apps, but it doesn't require buying, connecting, and finding room for a secondary display. With a larger external monitor, you can effectively have two nearly full-sized apps side-by-side.
Using split screen in Catalina (10.15) and Newer
Setting up split screen mode in macOS Catalina and above is pretty straightforward.
- Move the cursor over the Full-Screen button in the top-left of the app window (it's the green circle) and wait for the menu to appear.
- Choose either "Tile Window to Left of Screen" or "Tile Window to Right of Screen" to automatically move and resize the window to fit into the selected half of the screen. Note that in macOS Ventura, this option is called "Move Window to ___ of Screen" instead.
- Repeat the process for the other app you want to use in split screen, but choose the opposite of the first one.
- Once in position, you can manually readjust how much of the screen each app window takes up by moving the cursor to the side of the window until you see the double-arrow icon, then clicking and dragging to resize it.
- To change an app window back, move the cursor over the Full-Screen button again and select "Revert."
Once your app windows are in place, you can use them both in split-screen. Though keep in mind you may need to make some interface adjustments if you want to see more or less of various app elements, as an app's layout may not account for the reduced window size — causing some interfaces to appear cluttered or crowded.
Split screen for El Capitan (10.11) through Mojave (10.14)
Using the split screen feature in macOS El Capitan, Sierra, High Sierra, and Mojave is similar to 10.15 and above but also slightly different.
- Click and hold the Full-Screen button in the top-left corner of the app window (the green circle).
- The app window will get smaller. Continue to hold down the mouse or trackpad button and drag the window to the side of the screen you want to set it on.
- Release the mouse button or trackpad when you're finished positioning the window.
- Repeat steps 1-4 with another app and place it on the opposite side of the screen to finish setting up split screen.
When you're finished using split screen, change the app windows back by clicking the Full-Screen button to go into full screen. Or you can manually resize each window by moving the cursor to one of the edges until the dual-arrow icon appears, then clicking and dragging to expand it.
What to do if split screen isn't working
Using split screen in macOS is pretty intuitive once you know where to find the option. That said, it's possible that the necessary option may not be turned on for your Mac, which means you won't be able to use it until you go into the menus and change the proper settings.
If you're using macOS Ventura (13.2) or later:
- Open the Apple menu and select System Settings.
- Scroll down and choose Desktop & Dock from the menu sidebar.
- Scroll down through the right-side menu and look for the Displays have separate Spaces option. Turn this on, then exit Settings.
For macOS Monterey (12.6) and older:
- Open the Apple menu and select System Preferences.
- Select Mission Control.
- Find the option for Displays have separate Spaces and turn it on.
Once the option has been turned on, you can start using split screen immediately without restarting your Mac.


