How To Encrypt A Storage Device On MacOS, And Why You Might Need To
Protecting your computer's data is essential to maintaining your physical and digital privacy. With the increasing amount of sensitive information stored on computer systems, you should take the necessary steps to keep your data secure. Encrypting a storage disk is one step that provides another layer of security to protect your data from prying eyes. The latest macOS devices provide a built-in encryption tool called FileVault, which makes it easy to encrypt your storage disks without using a third-party application.
Encrypting a storage disk can protect your sensitive information, such as financial or personal data, from unauthorized access. In addition, encryption can also secure information if your storage disk is lost or stolen. If you work in a regulated industry, such as healthcare or finance, your job may require you to encrypt your storage disk by law to comply with data privacy regulations. Furthermore, encrypting a storage disk can also protect information when using public Wi-Fi networks, which are often unsecured and can be a breeding ground for hackers and cybercriminals.
How to encrypt a startup disk using FileVault
Encrypting a startup disk using FileVault is the most common method if you have a Mac. Apple's built-in encryption tool, FileVault, provides full-disk encryption, ensuring that all of the data stored on the startup disk is protected. This makes it easy to keep sensitive information, such as financial or personal data, secure from unauthorized access. It is important to note that FileVault only works for startup disks, not storage disks.
- Open System Preferences and select Security & Privacy.
- Click on the FileVault tab.
- Click the Turn On FileVault button.
- Choose whether to store the recovery key with Apple or with you.
- Click Continue.
- Choose the users who can unlock the disk and reset their password, if necessary.
- Click Restart to begin the encryption process.
The encryption process can take a while, depending on the size of your startup disk and the amount of data stored on it. During the procedure, your computer may run slower than usual, so you should run the process when you don't need to access your computer. It's also important to note that if you choose to store your recovery key with Apple, you'll need to log in to your iCloud account. If you decide to keep it with you, you'll need to document it and store it somewhere safe.
Once the encryption process is complete, your startup disk will be encrypted, and you will need to log in with your account password to access your data.
Reasons why you should encrypt your Mac storage disk
There are many reasons to encrypt your storage disk. If you work with sensitive information, such as financial or personal data, you should encrypt your storage disk to protect it from unauthorized access. Encryption also helps secure your information if your storage disk is lost or stolen. If you work in a regulated industry, such as healthcare or finance, your employer may require you, by law, to encrypt your storage disk to comply with data privacy regulations. Encryption is often required by privacy regulations, such as HIPAA or GDPR, to protect sensitive information such as financial information or personal health data. By encrypting your Mac storage disk, you can ensure that your information is in compliance with these regulations.
Encrypting your storage disk also provides peace of mind. If you store valuable or sensitive information on your storage disk, you want to know that it is secure and protected from unauthorized access. Encryption is a straightforward and effective way to ensure that your personal information remains locked away.
How to know if you should use FileVault on a Mac with the T2 security chip?
FileVault has become popular with Mac users looking to encrypt their startup disks; however, with the addition of the T2 security chip to Macs, using FileVault in conjunction has become a matter of security preference.
The T2 security chip provides an extra layer of security by automatically adding hardware-based encryption to your Mac, according to Apple. When used in conjunction with FileVault, the T2 security chip enhances the security of your device, making it even more difficult for cybercriminals to access your information and subject you to a potential ransomware attack. You can think of this combination as an even stronger security barrier that is harder to breach.
If your device ends up stolen or lost, the T2 security chip can help prevent unauthorized access to your Mac, which is especially important if you travel often. If you use FileVault and a T2 security chip-enabled Mac, you can ensure that your data is protected even if your Mac falls into the wrong hands. Your data will remain secure and inaccessible to anyone without the recovery key. While it may seem overkill, it's an excellent way to cover all your bases.
How to encrypt a storage disk on Mac using Disk Utility
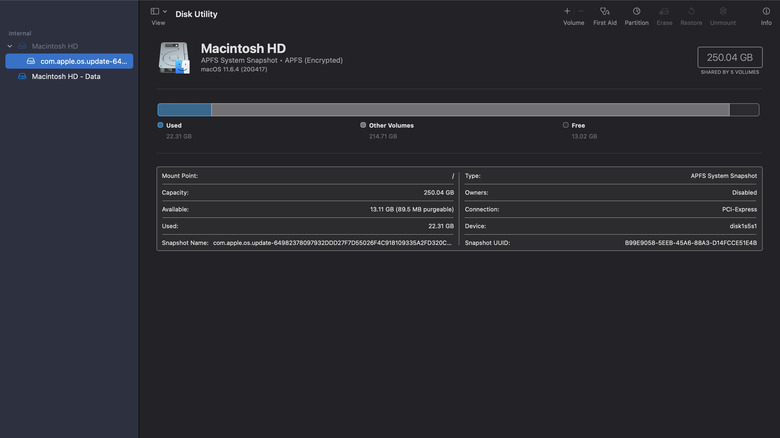
Disk Utility is a powerful tool for Mac users, offering a range of disk management and disk encryption options. While FileVault is a popular and convenient option for startup disks, you may prefer to use Disk Utility for more advanced options regarding encryption — especially as it relates to any external storage devices you may want to use with your Mac.
- To access Disk Utility on your Mac, go to the Applications folder and search for Disk Utility.
- Select the disk you want to encrypt from the list of available disks from the sidebar. You should be able to see any internal or external devices available.
- Choose the Erase button from the toolbar and select a new name.
- Select the Scheme menu and click GUID Partition Map.
- Then, select Format and click on your desired encrypted system format. Select a strong password and click Choose.
- Choose Erase and Done.
You can now use the encrypted disk image like any other disk. The data stored on the disk image will be encrypted and protected from unauthorized access, offering protection from potential ransomware attacks. You can change your encryption password anytime by navigating to File > Change Password within the Disk Utility application, according to Apple.


