10 Ways To Make Your Smartphone Photos Pop Using Snapseed
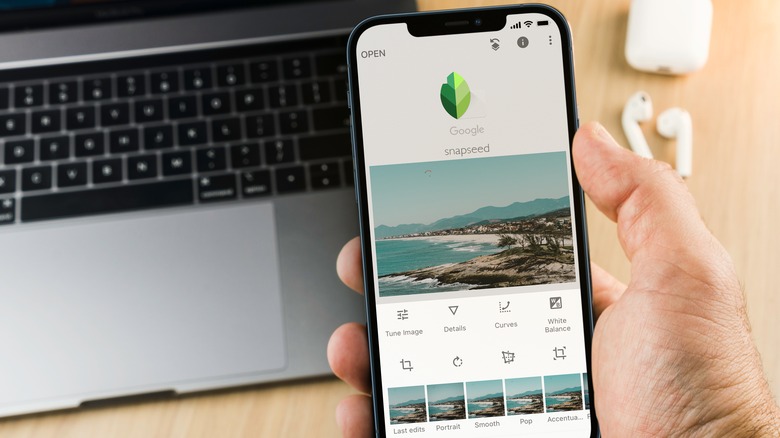
There are dozens of photo apps and image editors available for photographers, and they can all be used to improve your smartphone photography to various degrees. However, Snapseed is a powerful yet easy-to-use photo editor that can improve your smartphone photography no end. Despite being owned and managed by Google, Snapseed is available on iOS as well as Android. It's also completely free, with nothing hidden behind a paywall despite some of the tools being magical to use. This makes it accessible to everyone, and we thoroughly recommend you give it a try.
Snapseed provides a range of editing tools for all smartphone photographers. Amateurs and professionals alike can use Snapseed to make their smartphone photos look better. Most of the Snapseed tools outlined below will make subtle differences to your photos. However, several will make a huge difference on their own, and by using a combination of these, you can turn dull and lifeless smartphone snapshots into photographs you'll be proud to share on social media.
You don't need any skills to use Snapseed in its basic form, as the app does the hard work for you. However, if you have more experience editing images and an understanding of what individual settings to tweak, you can also manually manipulate your photos until they look just as you want them to look. Here are 10 ways to make your smartphone photos pop using Snapseed, along with images showing the impact of the edits made.
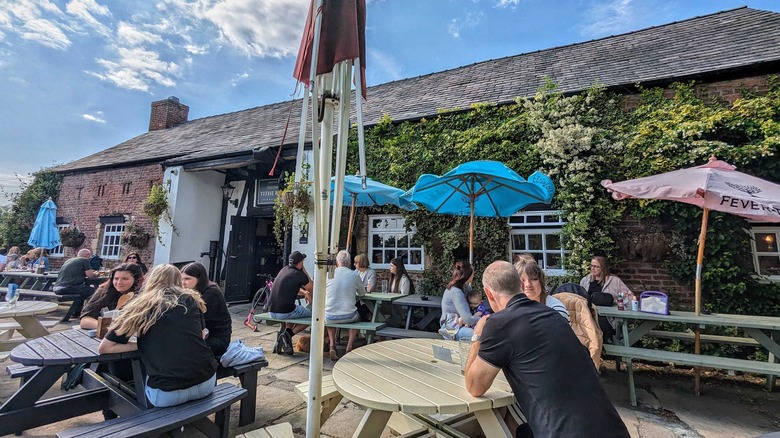
Choose one of the default styles that Snapseed offers
Snapseed offers a range of styles that can be applied to your smartphone photos. Snapseed's styles are just like filters, and apply specific settings to the photo. If you apply the right filter to the right photo, the results can be spectacular. These styles are sometimes enough to make a photo pop without changing anything else, making them perfect for amateur photographers who want to make basic changes without needing a degree in photography. However, even if you apply a Snapseed style, you can still tweak a photo further. You can think of Snapseed's styles as a starting point, giving you a basis to finetune further.
Snapseed's styles include Portrait (perfect for portraits of people), Smooth (which smooths all of the details out), Pop (which makes the colors and details pop), and Fine Art (which turns the photo black and white with an artistic flair). You can apply each turn to see if it suits the photo you're currently editing, but the edits won't stick unless and until you click the tick icon. Even if you then change your mind, you can undo the most recent edit or revert the photo back to its original form at any point. This applies to all of the editing tools mentioned in this article.
Tune the image utilizing the magic wand
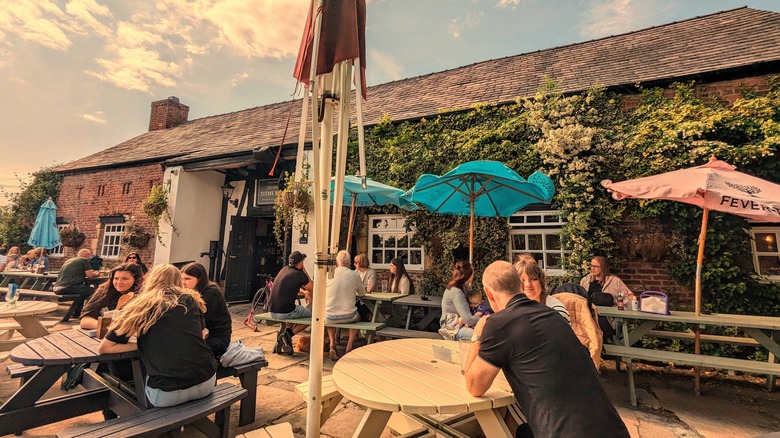
Snapseed's Tune Image tool lets you change the brightness, contrast, saturation, warmth, and many other visual elements of your photos. You can ramp these up or dial them down as you see fit, or utilize the magic wand and have Snapseed do it for you. The latter option is particularly useful if you're new to photo editing, and are still tuning into what works and what doesn't. In fact, if that's the case, Snapseed's magic wand can help, as seeing what the app chooses to do with your photo and what effect it has can help teach you what to do yourself.
To have Snapseed automagically tune the image as the algorithm sees fit, click the magic wand icon. If you then click the slider icon, you will be able to see the changes Snapseed made to each attribute, and adjust them further as you see fit. Or you can start with the manual sliders, bypassing the magic wand function completely. After selecting an attribute from the list, you then just move the slider to the left or right to increase or decrease its value. While you can see the effect your edits are having in real-time, none of them will stick until you tap the Tick icon in the bottom-right of the app.
Crop the image to improve the composition
Snapseed's built in Crop tool lets you edit your photo in a number of different ways. This includes changing the aspect ratio, with Snapseed offering a range of default sizes. You can also go freehand to remove any unnecessary elements from your photos or to fill the frame. The ultimate goal of editing any photo is to improve the composition of it, and beyond applying a style or tuning the image, the Crop tool should be the first tool you use. This is because it enables you to change what is and isn't included in the photo as a whole. After all, thinking about what is and isn't in the frame is one of the key smartphone photography tips everyone should be using.
To use the Crop tool, open the Tools menu and tap Crop. You'll see a range of different aspect ratios you can apply to your photo, including Original, Square, and a range of common ratios. Tap one, and it will be applied to the image. If you land on one that fits your photo perfectly, tap the Tick to apply it. There's also the option to select Free, and change the edges and corners of the photo as you see fit. You can even do this after selecting a set aspect ratio, which essentially allows you to finetune a default aspect ratio.
Edit the tonal contrast to sharpen or soften
Using the Tonal Contrast tool lets you tweak the high tones, medium tones, low tones, highlights, and shadows. You can tweak each setting with a simple-to-use slider, seeing the results appear in real-time as you make adjustments. While the Tonal Contrast tool isn't necessary for every photo, experienced photographers will get some use out of it as a way of fine-tuning images when the app's automagic settings haven't quite nailed the results they were looking for. Beginners and those who aren't looking to make subtle adjustments can probably leave this particular tool alone.
To change the tonal contrast of your photo, open the Tools menu and tap Tonal Contrast. The tool will open with High Tones selected, so just swipe your finger across to the left or right to decrease or increase the high tones as you see fit. When you're happy with these, tap the slider icon under the photo and switch to one of the other settings. Repeat until you're happy with each of the settings.
Changing the high tones add contrast of the highlights, the medium tones add contrast to the middle gray tones, and the low tones add contrast to the shadows in the image. The Protect Shadows and Protect Highlights options are designed to preserve details even with the contrast being increased.
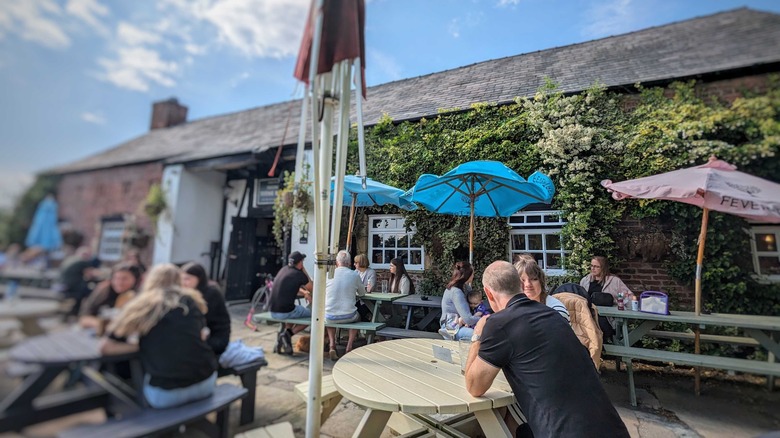
Change the white balance using the dropper tool
Another important tool to be aware of is the White Balance slider, which lets you tweak the temperature and tint of your photos. There's the option to automatically adjust both with one press of a button. Or you can use the dropper tool to set the white balance of an individual photo based on a particular area of the image.
Changing the temperature of a photo gives the photo a warmer or cooler vibe depending on your personal preference. Changing the temperature and tint is useful for cluing a viewer into how you're trying to make them feel. This can either be strong or subtle depending on what you're hoping to achieve, and you don't need to stick to the natural color palette that was present when you shot the photo.
To change the white balance of your photo, open the Tools menu and tap White Balance. Tap the AW icon to have Snapseed automatically adjust the white balance. Tap the dropper icon and drag it around the image to change the color settings based on the area it's targeting. Alternatively, click the slider icon to manually change the temperature and tint. In general terms, Temperature balances colors between cold blue and warm yellow, while Tint balances colors between green and magenta. I recommend experimenting with each one to find what works for the individual image you're editing.
Add a retrolux filter for a retro look
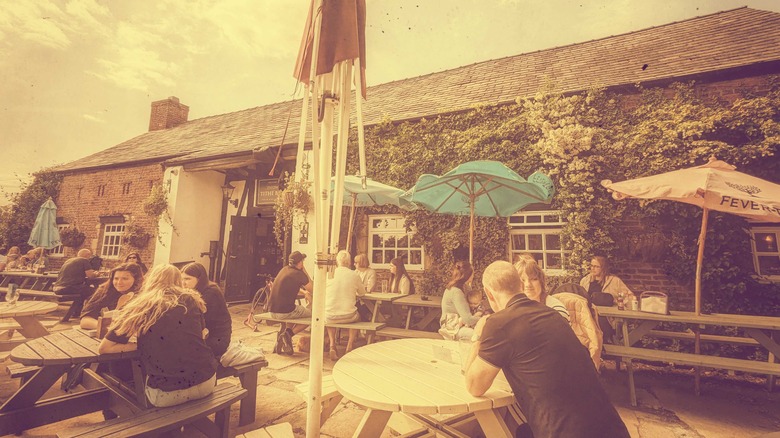
The Retrolux tool lets you apply one of a number of filters intended to give an image a retro feel. This is not a Snapseed tool you would use for every image — unless you're absolutely in love with the retro look, that is — but depending on the subject and setting, and the look and feel you're trying to create, it can be a useful option regardless. There are over a dozen retro filters to choose from, with each one changing the colors, temperature, tint, and brightness of your photo. Each one offers a slightly different retro look, allowing you to create your own retro style.
To add a retro filter to your photo, open the Tools menu and tap Retrolux. You'll see a range of retro filters under your photo, any one of which can be applied depending on what effect you're looking to create. Each filter has a different color palette, but once you have selected the best filter, you can then manually tweak how it looks. Tap the slider icon and you'll be able to increase or decrease the brightness, contrast, saturation, style strength, scratches, and light leaks. This level of control means you can make every single image look exactly as you want it to look.
Add a grainy film for an analog feel
The Grainy Film tool lets you apply one of a number of grainy filters, giving your digital image a more analog look and feel. We're all now very used to digital photos and how they look, but if you want to give a photo a more analog feel, you can apply one of a number of different filters that brings the grain from color film back. With some photographers actually buying old cameras to achieve this look when shooting, the Grainy Film tool provides an affordable and convenient way of achieving something similar.
To apply a grainy film look to your photo, open the Tools menu and tap Grainy Film. You'll see a range of grainy film styles across the bottom of the app, and can apply each in turn to see what effect it has on your image. When you have settled on one, tap the slider icon to open the finetune menu. You can increase both the grain and style strength by swiping left or right. Adding more grain to an image will make it look more pixelated, while style strength changes the strength of the style you have chosen. Setting either to a value of 0 will mean you can focus entirely on the other.
Switch from color to black and white
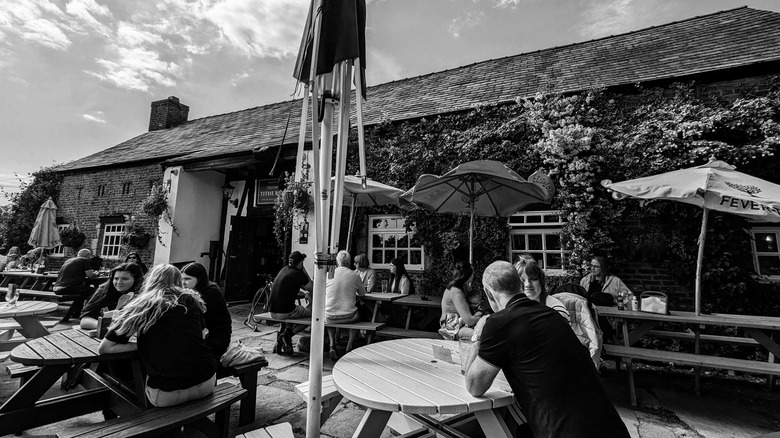
While you probably shoot exclusively in color, some photos look better in black and white. Which makes Snapseed's Black and White tool a must-have in any photographer's arsenal. It lets you remove all of the color from a photo, with the range of filters applying different styles of black and white to your image. You can also make manual edits to adjust very specific elements within that. When coupled with the Retrolux and Grainy Film tools, you can end up with photos that look like they were shot decades ago on old film cameras.
To turn your photo from color into black and white, open the Tools menu and tap Black and White. You'll see a small range of black and white styles running across the bottom of your photo, including Neutral, Bright, and Dark. Apply each one in turn to see what effect they have on your photo, and if it suits the subject, tap the Tick in the bottom-right to apply it permanently. You can also tap the slider icon to manually change the brightness, contrast, and grain values. You can also apply a color filter to replicate shooting with a colored glass filter over your lens. This effect may be subtle, but it can vastly impact the look of a shot.
Add lens blur to focus on a particular point
The Lens Blur tool lets you focus on a certain point of an image, blurring everything else around it. Unlike some of the tools Snapseed offers, this should be used with care, and isn't suitable for most photos. However, if you apply a lens blur to a shot that benefits from it, the results can be amazing. You get to choose the part of the photo to focus on by simply moving a dot around the screen. You can also choose different shapes for the lens blur to use, and make manual edits to change the blur strength, vignette strength, and transition.
To add a lens blur effect to your photo, open the Tools menu and tap Lens Blur. You'll see a dot with concentric circles around it. By moving the dot around, you can change the portion of the photo left, and what parts are blurred. Click the target at the bottom of the screen to switch from having the style applied in a circular pattern to a more linear effect. Both of these can then be manipulated on the screen to change the size and shape of the area in focus. You can also change the shape, and manually adjust the blur strength, transition, and vignette strength to fine-tune the effect.
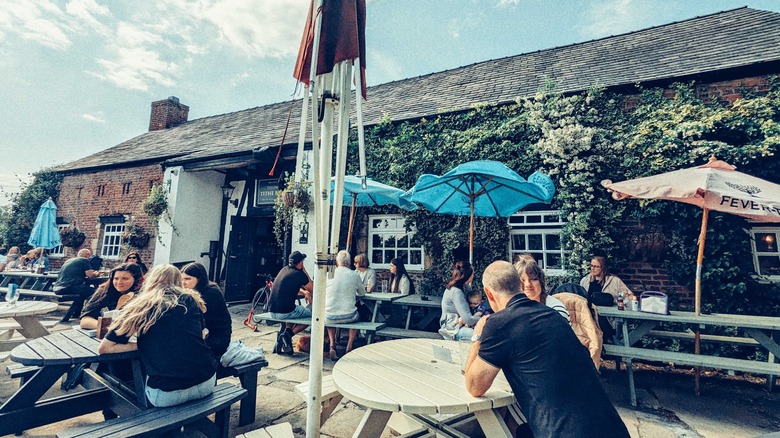
Use the HDR-scape tool to intensify the colors
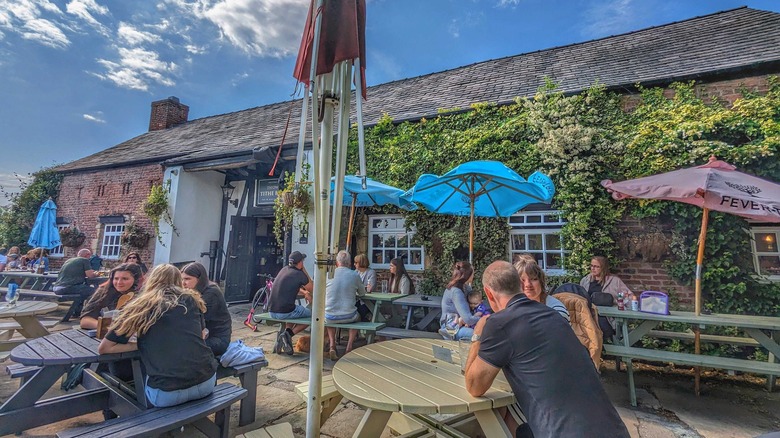
Finally, the HDR Scape tool ramps everything up to 11 by employing high dynamic range. And it's for this reason that it should be used very selectively. The results are most definitely mixed, but when it works, it really works. This is a tool to use in moderation and with caution, as it will cause your photos to look obviously (or even overly) artificial — potentially making people wonder if it had been made using AI. However, there is the option to make manual changes after the initial application to ensure the effect isn't too over-the-top. With some logical manual editing used, the HDR-Scape tool can make an ordinary photo look extraordinary.
To apply an HDR effect to your photo, open the Tools menu and tap HDR-scape. There are four basic styles you can apply: Nature, People, Fine, and Strong. Nature is obviously geared more towards photos showing nature, while People is best applied to portraits and human scenes. Whichever style you pick, you can manually adjust the effect by tapping the slider icon and increasing or decreasing the filter strength, brightness, and saturation levels. I would argue that this is the Snapseed tool that most benefits from manual edits, as without them, HDR-Scape can make your photos look worse rather than better.