6 Cool Projects You Can Do With A Raspberry Pi And Display
Being the versatile single-board computer that it is, the Raspberry Pi can help you build all sorts of projects with all sorts of accessories. Throw in a camera, and you have a smart doorbell, time-lapse recorder, and photo booth. Connect it to some sensors, and you can build a Pi-powered home automation system, weather station, and smart motion detector.
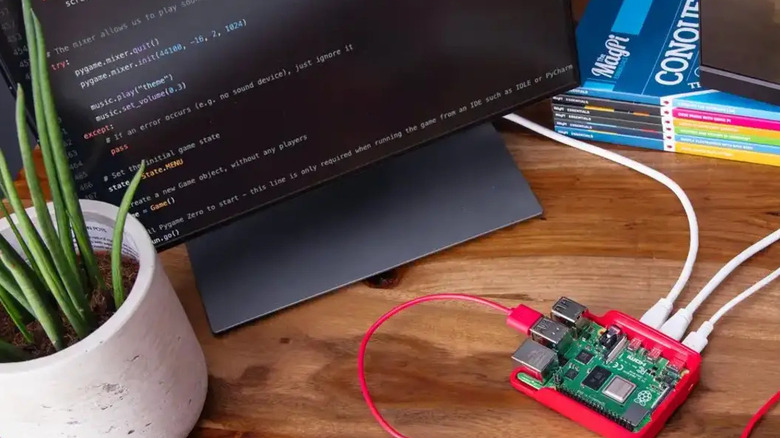
When it comes to display projects, the possibilities are equally endless, but probably the most simple one you can make with a Raspberry Pi and display is a computer. It's also the most beginner-friendly as you'll just need to connect the two together, install the operating system of your choice, and you're good to go. However, there are a host of other DIY projects out there that involve the use of a Raspberry Pi and monitor. If you're looking for something more fun and challenging to create other than a basic computer, we have a few ideas for you.
Digital picture frame
If you're the type who loves displaying photos, then you already know how cumbersome it is to arrange and fit all of your picture frames in the living room or bedroom. This is especially true if you have many of those pictures but very little space to put them in. To solve this dilemma, build yourself a Raspberry Pi digital picture frame instead. It's cheaper than commercial models and lets you practice your Python and electronics skills too.
What this DIY device does is display your locally stored photos for ten seconds each before fading and transitioning to the next image. You can also switch to the next or previous photo manually using the built-in capacitive touch sensor (which is also designed to help you shut down the Pi board safely with a single press). Another nifty feature of this digital picture frame is its ambient light sensitivity. When your room is well-lit, the monitor cranks up its brightness too, helping you see the image better. Conversely, when it's dark out, the monitor is dimmed, so it won't be too harsh on the eyes.
The image display software used in the project is called fbi, which can be conveniently launched with configurations right from the terminal. The touch and light sensors, on the other hand, were programmed with Python. Hardware-wise, what you need to build a Raspberry Pi digital picture frame is a Raspberry Pi with a heatsink, HDMI monitor with DDC/CI support, ambient light and capacitive touch sensors, wood for the frame, and wall mounting brackets.
Home Assistant kiosk
Google Assistant and Amazon Alexa may be most people's go-to smart home platforms, but for users concerned with privacy, integration, and customization, Home Assistant is a great alternative. This free and open-source home automation hub connects most, if not all, of your smart home devices together, so you can manage them from a single location. The best part is that Home Assistant runs on a local server, and its dashboard is accessible from any device on your home network by simply entering the IP address.
If you're a DIY tech enthusiast who's handy with computers, chances are you already have Home Assistant running your smart home. However, since its dashboard only lives on your browser and not on a dedicated device, it can be a hassle to control your system. Each time, you have to go through the process of opening your browser and typing in the address before you can get to your control buttons. A more convenient alternative to this is building a Pi-based Home Assistant kiosk.
Upon boot, this device automatically displays your Home Assistant dashboard in the Chromium browser — no need to manually launch apps or type anything. This means controlling your smart home devices can be as easy as approaching your kiosk and tapping on the dashboard. Compared to having the Home Assistant dashboard on a standard tablet, this DIY kiosk is more customizable. You can install a voice assistant on the Raspberry Pi, integrate extra accessories like a speaker or camera, program the device to shut down, and even upgrade the screen with something bigger.
To build this project, you only need the Pi, a touch screen, and some knowledge of terminal commands as you'll be running some configurations in the terminal (no coding required!).
Digital calendar dashboard
Paper calendars, while old-school to some, are undeniably handy. You won't need to push numerous buttons on your phone or computer just to know your upcoming deadlines. One glance at the calendar hanging on your wall, and you're pretty much informed about your agenda for the next several weeks. However, there are limitations to using paper calendars, like needing to physically write on the paper and having to replace them every year.
If you want something more modern and convenient, take a look at this digital calendar dashboard. This is one of the cheapest Raspberry Pi projects you can make, as you only need two things: a Raspberry Pi and any old screen you have lying around. The dashboard displays your 84-day calendar that's already marked with your scheduled events and tasks. There are also some extra elements here, such as the local date and time, world time, local weekly weather, and to-do list. To create the dashboard itself, DAKboard, a paid customizable display software, is used. It's then displayed on the Chromium browser. DAKboard also runs on any browser, allowing you to modify the dashboard by simply logging into your account from another computer and configuring the content from there. This flexibility also lets you customize the screen size to as big or as small as you prefer. Another convenient feature of this digital calendar is its automatic screen turn-on and off setting, scheduled for 8 a.m. and 6 p.m. respectively.
The software setup for the project is straightforward and requires no coding. In fact, you can get the DAKboard up and running in less than 30 minutes, making the project ideal for a quick weekend activity.
Arcade machine
Playing on your Xbox and PlayStation is great and all, but there's just a certain charm to arcade games that make them uniquely entertaining. Maybe it's nostalgia or the fact that they're simply exciting to play with. Whatever the case may be, it's never a bad idea to build your own arcade machine at home for you and your friends, and you have Raspberry Pi to help you with that.
This DIY arcade machine is made up of the Pi itself, any monitor or TV, and an arcade kit you can easily get from Amazon. It features a custom-made controller designed for four players, each controller having eight buttons and a joystick. While the software part of the project may sound complex and intimidating, it's actually quick and easy to set up. The entire system is powered by Recalbox, a retro gaming console you can use and download for free. It's already a fully functional operating system, so all you have to do is flash it to your Pi's microSD card. You can then configure your controller setup using Recalbox's UI, making the project ideal even for beginners.
Recalbox itself, however, doesn't have games built-in. You need to download ROMs first and add them to your microSD card to actually start playing. What's great about Recalbox is that it supports games from at least 90 systems, such as Super Nintendo, Watara Supervision, Game Boy Color, Wii, and Apple II, so you'll likely have hundreds, if not thousands, of games at your disposal.
Car backup camera
Most modern cars you'll see today are already equipped with a rearview camera to assist you when reversing. It's a nifty feature that's, unfortunately, lacking in older models. If you're driving a camera-less vehicle and want the convenience of having a view of what's behind you right there on your dashboard, then a Raspberry Pi-powered car backup camera might just be what you're looking for. This project is available in three versions of increasing difficulty, so you can pick what you want to build.
The first version is the simplest of them all. You just need your single-board computer, a compatible camera, and the screen to mount on your dashboard. Then, to get this basic setup running, simply open the camera in video mode from the terminal. And that's all there is to it. In the second version of the project, an object detection feature is added. It's based on Python and essentially overlays an image of color-coded distance markers to help you gauge how far an object might be from the back of your car. The code is only 14 lines long, easily understandable even for beginners.
The third version of the project uses a more advanced object detection method. With computer vision, specifically OpenCV, it can detect the objects in the frame and analyze whether they're already in the "alarm zone" at the bottom of the frame. This indicates that it's already close to the car. Once any object enters this alarm zone, an "Alert" message will pop up on-screen and a buzzer will sound.
DIY laptop with integrated Arduino
You might be thinking that the Raspberry Pi is already a functioning computer, so it's pretty redundant to make a laptop out of it. However, the Pi just by itself isn't really much of a standard computer — you'd still need peripherals like a keyboard, mouse, and monitor to use it like how you would any other computer. The problem with this setup is that these individual components make them a bother to transport, and it becomes especially inconvenient when you're also using the Pi to develop electronic projects with Arduinos. Instead of having to haul all of these components, you can just build a DIY laptop that integrates everything into a single, more portable device.
Like any standard laptop, this project comes complete with a screen, a full QWERTY keyboard, and a trackpad. Interestingly, this trackpad is made using an Arduino Micro and can be turned on or off to save battery. To power the laptop, a battery pack of three Lithium 18650 batteries is used, which can keep the device on for about four to five hours. The laptop also has a built-in Arduino Micro with protruding pins for your development needs. Another nifty feature of this DIY laptop is its dedicated battery display on an OLED screen.
There's not much to do on the software part of the project other than flashing the Raspberry Pi OS. Most of the work is focused on the hardware aspect, so expect plenty of soldering and assembling. To build the project, you need a Raspberry Pi, two Arduino Micro, a seven-inch screen, three Lithium 18650 batteries, one power bank circuit, a USB hub, a mini USB keyboard, an OLED screen, and some switches and buttons.