How To Change DNS Server On Windows (And Why You May Want To)

Internet users' experience highly depends on how efficiently the Domain Name Server (DNS) works while browsing the internet. The DNS converts human-understandable domain names to computer-understandable IP addresses. On your system, you use the DNS server, which is set by default by your internet service provider (ISP). However, that might not be the most efficient or reliable one.
If your Windows system is experiencing a DNS server issue or slow internet speed, you can change the default DNS server. Changing the DNS server can provide quicker browsing speed, improved privacy, and sometimes even access to some restricted websites. You can choose from several popular and more reliable DNS servers, such as Google DNS, OpenDNS, CloudFlare, and more.
While changing the DNS, you will be asked to enter a preferred and an alternate DNS. Google's preferred and alternate DNS servers are 8.8.8.8 and 8.8.4.4, respectively. Similarly, for OpenDNS, they are 208.67.222.222 and 208.67.220.220, respectively. Alternatively, you can set Google's DNS as primary and OpenDNS's DNS as alternate.
Changing the default DNS server on the Windows system is pretty easy. We will guide you on how to do that on Windows 10 and Windows 11.
Change DNS server on Windows 11
On Windows 11, changing the DNS server and setting a different one is pretty straightforward. Here is the step-by-step process:
- Click Start and select Windows Settings.
- Switch to the Network & Internet section on the left pane.
- Now, on the right side, select the type of network you are using. If you are connected via ethernet cable, select Ethernet, and if you are connected wirelessly, choose Wi-Fi.
- Select your network name from the list of networks.
- Scroll down and look for the DNS Server Assignment section. Click the Edit button next to it.
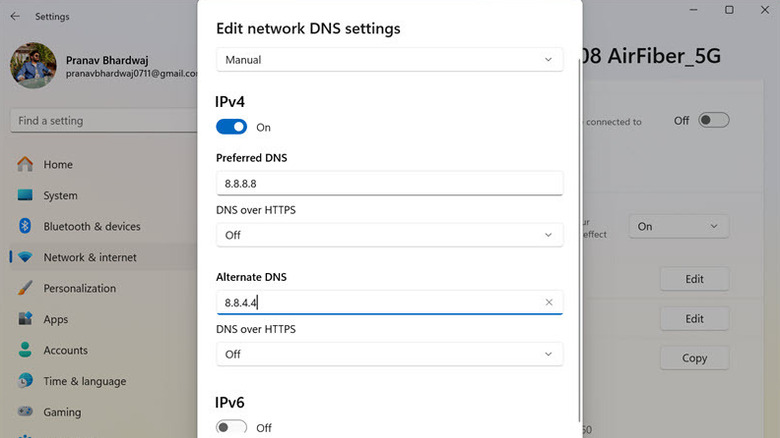
- Next, expand the drop-down menu and change the setting from Automatic (DHCP) to Manual.
- Toggle the button below IPv4 to turn it On.
- In the Preferred DNS field, enter the primary DNS server address you want to use.
- In the Alternate DNS field, enter the secondary DNS server address. This is used if the first one is unavailable.
- Click the Save button to apply the changes.
- Repeat the same process for IPv6.
Change DNS server on Windows 10
Like Windows 11, changing the DNS server on Windows 10 is easy with a different approach, which will also work on Windows 11.
Here is how to do that:
- On the Windows search box, type Control Panel and click its icon to launch.
- Select the View Network Status and Tasks option below the Network and Internet.
- Under the Network and Sharing Center window, click the Change Adapter Settings on the left pane.
- Look for your ethernet or Wi-FI network and select Properties.
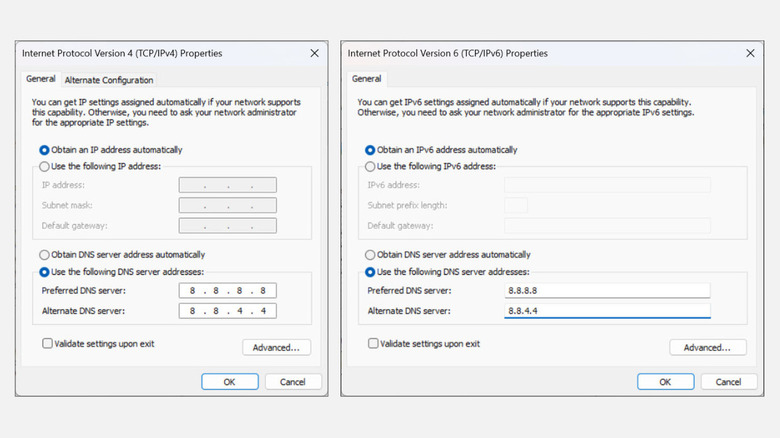
- Now scroll down, look for Internet Protocol Version 4 (TCP/IPv4), and double-click on it to open its properties.
- Under IPv4 properties, select the radio button titled Use the Following DNS Server Addresses.
- Set the Preferred and Alternate DNS as per your choice (Google's, OpenDNS's, or other) and click the OK button.
- Similarly, find Internet Protocol Version 6 (TCP/IPv6) and apply the same steps.
Why you may want to change the default DNS server

Changing the default DNS server on your Windows system can benefit you in various ways. First, it might enhance your browsing speed if you are struggling with slow internet even after having a fast plan. This is because DNS plays a critical role in loading web pages, and some third-party DNS, such as Google's, can process your request faster.
Some DNS services offer security features at the DNS level, such as phishing protection and blocking malicious websites. These features ensure a safer browsing experience and enhance your PC's overall security. The default DNS setting might not be reliable and cause frequent drops. Changing it to a trusted one can reduce the frequency of website down.
Some ISPs use DNS blocking to enforce regional content restrictions. A different DNS server can help bypass these restrictions, allowing access to a broader range of content. Conversely, some DNS offers parental controls to restrict adult content, social media platforms, or other websites unsuitable for children.
Finally, if you are continuously struggling with DNS errors such as "DNS server not responding," changing it might solve the issue.