How To Overclock Your AMD Ryzen CPU
When AMD launched its Ryzen lineup of CPUs in 2017, it represented a redemption story for the company. It had been producing disappointing CPUs for a while before then. Performance on that first generation of CPUs was far from perfect and sometimes fell significantly behind what Intel offered. That didn't matter, though, since AMD delivered excellent performance per dollar. Instead of paying $500 for a mid-tier Intel, you could spend $500 and get a higher-tier AMD chip. Overclocking support across the board was one more trick AMD had up its sleeve that would earn it a lot of goodwill in the gaming and enthusiast community.
Although many things have changed since then, with AMD's CPU lineup becoming even more competitive, the overclocking support remains on AMD Ryzen processors. AMD makes overclocking easy by providing its Ryzen Master application, which lets users overclock right from Windows instead of going into the BIOS to change settings.
Understanding overclocking and the risks involved

The core principle of overclocking is that the silicon that manufacturers ship isn't pushed to the absolute limit from the factory. As TechSpot explains, this mainly concerns silicon quality and what's commonly referred to as the "silicon lottery." Processor manufacturing is intricate, and CPUs are made in carefully controlled environments with highly accurate machinery to minimize flaws in the final product.
Flaws still make their way into the silicon wafers that eventually become CPUs, though, and those flaws can limit how fast a CPU can run. Manufacturers validate a specific run of CPUs to operate at a particular frequency and artificially limit the frequency to what they can guarantee. Overclocking takes advantage of the additional overhead that your specific CPU might have available to it.
Before you start overclocking your Ryzen CPU, there are some basics you need to understand. Firstly, overclocking involves walking a fine line between performance and instability. If you push things too far, you will end up with instability. The second key aspect of overclocking is balancing voltage, frequency, and heat. As you drive the frequency higher, you will likely need to add more voltage to the CPU, which will drive up the heat until you either reach the thermal or voltage limit or experience crashing. It's essential to know your CPU's voltage and thermal limits and avoid reaching them so that the life of your CPU isn't cut short by your overclocking efforts.
What tools do you need to overclock?
To overclock, you'll need AMD's Ryzen Master to do the overclocking itself, and you'll need programs to monitor and validate the performance increase and stability of the overclock.
For monitoring software, you can download HWINFO64, where you can see a variety of CPU temperatures. Throughout the overclocking process, keep an eye on the reported Tctl temperature (control temperature, which, depending on the generation of CPU, has an offset that you should also consider), which should not exceed the TjMax (junction temperature). If your temperature gets too high, your CPU will decrease the clock speed, power, and voltage to prevent damage to itself.
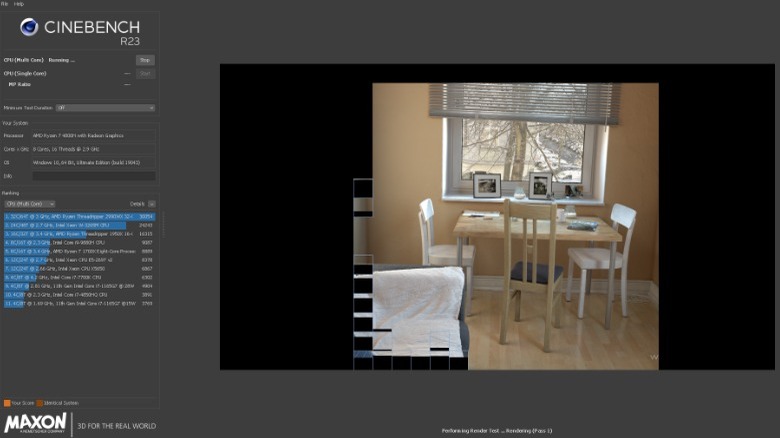
As far as testing and validation, there are two tools you can use. Cinebench R23 is a short test that will give you a good idea of both single- and multi-threaded performance improvements. You'll want to run this before you start overclocking to get a good idea of your baseline performance and again as you're overclocking to make sure the score — indicative of performance — is increasing. A higher number in Cinebench represents a jump in raw performance. Prime95 is a testing program that you can use to validate stability, specifically using the Small FFT test. Some in the overclocking community recommend running Prime95 for 15 to 30 minutes, while others suggest a minimum of 8 hours. Theoretically, the longer your computer can run the test without errors, the better.
Where to overclock in Ryzen Master
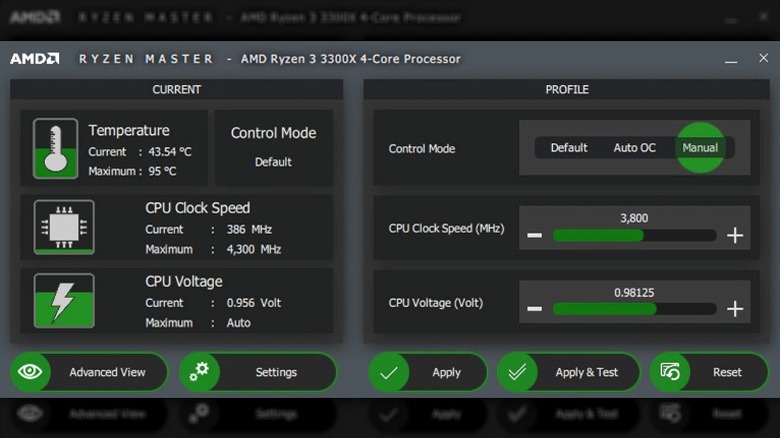
When you launch AMD's Ryzen Master, you will be greeted by the Basic View, which gives you a simple layout and basic controls over CPU clock speed (frequency), CPU voltage, and the CPU temperature and voltage readouts. If you're getting into overclocking, Basic View should be perfectly adequate. If you're a seasoned overclocking fanatic, you can switch over to the Advanced View by clicking "Advanced View" in the left sidebar.
To start overclocking in the Basic View, though, you need to first set the "Control Mode" to "Manual," which will unlock the "CPU Clock Speed" and "CPU Voltage" sliders. Adjustments should be made to only one option at a time so that the changes are isolated and any change that causes instability can be rolled back easily. After you adjust the voltage or frequency, hit "Apply" to save the settings.
Once you understand the Basic View, you can start playing with the Advanced View, where you can delve deeper into per-core overclocking, infinity fabric frequency, and memory speeds, which are options that can give you minor improvements on top of your overclock but are generally better left alone until later in your overclocking journey.
Don't make any changes yet. Read the rest of this article before proceeding to get a complete overview of the process.
CPU overclocking basics

Start by increasing the CPU frequency by 100-200 MHz intervals, then test using Cinebench R23's multi-core test to evaluate preliminary stability. Cinebench isn't specifically a stability test, but it's quick and will surface any significant issues (via Maxon).
If your new settings are stable, increase frequency until you see instability, then increase the voltage in 0.15V intervals, continuing testing until you reach stability. Incrementally increase voltage and frequency, one change at a time, while monitoring your Tctl until you reach a voltage limit, temperature limit, or cannot increase the frequency without instability regardless of voltage.
The other approach you can take is to set the voltage to the maximum limit (make sure to check your specific model because exceeding the maximum voltage can destroy your CPU) and then step up the frequency by 100-200 MHz, testing in Cinebench between each change until you get to an unstable frequency. Once you have an unstable frequency in a Cinebench test, drop the CPU frequency by around 50 MHz and test it again, decreasing the frequency until it's stable. Once you have a stable frequency, you can start incrementally reducing the voltage until you reach instability again. When you get an unstable voltage, go back to the last stable voltage and run Prime95 for half an hour or longer. If Prime95 crashes, it's not stable, and you should reduce the frequency or increase the voltage and try again.
Make sure to enable XMP in your BIOS as well
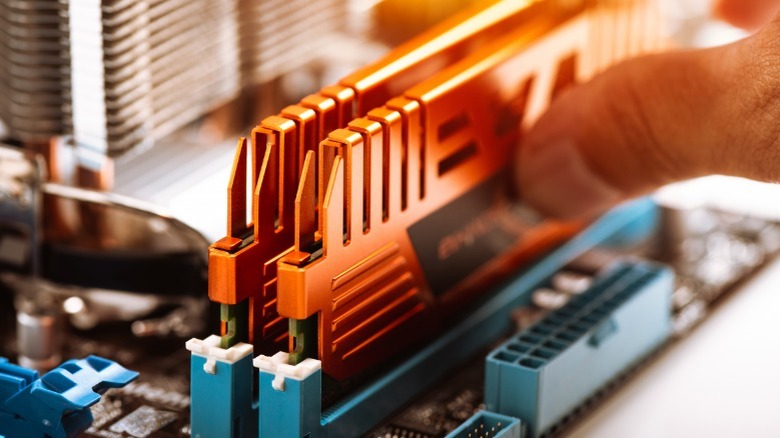
One of AMD's biggest struggles with its first-generation Zen architecture was memory speed and compatibility, as evidenced by numerous questions and complaints on online tech support forums. AMD even released an official RAM compatibility list because of the issues. While AMD has since addressed this in later generations, significantly improving compatibility with faster RAM and thus improving performance with built-in memory profiles, you still usually need to manually enable these RAM profiles to reach the advertised RAM frequency.
Memory profiles on AMD motherboards can have a variety of names. ASUS has DOCP (default overclocking profile), while Gigabyte has EOCP (extended overclocking profile), and many other vendors will use XMP (extreme memory profile). Where to find these settings will also depend on the specific motherboard, but it will always be in the BIOS and usually under the advanced options somewhere. If you're unsure how to enable the memory profile on your motherboard, the best place to check is your motherboard manual.
It should be noted that memory overclocking, whether manually or using memory profiles, above about 3200 MHz on DDR4 RAM will only yield single-digit performance benefits for AMD systems, in most cases, according to testing by Gamer's Nexus.